Create OTD Scans
You can use the OT Discovery (OTD) scan wizard to define a set of scan instructions for offline scanning. The OTD scan configuration defines the how the scan executes, including credentials, schedules, and restrictions.
For information on how to use the OTD scan configuration in Portable state agent scanning, see Scan Using Portable OT Agentsdocumentation.
To create an OTD scan using the configuration wizard:
-
Go to Data Collection > Active Queries.
The Active Queries Management page appears.
-
Click the Agent Scans tab.
The OTD Scans page appears.
-
Click Create OTD Scan.
The Create OTD Scan panel appears.
-
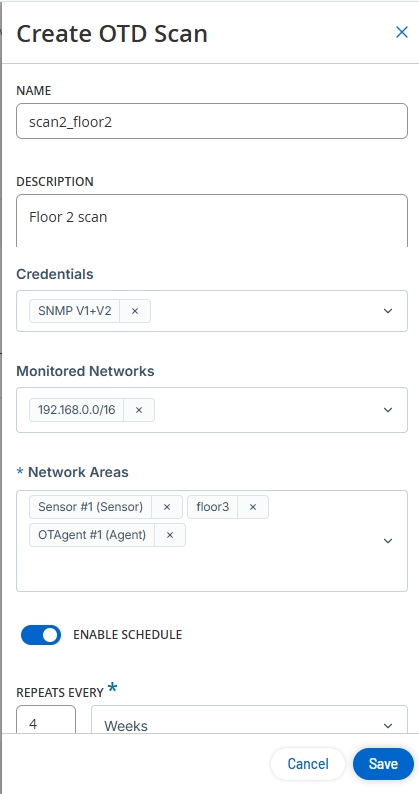
In the Name box, type a unique name for the scan.
-
In the Description box, type context or details for the scan.
-
In the Credentials drop-down box, select the required credentials from the list.
-
(Optional) In the upper-right corner, click Add Restrictions to apply restrictions to the scan. For more information, see Add Restrictions.
-
In the Monitored Networks drop-down box, select one or more subnets for the scan, or type a CIDR range.
Note: You can pre-populate subnets on the Monitored Networks page, or you can create them directly within this field by typing the CIDR range. -
In the Network Areas drop-down box, select one or more network areas.
Note: You can pre-populate network areas on the Network Areas page, or you can create them directly within this field by typing a new name for the network area. -
For Static agents, define a schedule.
-
Click the Enable Schedule toggle.
-
In the Repeats Every drop-down box, specify the frequency interval in minutes, hours, days, or weeks.
-
In the On section, select the days of the week you want to run the scan.
-
In the At drop-down box, select the time of the day you want to run the scan.
-
-
Click Save.
OT Security saves the OTD scan configuration.
What to do next