Network Areas
Network Areas map your subnets to their physical location. This mapping helps differentiate between scan data from overlapping IP ranges across different physical locations.
The Network Areas page displays all network areas configured in your system. Network areas fall into two distinct categories:
Automatic: Created by the system when you register a sensor or static agent.
Manual: Created by an administrator as a placeholder for a portable agent scan.
Use the Network Areas page to create categories for grouping your subnets.
View Network Areas
Go to Settings> Environment Settings > Network Management.
The Network Management page appears. The default tab is Monitored Networks.
Click the Network Areas tab.
The Network Areas page appears and lists all the sensors and agents configured in your ICP.
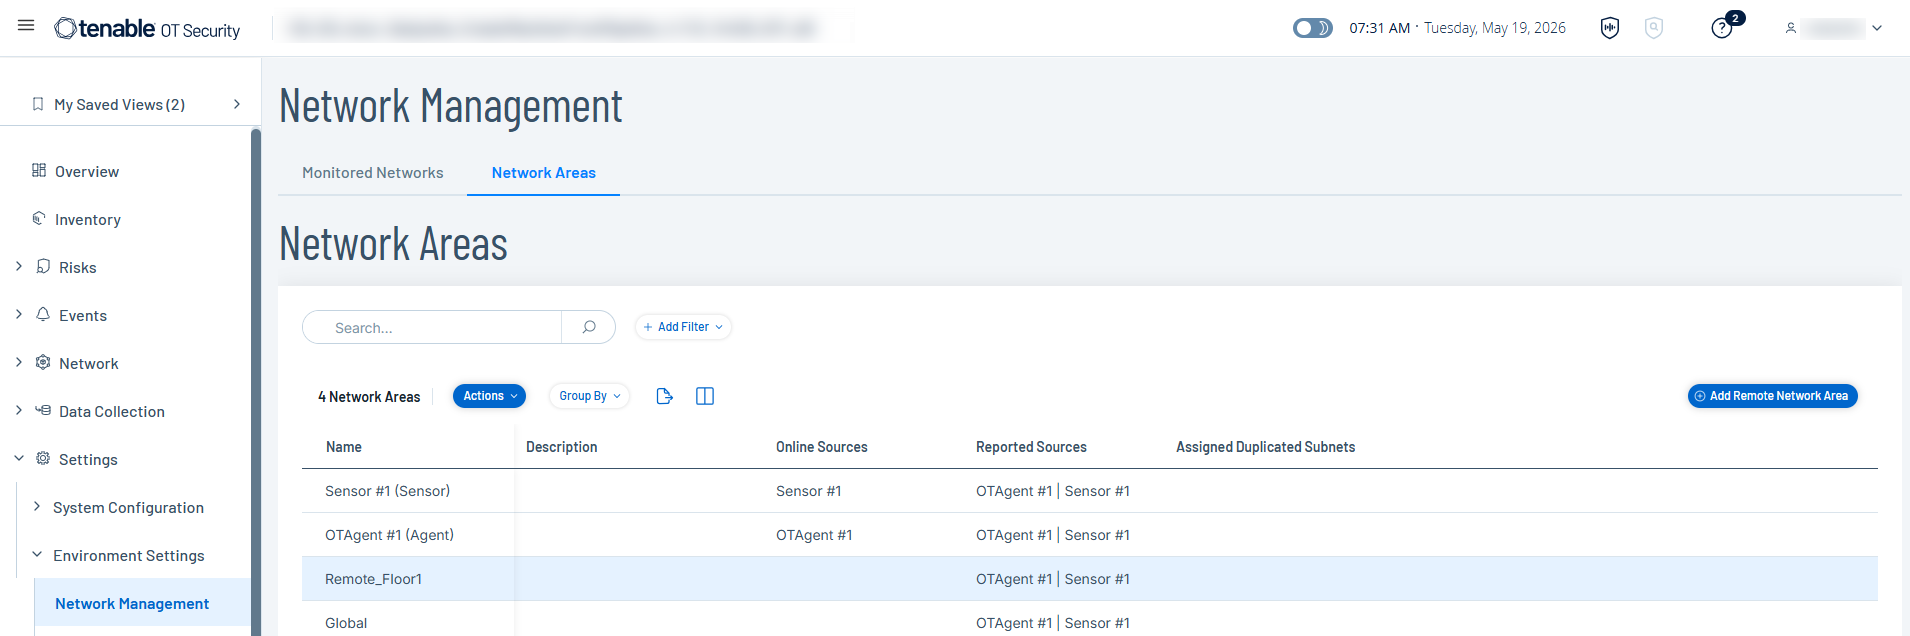
The Network Areas table includes the following details:
| Column | Description |
|---|---|
| Name | A unique identifier for the network area. |
| Description | A brief description of the network area. |
| Online Sources | All online entities associated with this network area. |
| Reported Sources | All reporting entities associated with this network area. |
| Assigned Duplicated Subnets | Displays the CIDR range and a counter showing the network area's position among all network areas that share that subnet. For example, if five network areas share one subnet, the column displays 1/5, 2/5, 3/5, 4/5, 5/5 respectively for each subnet. |
| In-Use | Indicates whether this network area is actively used in any Nessus scans or OT Discovery (OTD) scans. A network area marked In-Use cannot be deleted until it is removed from all associated scans. |
Add Remote Network Areas
Go to Settings > Environment Settings > Network Management.
The Network Management page appears.
Click the Network Areas tab.
The Network Areas page appears.
In the upper-right corner, click Add Remote Network Area.
The Add Remote Network Area panel appears.
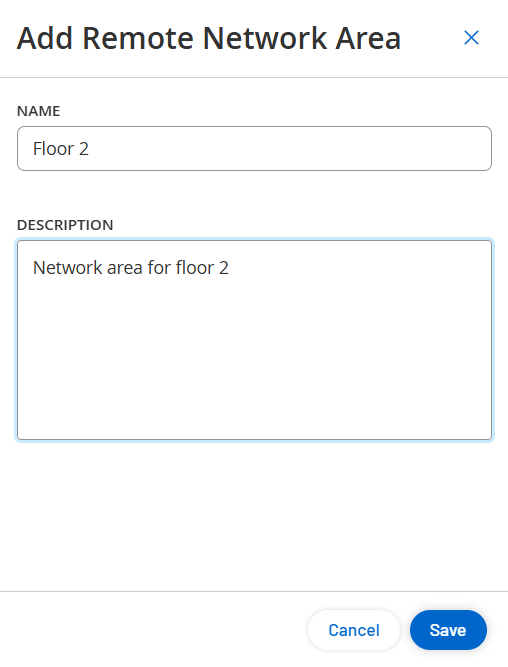
In the Name box, type a name for the remote area.
In the Description box, type a description for the remote area you are defining.
Click Save.
OT Security saves the remote network area.
Move Sources to a Network Area
You can group multiple sources under a single network area. For example, if a specific floor or building is monitored by three different sensors, you can group them under one network area. If you have two buildings where each building contains four sensors, you only need to configure two network areas (one per building) instead of eight separate areas.
To combine multiple reporting sources into a single network area:
In the Network Areas table, do one of the following:
Select the network area from which you want to move sources.
OT Security enables the Actions menu in the header.
Right-click the network area from which you want to move sources.
A menu appears.
Select Move Sources.
The Move Sources panel appears.
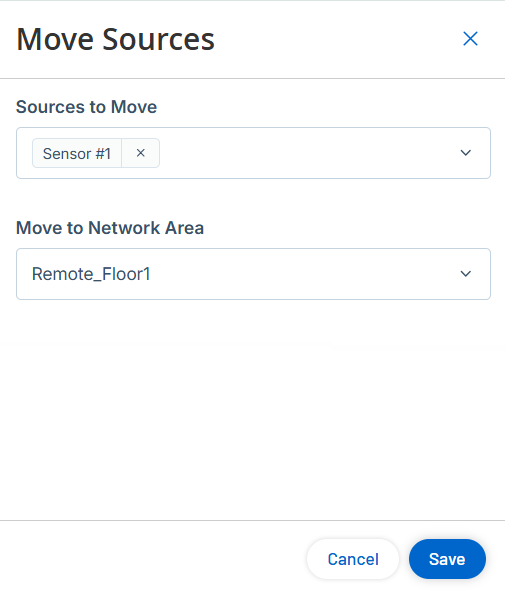
In the Sources to Move drop-down box, select one or more sources to move.
In the Move to Network Area drop-down box, select the target network area from the list.
Click Save.
OT Security moves the selected sources to the specified network area.
Edit Remote Network Area
You can edit the name and description of an existing remote network area.
In the Network Areas table, do one of the following:
Select the network area you want to edit.
OT Security enables the Actions menu in the header.
Right-click the network area you want to edit.
A menu appears.
Select Edit Details.
The Edit Details panel appears.
Modify the details as needed.
Click Save.
OT Security saves your modifications, and the updated details appear in the Network Areas table.
Delete Remote Network Area
You can delete remote network areas that you no longer need.
To delete a network area:
In the Network Areas table, do one of the following:
Select the network area you want to delete.
OT Security enables the Actions menu in the header.
Right-click the network area you want to delete.
A menu appears.
Select Delete.
OT Security deletes the selected network area.