Jira
Integrate your Jira projects with Tenable One AI Exposure to support the creation of issues related to specific findings in Tenable. Tenable supports integration with both Jira Software (on premises, version 8.5.3 and above) and Jira Software Cloud.
To integrate your projects with Tenable, you need to:
- Add a Jira Instance - Connect a Jira instance to Tenable using OAuth, a password or API token, or a personal access token. Must be an admin user.
- Add a Jira Space - Integrate one or more Jira projects with Tenable by granting the dedicated Tenable user permission to the projects.
What to do next:
-
To start creating issues for findings, you need to also configure automation rules or manually trigger an action after you integrate a tool. Successfully completing all integration steps does not trigger the sending of any data on its own.
Before You Begin
Adding a Jira instance to AI Exposure requires a dedicated Jira identity and one of three authentication methods:
- OAuth 2.0
- A password or API token
- A personal access token (PAT)
Tenable recommends OAuth. Although you can use an existing Jira user, Tenable recommends that you create a dedicated user or service account to simplify audit-trail activities. If needed at a later date, you can remove the Jira identity to terminate the integration.
Complete the setup for your chosen authentication method in Jira before you start the wizard.
Set Up an OAuth 2.0 Credential
Create an OAuth 2.0 credential for a Jira service account. The integration runs as that service account and inherits the scopes you grant the credential. If you do not already have a service account, create one first. For more information, see the Atlassian documentation.
To create an OAuth 2.0 credential:
- In Atlassian Administration, select your organization (if you have more than one).
- Navigate to Directory > Service accounts.
- Select the service account to create a credential for.
- Click Create credentials.
- Select OAuth 2.0, and then click Next.
-
Select the following scopes to determine what the credential can do in Jira:
- write:jira-work
- read:jira-work
- read:jira-user
- read:priority:jira
- Click Next.
- Review the OAuth information, and then click Create.
- Copy the Client ID and Client secret.
Set Up a Jira User
For password or API token or personal access token authentication, create a dedicated Jira user with:
- Product access to the Jira product that your project belongs to (for example, Jira Software). To identify the product, in the Jira console (not the Admin page), navigate to Projects > View all projects, and then use the dropdown filter.
-
The following project permissions, granted via the permission scheme for the user's project:
- Assign issues
- Browse projects
- Create attachments
- Create issues
- Edit issues
Then create the credential for your method:
- (Password or API token) Create an API token. Create an API token for the Jira user. For the steps to create an API token, see the Atlassian documentation.
- (Personal access token) Create a personal access token. Create a personal access token (PAT) for the Jira user. For the steps to create a personal access token, see the Atlassian documentation.
Add a Jira Instance
After you complete the prerequisites, add the Jira instance from the AI Exposure Console.
To add a Jira instance:
- In the AI Exposure Console, navigate to Settings > Integrations.
- (Optional) Select an account scope in the Organization dropdown.
- Click Add Integration.
- In the Integrations Library, click Jira. The Jira wizard opens.
-
Activate the Jira instance:
Enter your Jira Instance URL.
Note: You can find your Jira URL in the Atlassian Administration console, in the account profile area, on the Products page.-
Under Authentication, do one of the following:
- To use OAuth, select OAuth (recommended), and then enter the Client ID and Client secret from the OAuth 2.0 credential you created in Jira.
- To use a password or API token, select Password or API token, and then enter the User name (email address) and the User password or API token of the Jira user you created.
- To use a personal access token, select Personal access token (PAT), and then enter the token you created.
- Click Finish.
After your instance is added successfully, it appears in the AI Exposure Console, in the table in Settings > Integrations > Jira.
Add a Jira Space
Before you can add a Jira space, you must first Add a Jira Instance.
To add a Jira space:
- In the AI Exposure Console, navigate to Settings > Integrations and find the relevant Jira instance you created.
- Click the three dots next to an instance name, and then click Add Space. The Add Jira Space wizard opens.
- Configure the space (Step 1 in wizard). Grant the Tenable service account or user you created when you added a Jira instance permission to the Jira project, and then enter the space's key:
- In your Jira Software instance, navigate to the Projects page and select the project you want to add.
-
Find the project, and then navigate to Project settings in one of the following ways:
- Click the three dots next to the project, and then click Project settings.
- Click the project, and then navigate to Project settings.
- Navigate to People, and then click Add people.
- Enter the email address of the service account or user you created when you added a Jira instance, select a Role, and then click Add.
- In the AI Exposure Console, enter the Space Key. You can find the project key in your Jira Software instance on the Projects page.
- Click Next.
- Sync Work Item Priorities to align the severity of findings in Tenable with the corresponding priority in Jira (Step 2 in wizard). Jira tickets created via Tenable are assigned the chosen priority. When finished, click Next.
- Do not sync
- Sync using custom mapping — For each Finding Severity in Tenable, assign a Jira Issue Priority.
-
Sync Work Item Statuses to align the statuses of findings in Tenable with the corresponding status in Jira (Step 3 in wizard). Jira tickets created via Tenable are assigned the chosen status. When finished, click Next.
Note: This feature requires additional permissions and configuration in Jira. See Allow Jira Issue Transitions for more information.- Do not sync
- Sync issues using custom mapping.
- For each Issue Type in Tenable, choose whether to sync using custom mapping.
- For each Finding Status in Tenable, assign a Jira Issue Status.
- Click Finish.
After your space is added successfully, it appears in the table in Settings > Integrations > Jira.
Allow Jira Issue Transitions
To transition Jira issues between statuses, you need to verify that it is allowed in the project workflow. A workflow is a set of statuses and transitions that an issue moves through during its lifecycle, and typically represents a process within your organization. If the transition is not allowed in your workflows, you need to configure additional transitions that allow Tenable to move issues.
Example:
Your workflow might dictate that an issue with a status of To Do cannot transition to Done without first moving to In Progress. However, this means that when an Open finding becomes Closed in AI Exposure, your workflow would not allow the status transition, because it was not moved to In Progress first. To allow AI Exposure to bypass such transition limitations, you need to configure additional transitions in Jira.
| Finding Status | Jira Status |
|---|---|
| Open | To Do |
| - | In Progress |
| Closed | Done |
To configure Jira transitions for Tenable:
- Add a project role:
- In the relevant project, navigate to Settings > System.
- Under SECURITY, click Project roles. The Project Role Browser displays, which contains a list of all the project roles in your Jira site.
-
Under Add Project Role at the bottom of the page, enter a meaningful name and description. For example:
- Name: AI Exposure Project Role
- Description: Used in the project's workflow to set transition permissions.
- Click Add Project Role.
- Assign a user or group to the project role:
- Navigate back to the same project, click Back to project, and then click Project settings.
- Click People.
- Click Add people in the top right corner.
-
Select the name of the user that you created when you added your Jira instance in AI Exposure.
Note: Select the user name and not the email address of the relevant user. - Select the Role that you created earlier (AI Exposure Project Role).
- Click Add 1 person.
- Add a workflow transition:
- Click Back to project, and then click Project settings.
- Click Workflows.
- Select the relevant workflow, and then click Edit.
- In the Diagram view, click Add transition.
-
In the dialog, complete the following fields:
- From status: Any status
- To status: Done
- Name: Any to Done
- Click Add.
- In the diagram, next to the DONE status, click All.
- Click Conditions.
- At the bottom of the page that opens, click Add condition.
- Select the User is in Project Role option, and then click Add.
- Select the Project Role you created in the previous step, and then click Add.
- Repeat the above steps to add another transition from Any Status to To Do.
- When ready, click Publish Draft at the top of the Workflows page.
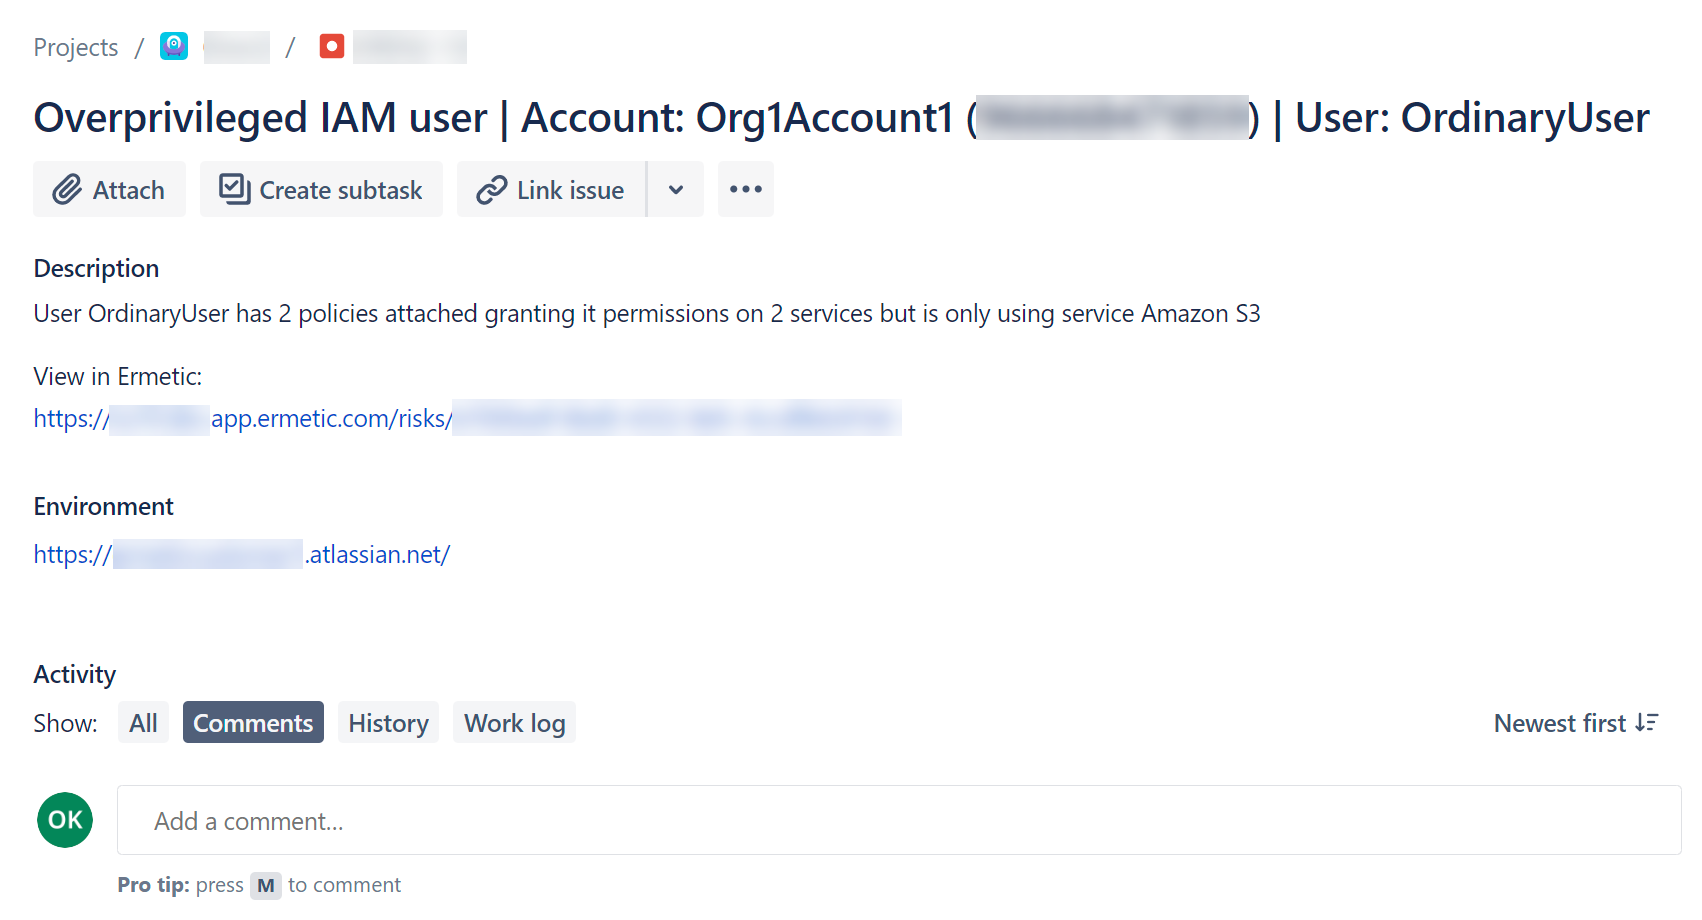
Sample Jira Issue