ServiceNow
Integrate your ServiceNow instance with Tenable One AI Exposure to support the creation of incidents related to specific findings in Tenable.
What to do next:
-
To start creating issues/incidents for findings, you need to also configure automation rules or manually trigger an action after you integrate a tool. Successfully completing all integration steps does not trigger the sending of any data on its own.
Before You Begin
You can authenticate the integration with OAuth 2.0 or basic authentication. Tenable recommends OAuth. Both methods require a dedicated ServiceNow user. OAuth requires one additional step: registering an OAuth application that runs as that user.
Tenable recommends a dedicated user to simplify audit-trail activities. If you no longer need the integration, you can remove the user to terminate it.
Complete the following in your ServiceNow instance before you start the wizard:
-
Create a ServiceNow user — Required for both authentication methods. Create a dedicated user and select the Web service access only option. Tenable recommends a Global user so that all data is visible. Grant roles according to the authentication method you use:
- For basic authentication, grant the itil role.
- For OAuth, grant the itil, sn_incident_read, and sn_incident_write roles.
Note: Tenable recommends a Global user so that all data is visible. The user must be able to create and update incidents and view users and groups. -
(OAuth only) Register an OAuth application. To authenticate with OAuth, register an OAuth application in ServiceNow that uses the Client Credentials grant. The application runs as the user you created above and inherits only that user's permissions:
- In your ServiceNow instance, navigate to System OAuth > Inbound Integrations.
- Click New Integration, and then select OAuth - Client credentials grant.
- For OAuth Application User, select the dedicated user you created.
- Set the Auth scope to Restricted so that the application inherits only the permissions of that user.
- For Limit authorization to the following APIs, choose Attachment API and Table API
- Copy the generated Client ID and Client secret.
Note: The minimum access token lifespan is 5 minutes (300 seconds).
Add an Instance
After you complete the prerequisites, add the ServiceNow instance from the AI Exposure Console.
To add a new instance:
- In the AI Exposure Console, navigate to Settings > Integrations.
- (Optional) In the Organization dropdown, select an account scope.
- Click Add Integration.
- In the Integrations Library, click ServiceNow. The ServiceNow wizard opens.
-
Activate the instance (Step 1 in wizard):
- Enter an Instance Name for the instance in Tenable.
- Enter the Instance URL of your ServiceNow instance.
Under Authentication, do one of the following:
- To use OAuth, select OAuth, and then enter the Client ID and Client secret from the OAuth application you registered in ServiceNow.
- To use basic authentication, select Basic, and then enter the User name (ID) and Password of the ServiceNow user you created.
See Before You Begin for more information.
- Click Next.
- Sync Incident Priorities to align the severity of findings in Tenable with the corresponding impact/urgency of incidents in ServiceNow (Step 2 in wizard). ServiceNow incidents created via Tenable are assigned the chosen priority. When finished, click Next.
- Do not sync
- Sync using custom mapping — For each Finding Severity in Tenable, assign a ServiceNow Incident Impact and a ServiceNow Incident Urgency.
-
Sync Incident States to align the statuses of findings in Tenable with the corresponding state in ServiceNow (Step 3 in wizard). ServiceNow incidents created via Tenable are assigned the chosen state. When finished, click Next.
Note: This feature requires additional permissions and configuration in ServiceNow. See Sync Incident States with Finding Statuses for more information.- Do not sync
-
Sync using custom mapping.
- For each Finding Status in Tenable, assign a ServiceNow Incident State.
- Choose whether to Create a new incident when a finding is reopened.
Important: The Closed and Canceled states in ServiceNow are considered final and cannot be reverted to an active state. Once an incident reaches one of these states, it is effectively retired from the incident lifecycle. As a result, if you map a finding status to one of these states, you cannot choose to create a new incident when a finding is reopened. To ensure findings can be reopened and tracked, consider mapping findings to a non-final ServiceNow state.
-
Assignment Groups: Exclude to stop AI Exposure from assigning incidents to specific ServiceNow assignment groups (Step 4 in wizard). AI Exposure disables excluded groups wherever you or the system can select an assignment group.
- Allow all — No groups are excluded. This is the default.
- Select the groups to exclude.
Note: Automation rules that already use an excluded group keep running as before. After you remove an excluded group from a rule, you cannot select it again.
After your instance is added successfully, it appears in the table in Settings > Integrations > ServiceNow.
Sync Incident States with Finding Statuses
You can sync ServiceNow incident states with AI Exposure finding statuses by granting Tenable an extra level of permissions. This is done by importing a custom update set created by Tenable.
To sync incident states with findings statuses:
- In your ServiceNow instance, navigate to Retrieved Update Sets (under System Update Sets).
- Under Related Links, click Import Update Set from XML.
-
Choose and Upload the following XML file:
- Click to open the newly created Tenable Role Update Set - Incident States.
- Click Preview Update Set. The Update Set Preview dialog displays. When finished, click Close.
- Verify that no conflicts (Collisions) exist.
- Review the changes (Customer Updates), and then click Commit Update Set. The Update Set Commit dialog displays. When finished, click Close. The State of the update set should now be Committed.
- Navigate to Users and Groups > Users.
- Find and click on the User ID of the Tenable user you created when you added a ServiceNow instance.
- Navigate to the Roles section at the bottom of the page and then click Edit....
-
Add the Tenable role to the Roles List:
- From the left-hand Collection area, search for and select tenable_state_readonly_role.
- Click on the Add button (>) to move the role to the Roles List on the right side.
Important: Make sure the itil role is also in the Roles List on the right side. This role was granted when you added a ServiceNow instance, and is needed for the integration to work. - Click Save.
Use Additional Fields in Incidents
By default, Tenable supports customizing a basic set of relevant fields when creating ServiceNow incidents via AI Exposure actions. These include the Assignee, Assignment group, Category, Impact, Urgency, Summary, and Description fields.
- You can customize additional fields by granting Tenable an extra level of permissions beyond those granted when you integrated with ServiceNow. This is done by importing a custom update set created by Tenable.
- See Supported Fields to understand which additional fields you can use.
To use additional fields in incidents:
- In your ServiceNow instance, navigate to Retrieved Update Sets (under System Update Sets).
- Under Related Links, click Import Update Set from XML.
-
Choose and Upload the following XML file:
- Click to open the newly created Tenable Role Update Set - Additional Fields.
- Click Preview Update Set. The Update Set Preview dialog displays. When finished, click Close.
- Verify that no conflicts (Collisions) exist.
- Review the changes (Customer Updates), and then click Commit Update Set. The Update Set Commit dialog displays. When finished, click Close. The State of the update set should now be Committed.
- Navigate to Users and Groups > Users.
- Find and click on the User ID of the Tenable user you created when you added a ServiceNow instance.
- Navigate to the Roles section at the bottom of the page and then click Edit....
-
Add the Tenable role to the Roles List:
- From the left-hand Collection area, search for and select tenable_fields_readonly_role.
- Click on the Add button (>) to move the role to the Roles List on the right side.
Important: Make sure the itil role is also in the Roles List on the right side. This role was granted when you added a ServiceNow instance, and is needed for the integration to work. - Click Save.
Supported Fields
Tenable only supports customizing fields that meet all of the following criteria:
- Field is not dependent on the value of another field.
- Field is visible (not hidden by UI Policy that applies unconditionally).
- Field is writable. A field is excluded if it is marked read-only in the Dictionary, a Dictionary Override, or by a UI Policy that applies unconditionally.
- Field type is supported (string, choice, integer, reference).
- Fields restricted by a UI Policy with conditions remain fully available (visible, optional, writable). Since Tenable can detect that conditions exist but cannot evaluate them, these fields are flagged with a "(UI-Policy)" label and tooltip.
The following fields are never shown:
- number (auto-generated by ServiceNow)
- state (managed separately)
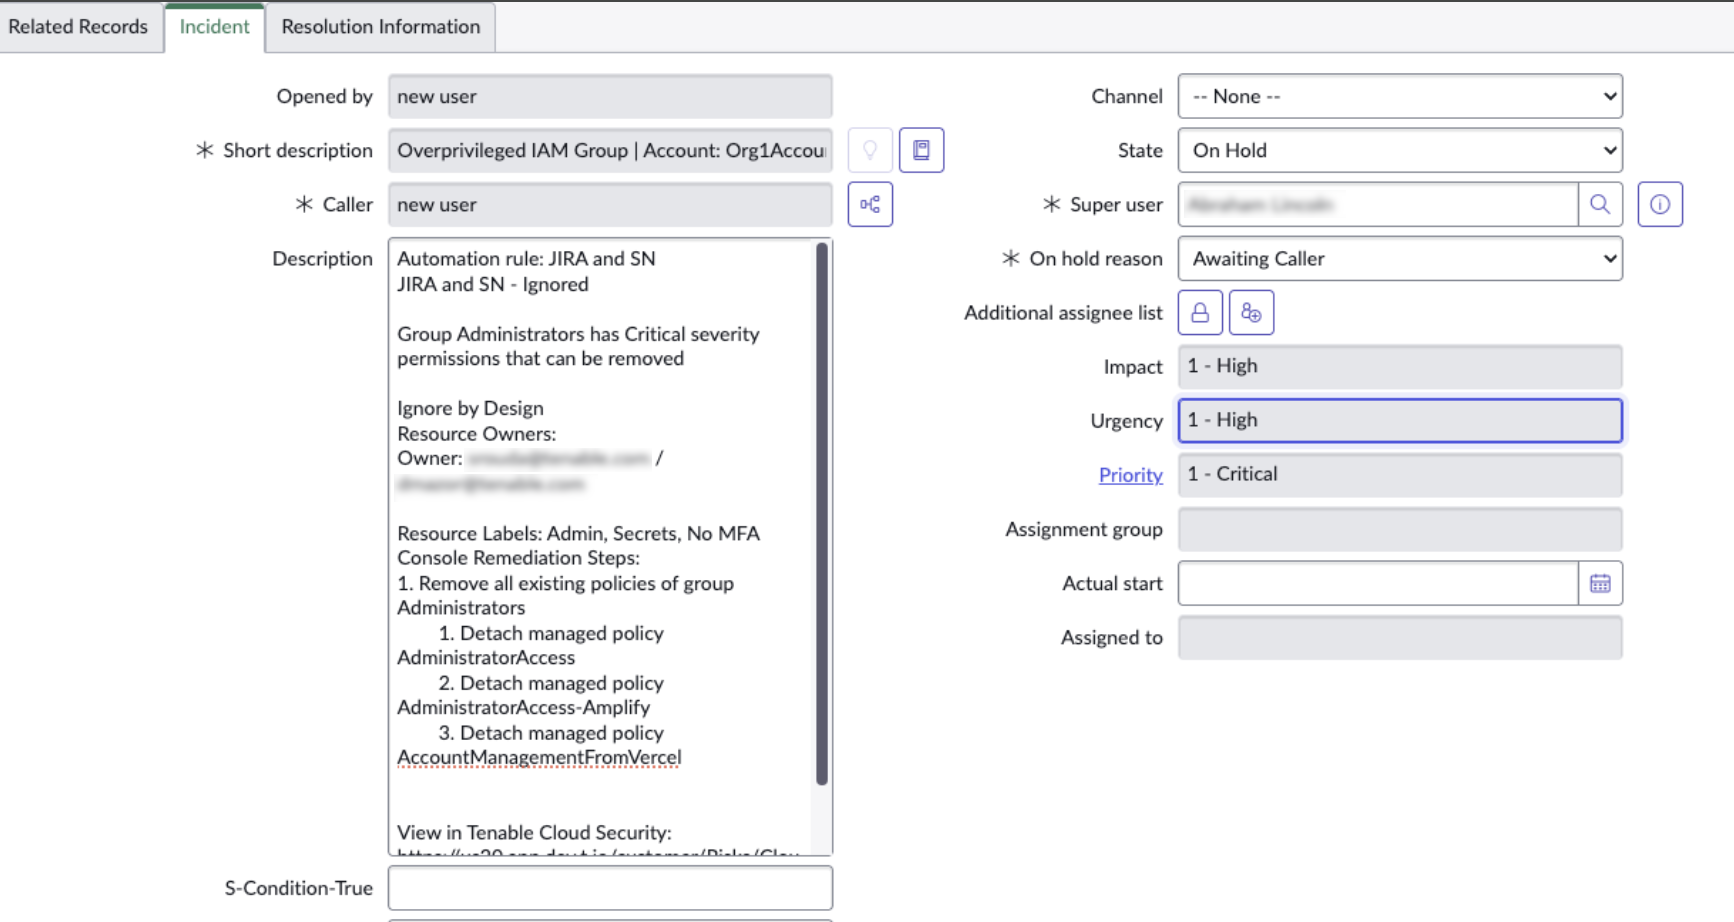
Sample ServiceNow Incident