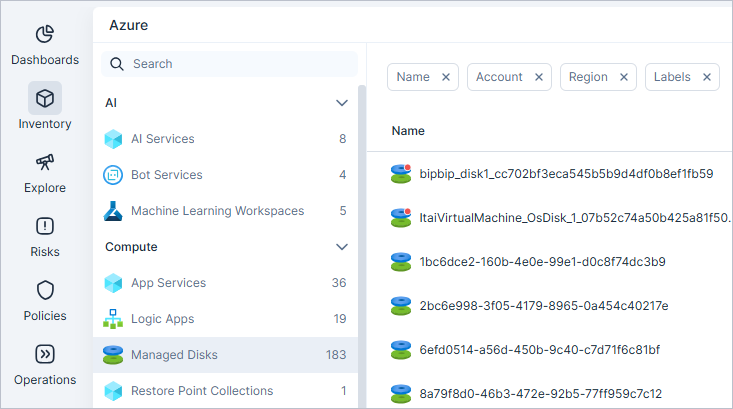
View Your Asset Inventory
You can use the Inventory view to learn a wide variety of important things about your multi-cloud environment. For example, you can:
- See all the running EC2 instances in your AWS environment that are exposed to the internet, but are also running with service accounts that have high privileges.
- See all the users in Microsoft Entra ID that are guest users and have high privileges in your Azure subscriptions or AWS accounts.
- See all over-privileged users with sensitive permissions that haven't been used for x number of days.
See Common Inventory Use Cases for more information about important use cases that the Inventory view can help you solve for.
The Inventory view lists all resource categories together, without separating by cloud provider or identity provider. To view resources for a specific provider, use the organization selector at the top of the Console. You can also Search across Your Inventory to find resources across your entire multi-cloud environment.
Each view is divided according to product categories that are relevant across all cloud providers and IdPs:
- AI
- Compute
- Containers
- Data
- IAM
- Kubernetes
- Management
- Network
- Security
Each of the above categories contains vendor-specific resource types, according to the actual resources in your environment. For example, the IAM category can include AWS IAM users, Azure service principals, and Google Cloud roles — all grouped together for easier visibility.
To view your asset inventory:
- In the Tenable One Cloud Exposure Console, go to Explore and click Inventory.
- From the Inventory view, search for and select the relevant category and resource type that you want to view. For example, Compute > AWS EC2 Instance.
- Use the column picker on the top right of the table to choose which columns to display.
- Filter the Asset Inventory to modify the scope of the visible data. The resource elements (filters/columns) displayed differ for each resource type. For example, for EC2 instances, you can filter by a specific tag (tags are defined in the cloud service provider and imported within Cloud Exposure).
- Drill down to View Resource Details.
Filter the Asset Inventory
Use the filters at the top of the table to narrow the scope of the visible data (for more information, see Filter Data):
- Click on the + button to add a filter.
- To filter the table by the search term, click Select matches.
- Some resources may not have a value for a particular filter/column. To filter the table by all resources that have any value for the filter, click Select all.
You can also filter by organization or account at the top of the Inventory page to only see resources for a specific account or group of accounts. For more information, see Account Hierarchy and Folders.

While the filters that are available differ for each resource type, the following global filters are relevant for all resource types:
-
Labels — Displays all labels applied to the resource, whether applied:
- Manually (via Settings > Inventory > Labels).
- Automatically based on tag, or tag key and value (via Settings > Inventory > Labels). Labels created in this way have a flag icon
 next to them.
- Automatically by the system.
Hover over a label tag for more information. If a resource has more than one label, click on the icon to see any additional labels.
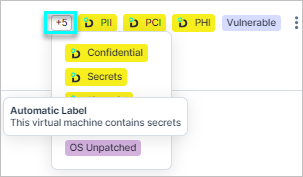
See Apply Labels to Resources for more information.
- Findings — Displays all findings associated with resources of the given resource type.
-
Finding Severity — Indicates the severity of any finding/s associated with the resource:
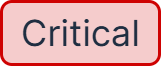

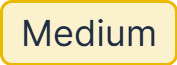
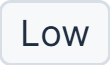
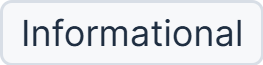
If there is more than one finding for the resource, the highest severity finding is displayed. For example, if the resource has two associated findings, one with Critical severity and one with Medium severity, the Findings column will display Critical.
Create a Scheduled Report
Create a scheduled report directly from the Inventory view, where the report contents are based on the specific filters you apply to the table. For example, you can create a scheduled report for all EC2 Instance is exposed to the internets that expose secrets. The report is created according to the current filters applied to the table. The output data is in CSV format, and contains all relevant resource data, including the URL of each resource page in the Cloud Exposure Console.
To create a scheduled report:
- In the Cloud Exposure Console, go to Explore > Inventory.
- From the Inventory view, select the relevant category and resource type that you want to view. For example, Compute > EC2 Instances.
- Apply any relevant filters.
- From the top-right corner of the table, click the Report button.
- Fill out report details. See Create a Report for more information.
- Click Schedule or Generate.
- You can see the report details in the Reports page.
Export Inventory Data
Export all data for any inventory view, by resource type. For example, export all Virtual Machine inventory data. The data is exported according to the current filters applied to the table. The output data is in CSV format, and contains all relevant resource data, including the URL of each resource page in the Cloud Exposure Console. You can export an unlimited number of results.
Alternatively, you can create/schedule an Inventory report for all resource types within a given account scope.
To export inventory data:
- In the Cloud Exposure Console, go to Explore > Inventory.
- From the Inventory view, select the relevant category and resource type that you want to view. For example, Compute > EC2 Instances.
- Apply any relevant filters.
- From the top-right corner of the table, click the Export button.
Search across Your Inventory
Use the global search to find users, roles, and resources across your entire multi-cloud environment. Searches will be filtered according tto any organization or account scope selected via the organization selector. For example, if you applied a filter to view only Azure accounts, any AWS or GCP resources will not appear in the inventory search.
The search supports a full range of resource properties as inputs, including:
- Resource name
- IP address
- ARN (for AWS)
- Access keys
- Azure Application ID
The search bar appears at the top of the Cloud Exposure Console, regardless of which page you're on.
To search across your inventory:
- (Optional) Select a scope in the organization selector to limit the search to a subset of accounts.
-
Enter a search term in the Search box at the top of the Console.
As you type, a list of results will appear, along with the total number of results for the current search term. Results are also broken down by resource type, so that you can see all matching results by type. You can scroll across the full list of results.
- Click the relevant resource that best matches your search.