Secure Vulnerable Privileged VMs
Objective
Identify and monitor virtual machines (VMs) where high-severity vulnerabilities meet high privileges. This allows you to prioritize assets where an exploit could lead to full project control or lateral movement.
Step 1: Surface the Risk via Built-in Query
Use a built-in query to find immediate threats.
- Navigate to Explore > Explorer.
-
Click Select query
 and select the following query:
- Virtual Machines with Critical or High Vulnerabilities and High Privileges
Understanding the filters: This filters your inventory for VMs with toxic combinations where an exploit could lead to full project control.- Vulnerability Severity (Critical/High) — Limits results to exploits with the highest impact.
- Network Exposure (Internet Direct) — Identifies if the asset is reachable by external attackers.
- Labels (Admin/Privileged) — Correlates the vulnerability with high-level identity permissions.
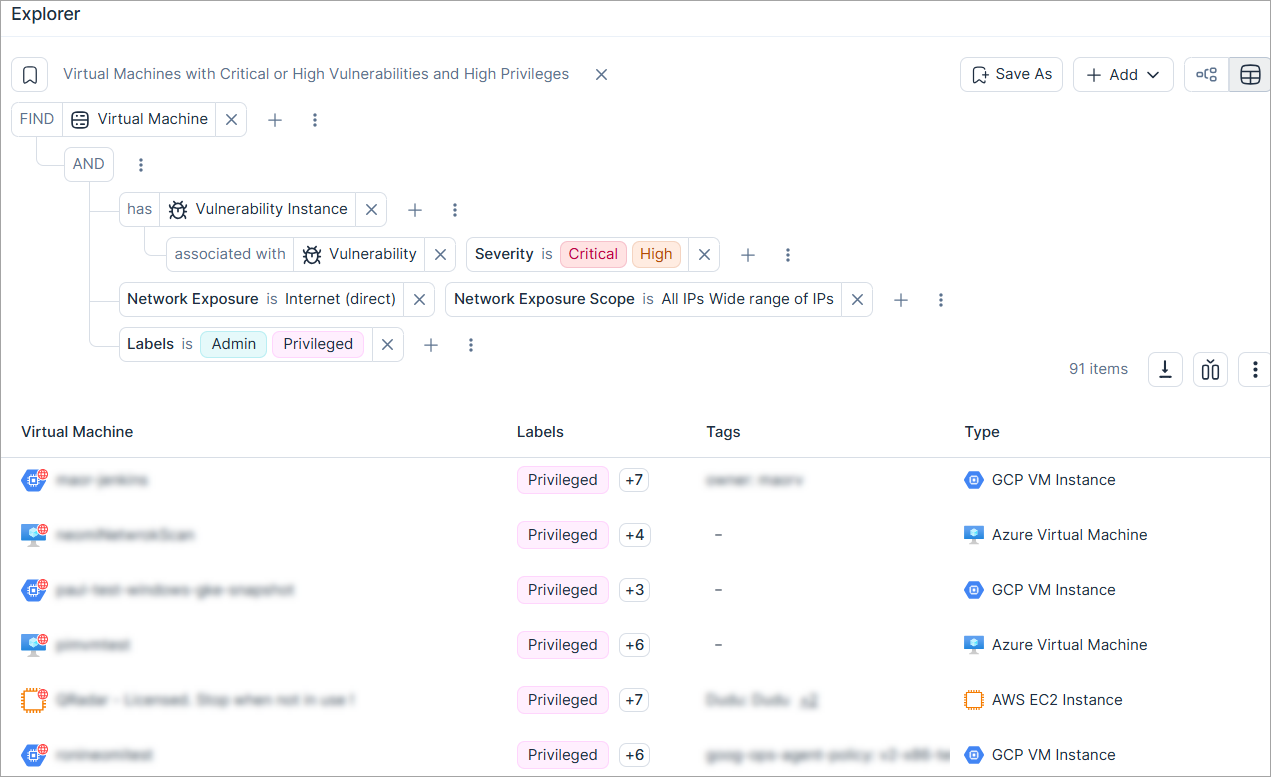
Step 2: Operationalize Detection
To ensure continuous governance, convert this query into automated alerts and stakeholder reports.
Create a Custom Policy
To continuously monitor these risks, convert the query into a custom policy.
- From the built-in query page, click Add > Custom Policy. The Create Custom Policy wizard opens.
- Enter a meaningful Name and Description (Optional).
- Leave the policy type as Query.
-
Leave the option Link to existing query enabled.
Note: This ensures your policy stays synchronized with any future updates to the source query. - Assign the policy a Severity, which determines the severity level of any findings triggered by the policy.
- (Optional) Enter custom Remediation steps to provide clear guidance for security teams.
- When finished, click Create.
Create a Report
Create a CSV report to schedule a weekly summary of these high-risk VMs for relevant stakeholders.
- From the built-in query page, click Add > Report. The Create Report wizard opens.
- Enter a meaningful Name.
- Leave the report type as Query.
-
Leave the option Link to existing query enabled.
Note: This ensures your policy stays synchronized with any future updates to the source query. -
Choose a Delivery Time. For example, to schedule a weekly delivery on Monday mornings:
- Select Schedule.
- Select Repeat every 1 week on M At 10:00AM.
- Add Delivery Methods to send a copy of the report to specific recipients.
- Click Schedule.