Exposure Instance Details
The Exposure Instance Details page shows a list of specific occurrences of identified weaknesses.
To access the Exposure Instances page:
-
In Tenable Identity Exposure's left navigation pane, click the Exposure Center icon
 .
. -
From the submenu, click on Exposure Instances.
The Exposure Instances page appears.
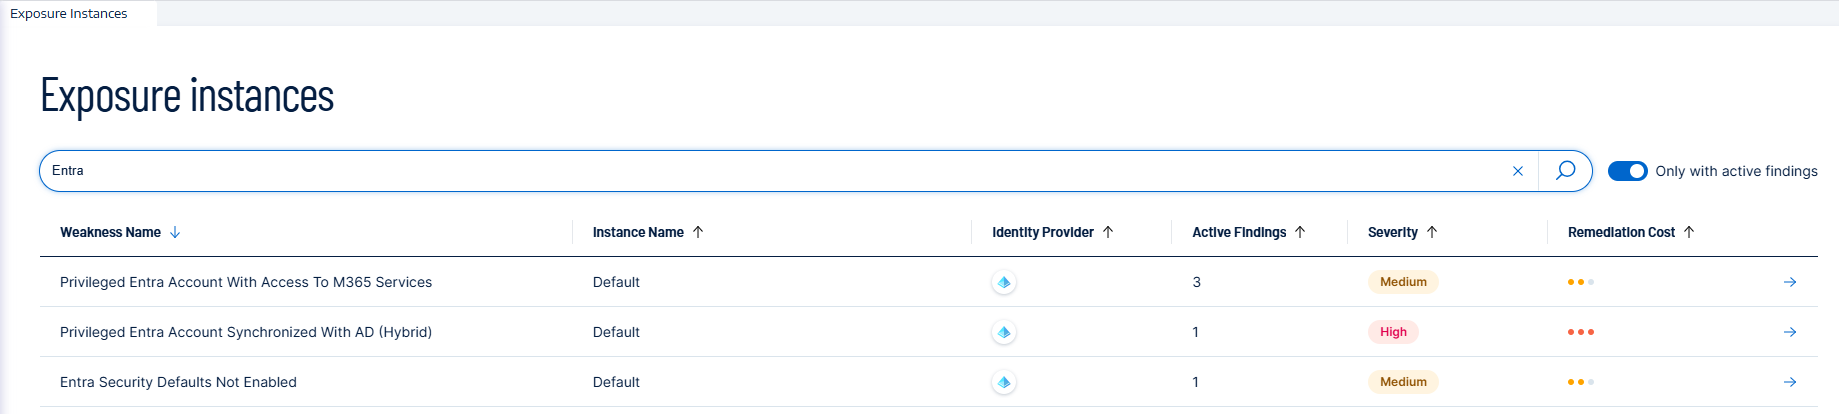
General Information
This page shows a table listing all Exposure Instances, with their corresponding information:
-
Weakness name: The generic name of the weakness
-
Instance name: The specific name of this instance
-
Identity Provider: The name of the identity provider where the data originated
-
Number of active findings
-
Severity: Indicates the criticality of this weakness
-
Remediation Cost: Indicates the effort required to address this weakness (Low, Medium, High)
Detailed information
-
To go into further detail about each Exposure Instance, click the arrow at the end of the line. This opens another page with the following information for each exposure instance:
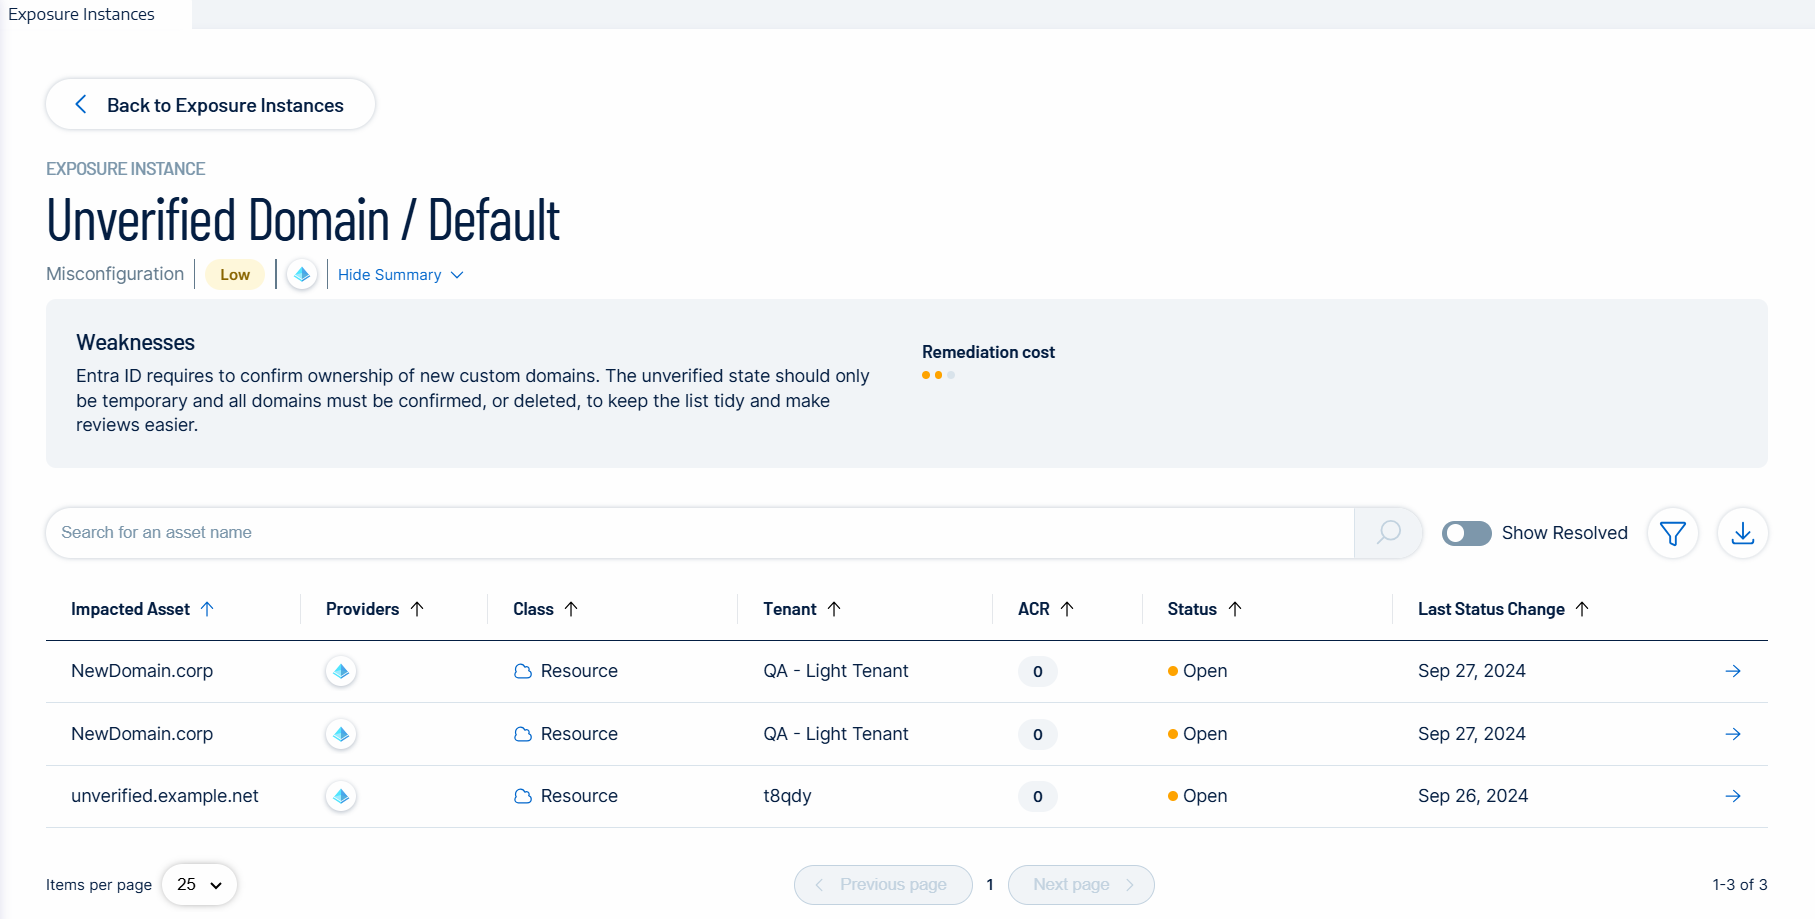
Header information
The header shows the following information:
-
The Weakness type, such as a misconfiguration and the instance name (default)
-
The severity: The severity of the Weakness (low, medium, high)
-
The Weakness description: A detailed explanation of the Weakness and why it poses a security risk.
-
The estimated remediation cost
Impacted Assets
Impacted assets are the assets that the Exposure Instance impacted with their corresponding details:
-
Provider
-
Type of asset
-
Tenant: The term "tenant" is used generically to refer to Identity Provider (IDP) tenants, even though each IDP may have its specific name for this concept (e.g., Entra ID tenant, AD domain, etc.).
-
ACR score (Asset Criticality Rating)
-
Status: Open, Resolved, or Resurfaced
-
Last Status change date
Exclusions
See Exposure Instance Exclusions for complete details.
Analyzing Findings
To view the Finding associated with the impacted asset, click on the arrow at the end of the line. This opens another page with this information for the finding:
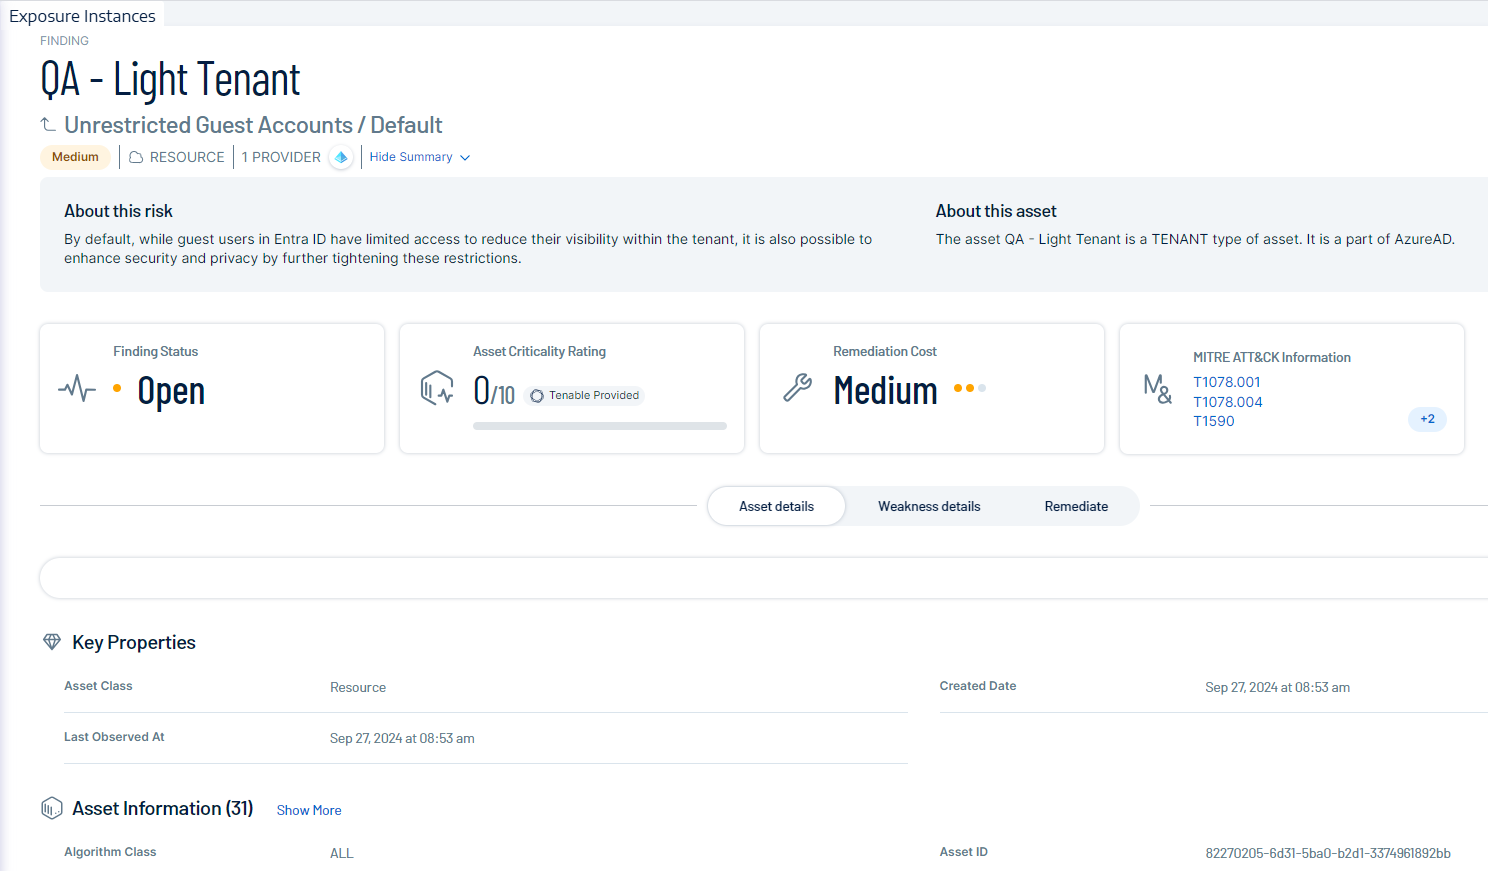
Header information
The header in the Finding page shows the following information:
-
Tenant name
-
The weakness name and associated Exposure Instance name
-
The severity: The severity of the Weakness (low, medium, high)
-
The asset class: The category that the asset belongs to. See Asset Classes for more information.
-
The provider: The Identity Provider
-
A summary of the exposure instance
-
“About this risk” gives a brief description of this weakness
-
“About this asset” indicates the asset type (such as “tenant”) and the Identity Provider
-
Finding Statuses
Findings can show the following statuses:
Note: By default, the page only shows open and resurfaced findings.
-
Open: This indicates an active security issue that needs attention. The weakness has been detected and has not yet been addressed.
-
Resolved: This status shows that the previously identified weakness has been successfully addressed. The security issue is no longer active.
Tip : enable the toggle “Show resolved” to show resolved findings.) -
Resurfaced: This status appears when a previously resolved issue has been detected again. It may indicate that the solution was temporary or that the issue has recurred.
-
Excluded: This status appears when you apply your filter to show impacted assets with an exclusion applied.
Asset Criticality Rating (ACR)
Tenable assigns an ACR to each asset on your Identity Provider to represent the asset's relative criticality as an integer from 1 to 10. A higher ACR indicates higher criticality. See ACR for more information.
Remediation Cost
Remediation cost refers to the estimated effort needed to address a specific weakness, factoring in a combination of human labor, complexity, and potential financial expenses.
This cost breaks down into three levels:
-
Low: Relatively easy to fix, requiring minimal time and resources.
-
Medium: Requires moderate effort to address.
-
High: Complex issues that may require significant time, resources, or changes to resolve.
This classification helps prioritize which issues to tackle first based on both their severity and the effort required to fix them.
MITRE ATT&CK Information
Related techniques from the MITRE ATT&CK framework.
Finding details
Below the header, the Findings page shows three tabs to highlight the following information:

-
Click on any of these tabs to expand details.
Asset details
The "Asset details" is the default open tab in the Findings page.
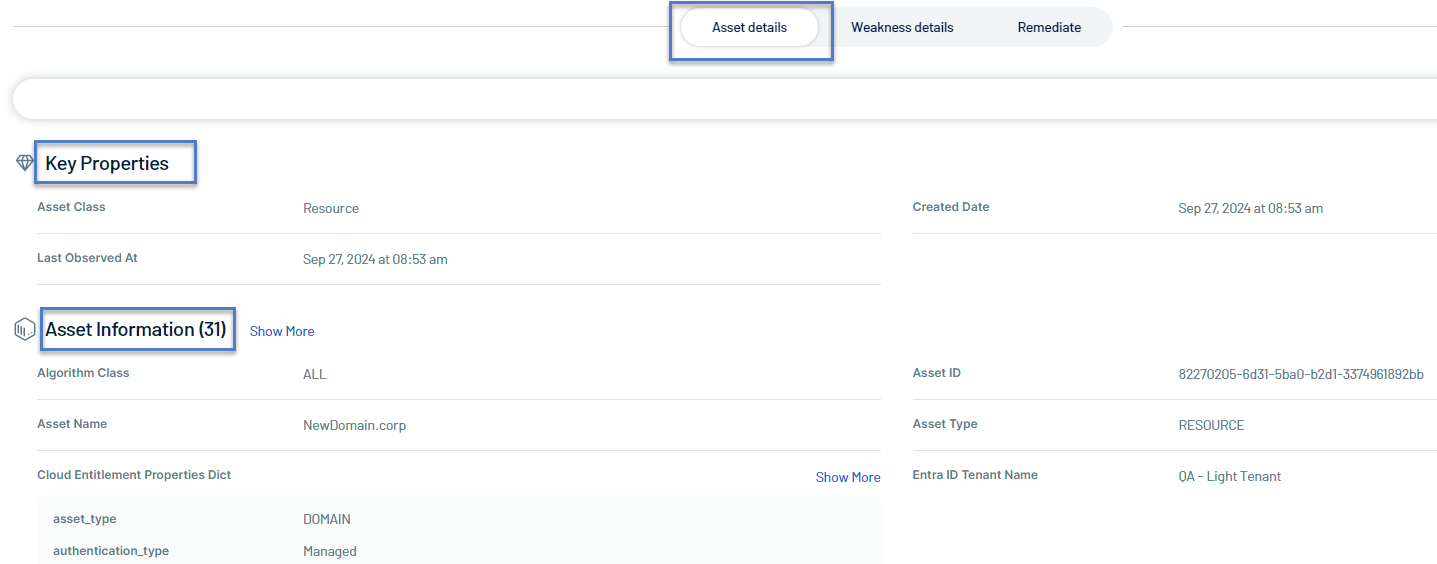
This section gives the following information:
-
Key Properties — This section provides high-level details about the asset such as Asset Class. It also shows the asset creation date and when it was last observed.
-
Asset Information — This section contains more detailed attributes of the asset related to information from the Identity Provider.
Weakness details
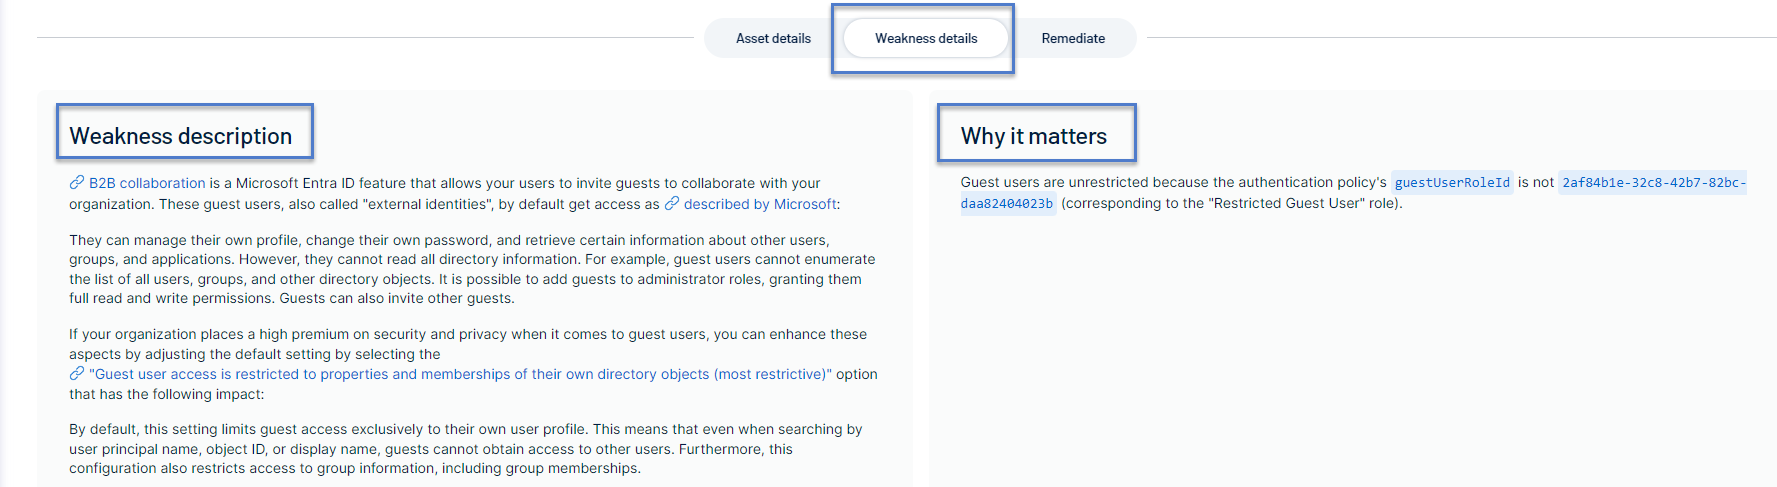
This section gives the following information:
Weakness description — In simple terms, this section explains why the weakness can pose security risks to help you understand and address the weaknesses.
Why it matters — This section identifies the specific occurrence of this weakness so you can focus your effort on remediating it.
Remediation

This section guides you through the process of remediating a weakness.
Remediation Guidelines — The textual guidelines provide step-by-step instructions on how to address the identified weakness. These guidelines typically include:
-
Detailed instructions on how to correct the weakness.
-
Best practices to prevent similar issues in the future.
-
Links to relevant documentation or additional resources.
Remediation Scripts — For some findings, automated remediation scripts may be available.
Before you run the script:
-
Review its content to understand what changes it will make.
-
Adapt it for your environment if necessary.
-
Test the script in a non-production environment if possible.
-
Ensure you have the necessary permissions to execute the script.
To run the remediation script:
You can either open a PowerShell console, paste the remediation script, and run it directly, or, if you prefer, download it as a .ps1 file to execute.
-
Look for a "Download Script" button in the Remediation tab.
-
Click this button to download the remediation script.
-
Run the file like any PowerShell script.
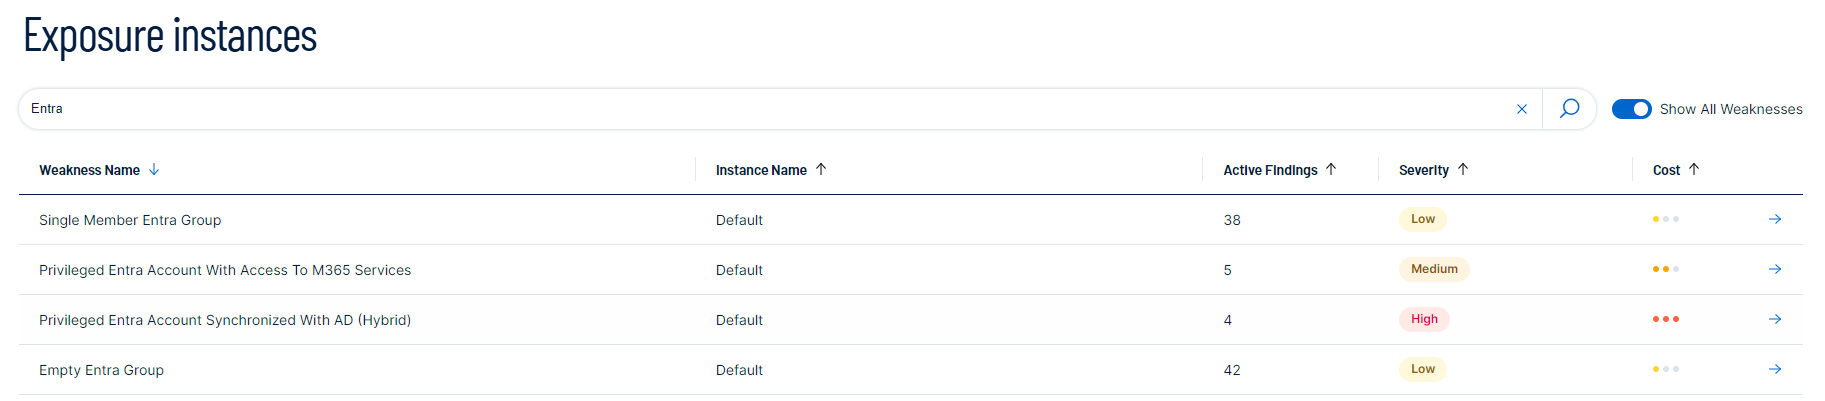
Search
You can search in the list of exposure instances for a specific instance by weakness name, instance name, or severity.
To search for an instance:
-
In the “Search” box, type in a search term (for example, “Entra”). The list shows all instances matching the search criteria.
-
You can search the exposure instance for specific impacted assets. In the “Search” box, type in an asset name (for example, “Security”). The list shows all instances matching the search criteria.

Filter
To filter the list of weaknesses:
-
Click the
 icon .
The “Add Filter” button appears.
-
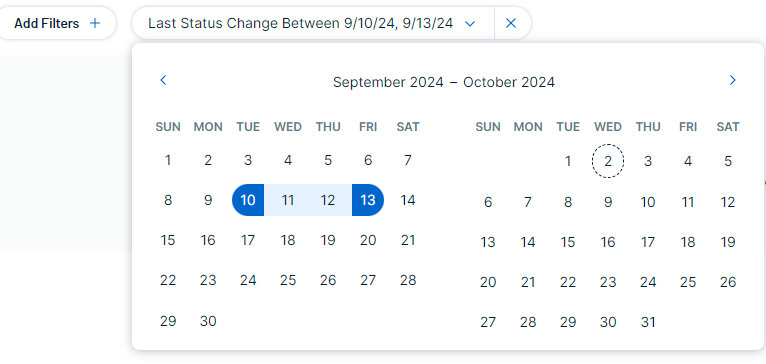
Click “Add Filter”. You have these filter options:
-
By “Last Status Change”: Select a date from the date picker.
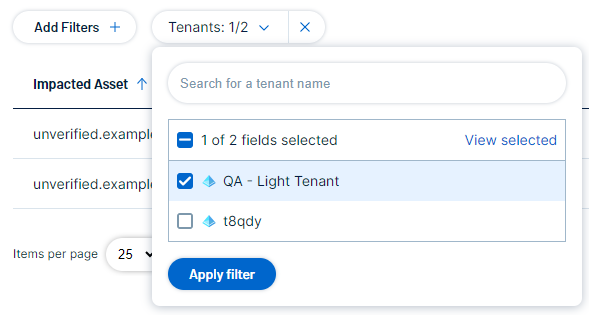
-
By "Tenant": Select the tenant name. You can also search for a specific tenant in the "Search" box and click View selected.
-
-
Click Apply Filter.
Export
You can export the list of impacted assets for a exposure instance as an Excel file.
To export the list of impacted assets:
-
On the exposure instance page, click the
 icon.
icon.
See Also