Audit the AWS Environment
You can use Tenable Vulnerability Management to audit the Amazon Web Services environment to detect misconfigurations in your cloud environment and account settings using Tenable Vulnerability Management. Complete the following steps to configure AWS for successful Audit Cloud Infrastructure assessments with Tenable Vulnerability Management.
Note: Tenable recommends that you create a new read-only access AWS account just for Tenable Vulnerability Management. If you experience issues, see AWS Audit Troubleshooting.
To audit the AWS environment, you must complete the following tasks:
- Create a Read-Only Group in AWS
- Create a Scanning User in AWS
- Configure AWS Audit Cloud Infrastructure in Tenable Vulnerability Management
- View Audit Details in the Scan Results
Create a Read-Only Group in AWS
To create a read-only group in AWS:
-
Log in to your AWS account.
- Click My Account > AWS Management Console.
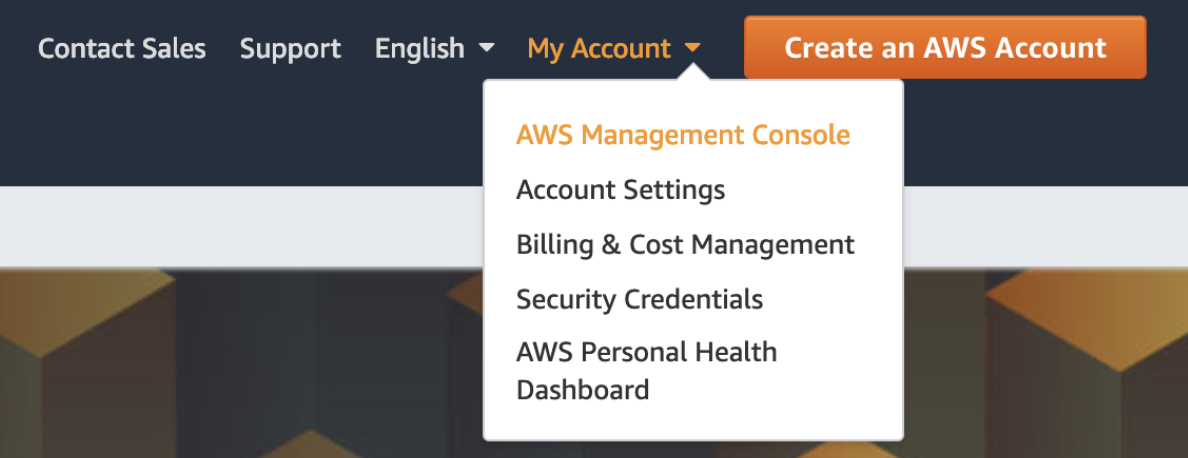
The AWS Management Console appears.
- Click Services.
The Services page appears.
- In the Security, Identity, and Compliance section, click IAM.
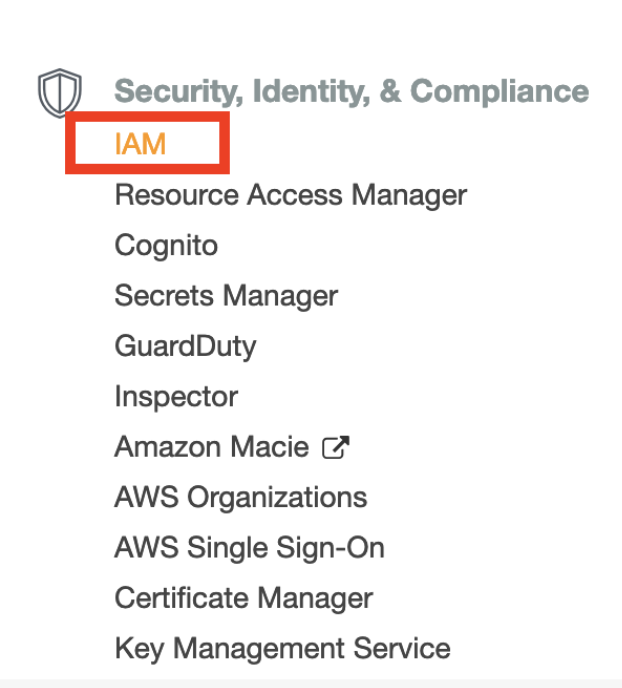
The IAM control panel appears.
- In the left panel, click Groups.
The Groups page appears.
- Click Create New Group.
The Create New Group Wizard appears.
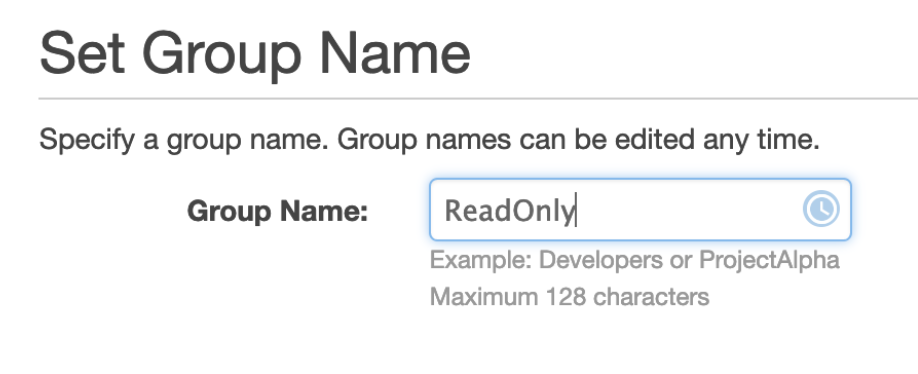
- In the Group Name box, type a name for the read-only group.
- Click Next Step.
The Attach Policy screen appears.
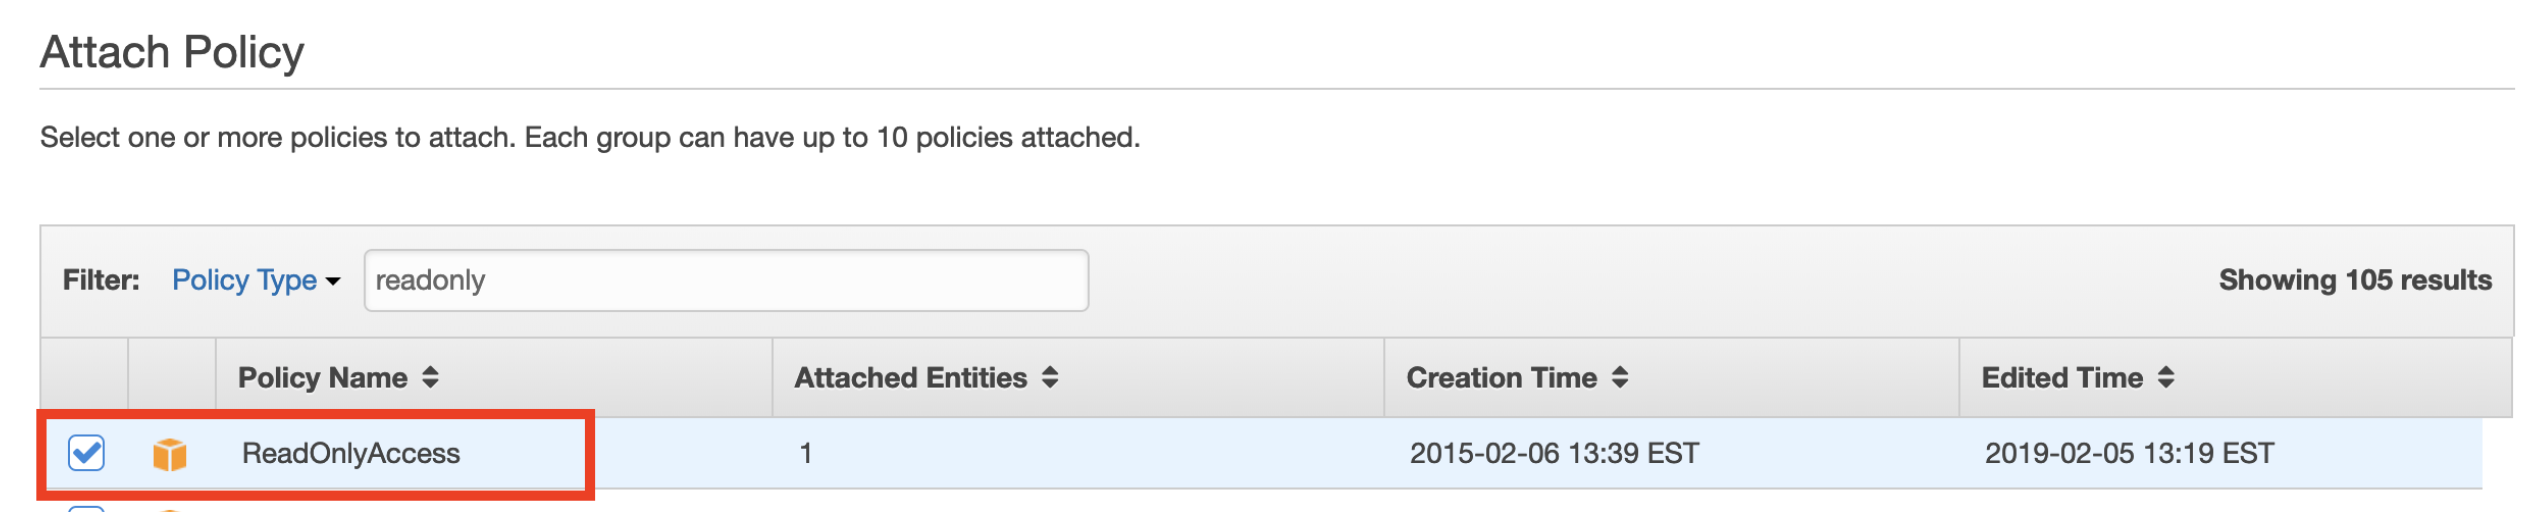
- Select the ReadOnlyAccess AWS-managed policy.
- (Optional) On the Attach Policy screen, select the SecurityAudit AWS-managed policy.
- Click Next Step.
The Review page appears.
- Review the group information.
- Click Create Group.
AWS creates the read-only group.
Create a Scanning User in AWS
To create a scanning user in AWS:
-
Log in to your AWS account.
- Click Users > Add Users.
The Add User page appears.
- In the Set user details section, in the User name text box, type a name for the user.
- In the Select AWS access type section, select the Programmatic access checkbox.
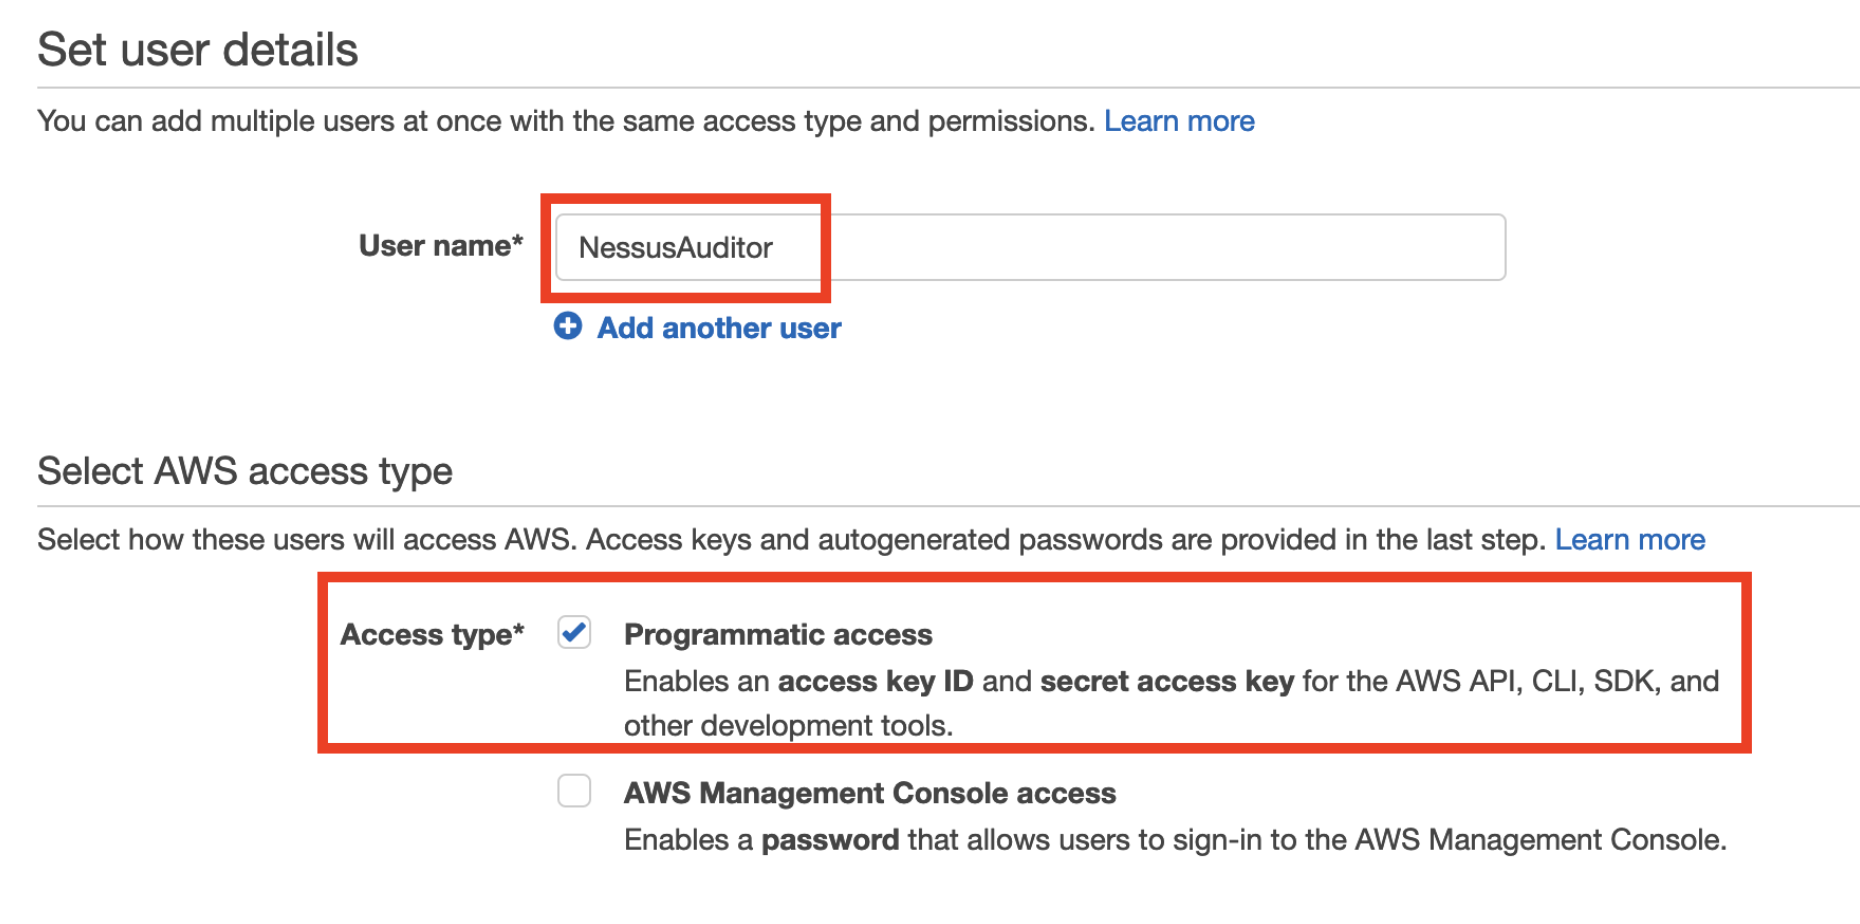
- Click Next: Permissions.
The Set permissions page appears.
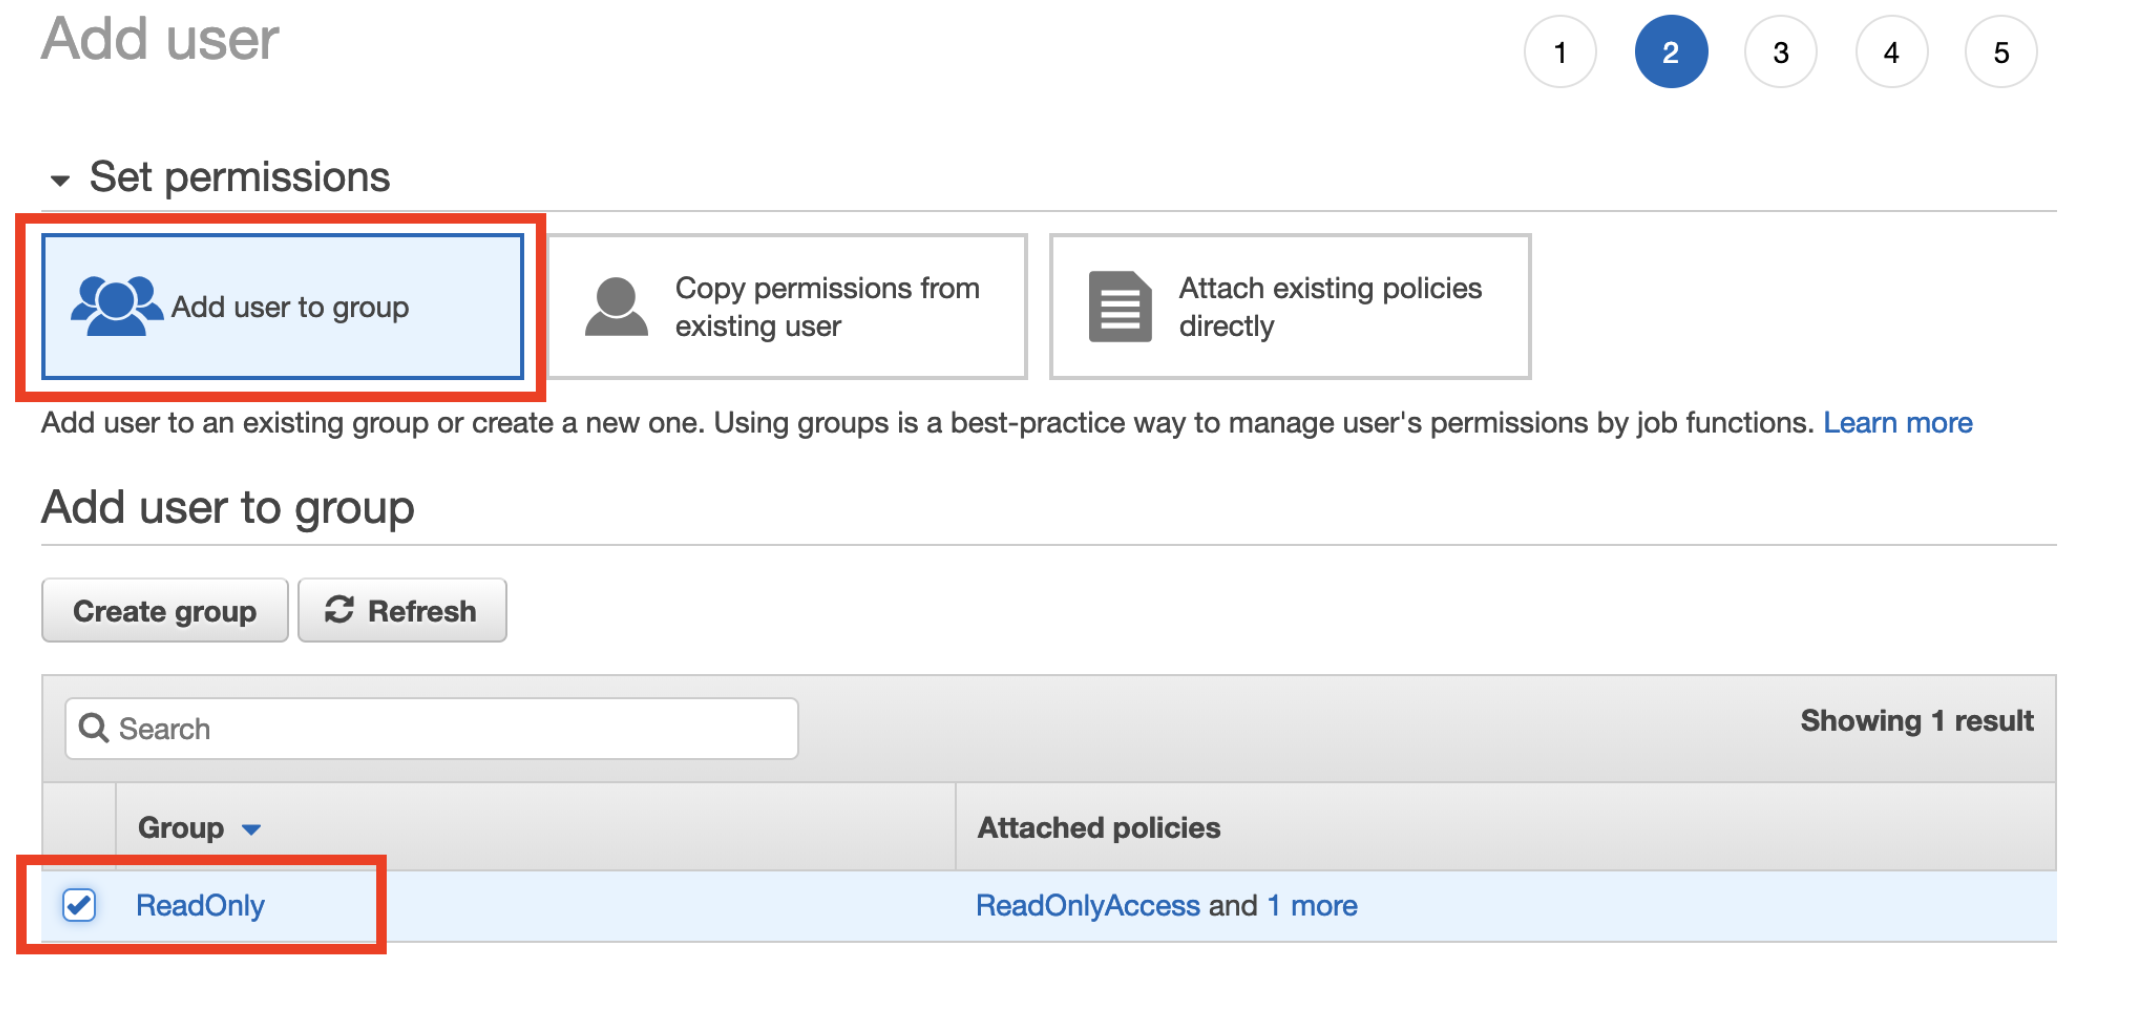
- Click Add user to group.
- In the Add user to group section, select the read-only group you previously created.
- Click Next: Tags.
The Tags page appears.
- (Optional) Configure any tags you want to add to the user profile.
- Click Next: Review.
The Review page appears.
- Review the user profile.
- Click Create User.
An Access key ID and Secret access key appear.
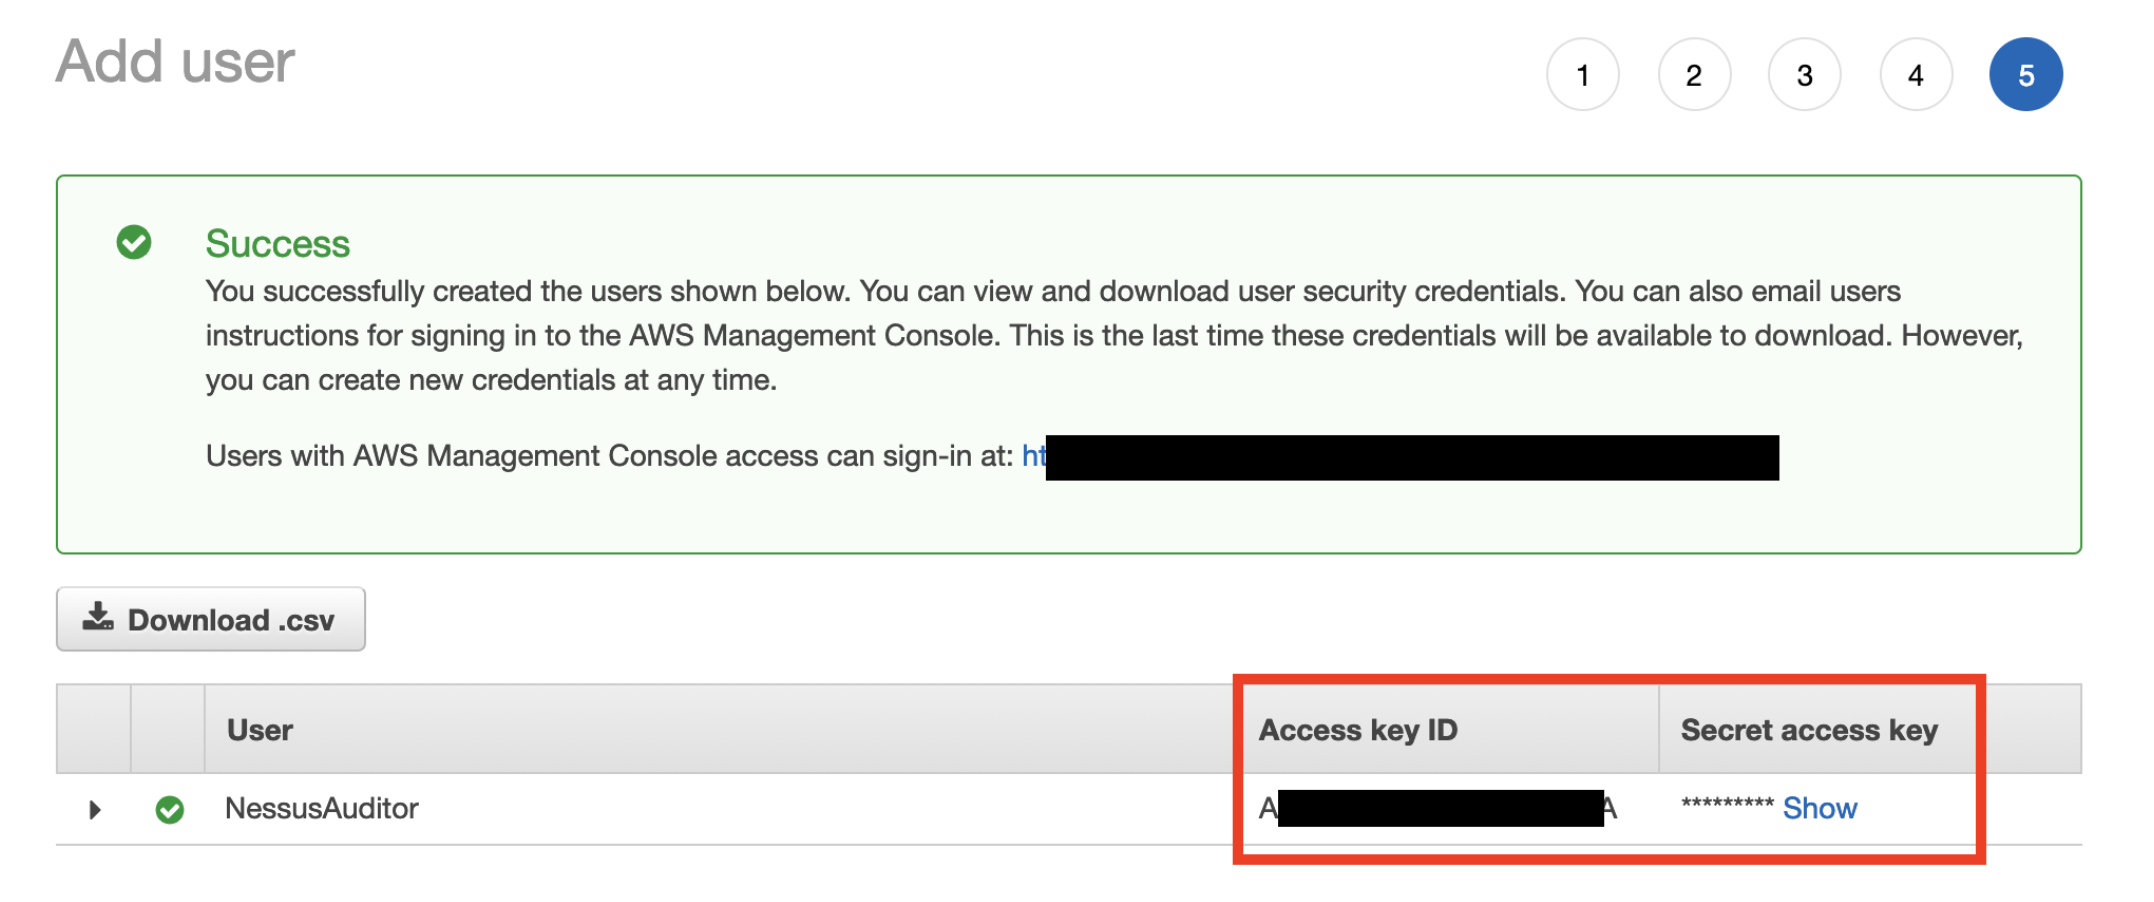
- Copy the Access key ID and Secret access key to use to configure the Audit Cloud Infrastructure in Tenable Vulnerability Management.
Configure AWS Audit Cloud Infrastructure in Tenable Vulnerability Management
To configure AWS Audit Cloud Infrastructure in Tenable Vulnerability Management:
- Log in to Tenable Vulnerability Management.
-
In the upper-left corner, click the
 button.
 The left navigation plane appears.
-
In the left navigation plane, in the Vulnerability Management section, click Scans.
The Scans page appears.
-
In the upper-right corner of the page, click
 Create a Scan.
The Select a Scan Template page appears.
- Click Audit Cloud Infrastructure.
The New Scan page appears.
- On the Settings tab, type a name for the scan.
- Set Scanner Type to Tenable Cloud Sensor.
- Click the Compliance tab.
The Compliance options appear.
- Click AMAZON AWS.
- Select the appropriate audit files for the scan.
When you select an audit file, Tenable Vulnerability Management adds the file to the list.
- Click the Credentials tab.
The Credentials options appear.
- In the ADD CREDENTIALS section, select Amazon AWS.
- In the AWS Access Key ID text box, type the key you copied in the Create a Scanning User in AWS section.
- In the AWS Secret Key text box, type the key you copied in the Create a Scanning User in AWS section.
- From the Regions to Access drop-down box, select the region to which you want to apply the scan.
- Do one of the following:
- To save without launching the scan click Save.
To save and launch the scan immediately, click the drop-down arrow next to Save and select Launch.
Tip: If you experience aborted scans or are unable to find a matching scanner route, you may need to specify a dedicated scanner, and re-scan. For troubleshooting help, see AWS Audit Troubleshooting. For more information on Tenable Vulnerability Management scans, refer to the Tenable Vulnerability Management User Guide.
View Audit Details in the Scan Results
After the scan completes, you can analyze the results in Tenable Vulnerability Management.
To view audit details in the scan results:
- Log in to Tenable Vulnerability Management.
- In the top navigation bar, click Scans.
- Click the AWS Cloud Infrastructure scan you previously created.
- Click the Audits tab.
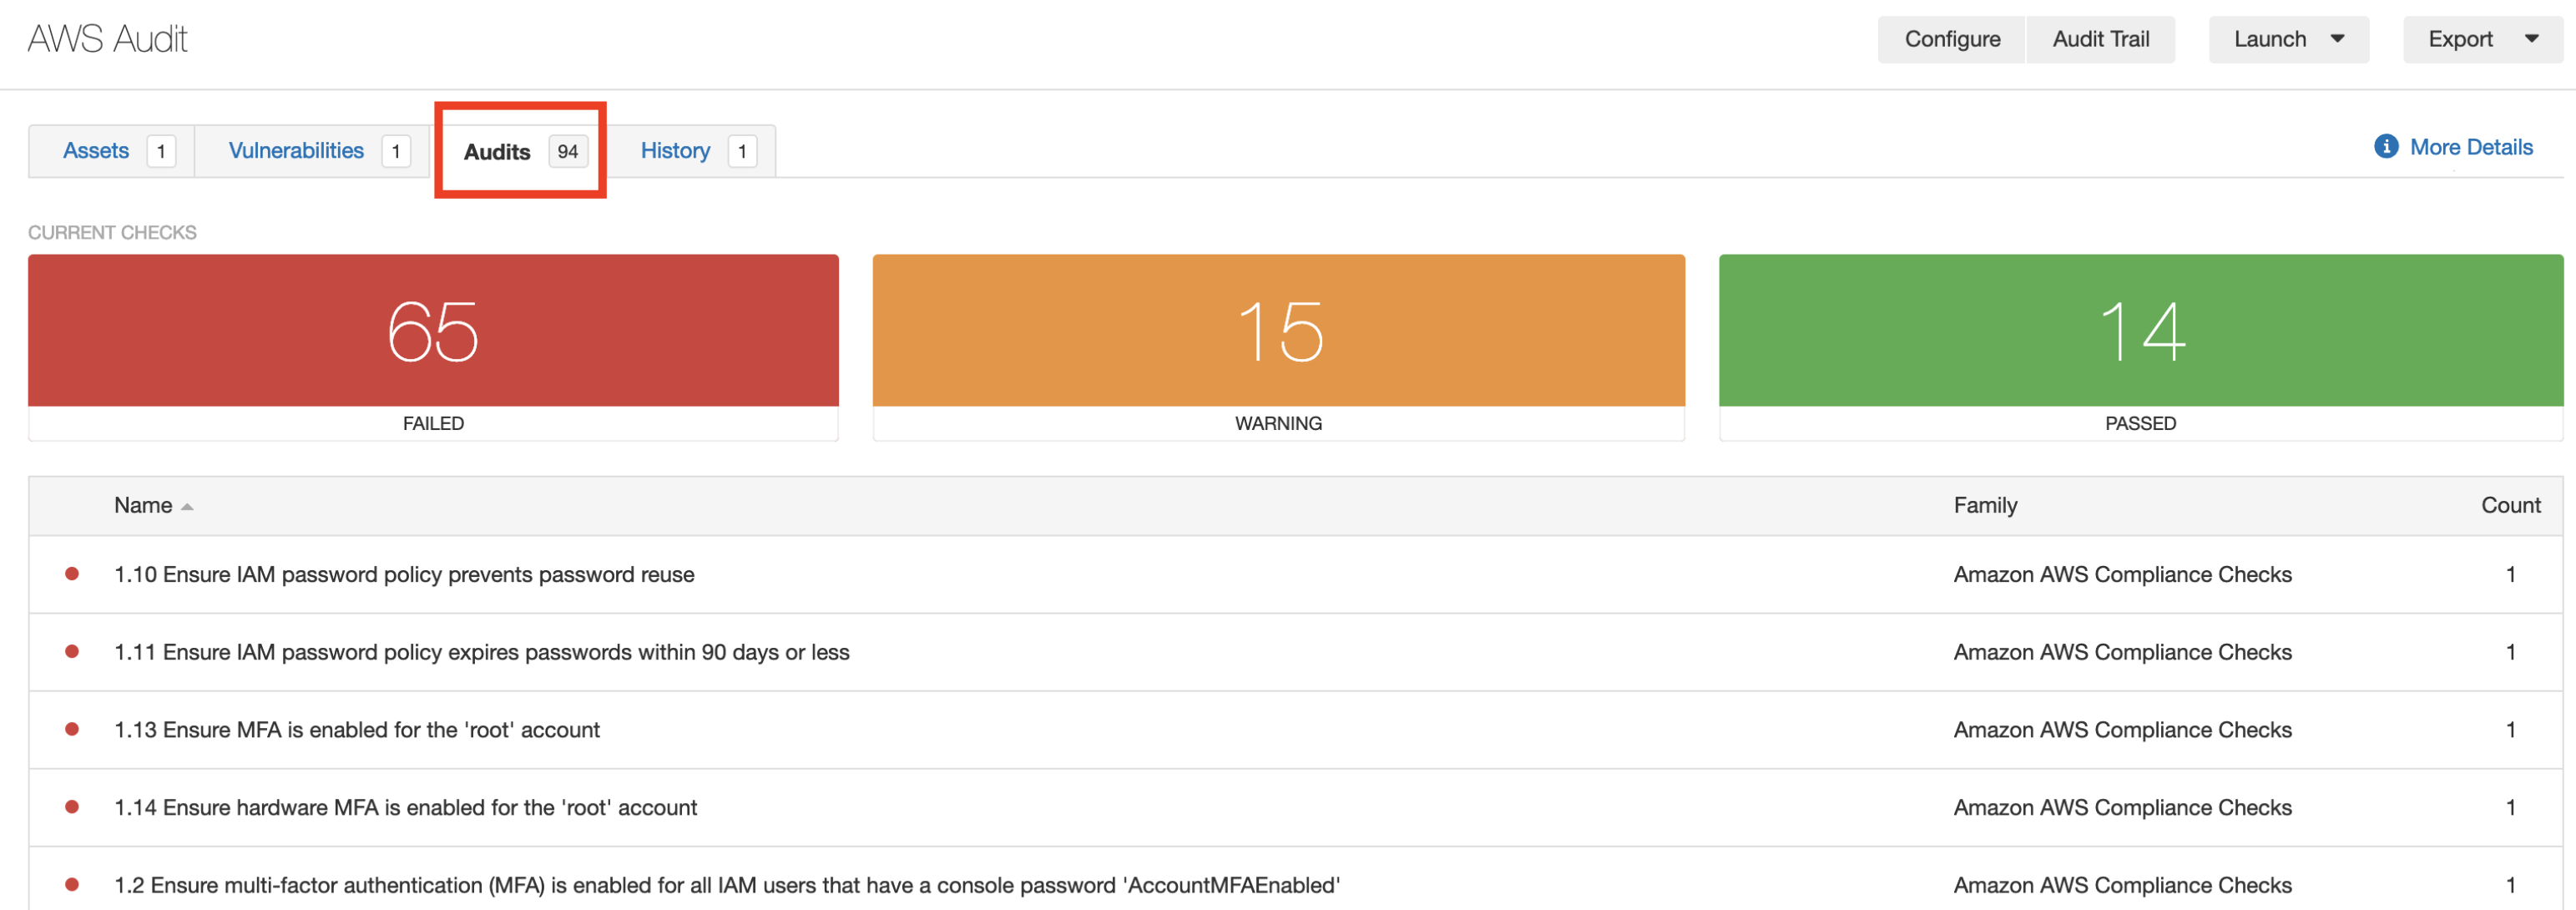
- Click an audit in the table to view audit details, including the Description, Reference Information, and Solution.
