Troubleshooting
-
I get an error while installing the app: "Minimum Permitted App Base Image"
If you attempt to install the app on a QRadar system where the Minimum Permitted App Base Image Stream is set to v4, the installation fails, and you get the following error message:
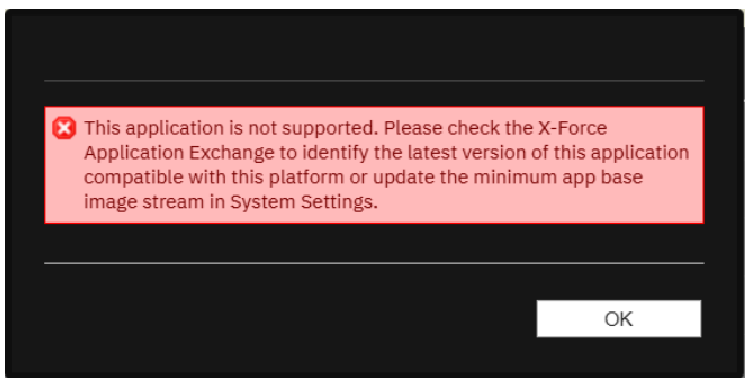
Remediation steps:
- Open System Settings from the Admin tab.
- Find the option Minimum Permitted App Base Image Stream and select v3+ RHEL with Python 3.8.
-
Click Save and Deploy changes.
-
Install the app again from the extension management.
-
After clicking the action buttons for Tenable Vulnerability Management or Tenable Security Center, you get an alert with the message: “Check if the configuration page details are filled."
This occurs if you did not configure an account on the Configuration page. Refer to the Configure QRadar with Tenable Vulnerability Management page for steps on how to configure an account.
-
Offense note shows the configuration error message: “Error while reading configurations.”
Your configuration file may have been corrupted.
This can also occur if you upgraded the application to v2.0. from a previous version and you did not reconfigure your files. If you did this, delete the configurations from the configurations page and reconfigure the credentials.
-
How do I view my log files?
- Log in to your QRadar instance.
- In the Admin section, click System and License Management.
- Select the host on which the Tenable App is installed.
-
In the top section, click Actions and select Collect Log Files.
The Log File Collection window appears.
- Click Advanced Options.
- Click the check box to select Debug Logs, Application Extension Logs, and Setup Logs.
- For data input, select 5 days.
- Click the Collect Log Files button.
-
Click Click here to download files.
The log files download in a zip file on your local machine.
-
The configuration page shows the error message: “Failed due to proxy error or invalid credentials. Check logs for more detail.”
Verify that you entered valid credentials for the configuration or proxy.
-
New configuration shows the error message: “Failed due to network connection timeout or Failed Proxy Authentication or invalid server address. Check logs for more details.”
This occurs when either the internet for the virtual machine (VM) is down, proxy authentication needs more credentials to proceed, or the provided server address is Invalid. Verify that the internet for your VM is operational, the entered proxy credentials are valid, and the server address is correct.
-
New configuration shows the error message: “401 - Authorization service token is not valid.”
You entered an incorrect authorization service token. Enter the correct service token.
-
An alert pop-up shows the error message: “Check if the configuration page details are filled.”
Check that you correctly configured your Tenable Vulnerability Management or Tenable Security Center account.
-
An alert pop-up shows the error message “Failed due to network connection timeout or Failed Proxy Authentication. Check logs for more details.”
This occurs when you have an internet connectivity problem on the VM or proxy authentication failed. Verify the Internet is on and valid proxy credentials are entered.
-
An alert pop-up shows the error message “Please enter a valid Address or configure valid proxy settings or verify SSL certificate.”
If you have verified that the Address is set to the IP/FQDN of your Tenable Security Center configuration, try disabling the Enable/Disable SSL Verification option and resubmitting. If the error persists, open a case with Tenable Tech Support.
-
An alert pop-up shows the error message “Failed due to invalid credentials or connection error.”
This occurs when Tenable Vulnerability Management or Tenable Security Center credentials are updated in the Tenable system, but the updates are not made in the QRadar configuration page. Add the updated credentials to the configuration page.
-
Container proxy settings were overridden, causing the application to stop working as expected.
The configuration must be updated to allow the local proxy on the application to make tunneled connections. For steps on updating the proxy connections, refer to the IBM QRadar Support Documentation.
-
An alert pop up shows the error message: "Failed to connect flask server."
When there are multiple IP addresses or multiple vulnerabilities for all of the IP addresses present in the offense, it may take more than one minute to fetch vulnerability data from Tenable and populate notes. The dashboard displays "Failed to connect flask server." If the total time of initiating a scan exceeds one minute for Tenable Vulnerability Management and Tenable Security Center both, the "Failed to connect flask server" message shows in the backend.
The scan initiates and ingests the event with the scan status "In progress" in QRadar. You can see this scan event in the dashboard.
Reload the web page.
-
After upgrading from OT Security v1.0.0, or AlsidForActiveDirectoy, to Tenable v4.0.0, Tenable Vulnerability Management or Tenable Security Center events are parsed as "Unknown" or "Tenable Message."
Installing Tenable v4.0.0 on OT Security v1.0.0 DSM, or AlsidForActiveDirectory, Tenable Vulnerability Management or Tenable Security Center events are parsed as "Unknown" or "Tenable Message." In the Log Source Extensions tab, extensions may appear disarranged.
- Go to the Log Source Extensions tab under the Admin section.
- Confirm that the Log Source Extensions appear jumbled up.
- Click TenableCustom_ext. An XML file downloads to your local machine.
- Open the instance SSH and run the following command: /opt/qradar/bin/contentManagement.pl -a search -c 24 -r .*Tenable
- Copy the ID corresponding to Tenable. For example, if the ID copied is 4002, then in the XML file, change device-type-id-override="4001" to device-type-id-override="4002".
- Click Upload and select the modified XML file. Select Default Log Source Type as Tenable.
- Click Save.
- Confirm that the value of device-type-id-override is correct for all of the extensions.
Note: If events of Tenable Vulnerability Management or OT Security are parsed as "Unknown" or "Custom Message," then follow the same steps for those respective log source extensions.
-
After upgrading from v2.0.0 (QRadar app framework v1 app) to v3.0.0 (QRadar app framework v2), unable to launch scan, unable to populate offense notes in the back end.
There are multiple errors which contain the "EncryptionError" exception in the log files. To check the logs:
- Go to the Admin tab of the QRadar console. Open the configuration page and click the Edit icon.
- Save the configurations again.
- If that does not work, delete the configurations and save again.
-
Configuration page, dashboard, or offense note shows error or unintended behavior.
Clear the browser cache and reload the webpage.
-
Can the Tenable app for QRadar scan multiple IPs?
Yes, rule base scan can initialize scan for multiple IPs.
-
"Error while initiating socket connection with IBM QRadar” observed in log files.
This issue might be observed in QRadar v2 app framework (< v7.4.2 P2).
For more information, refer to the IBM QRadar documentation.
-
Error message: "Unable to Launch scan. Error while creating socket connection with Qradar. Check logs for more details."
This issue was observed when port 514 was not enabled in QRadar.
-
Unable to save configuration using self-signed certificates for Tenable.sc.
If the user is using self-signed certificates and keeping the SSL toggle button on and is receiving “Please enter valid Address or configure valid proxy settings or verify SSL certificate.” error messages in the user interface, the probable cause is that the SSL certificate is not present on QRadar.
If you want to use self-signed SSL certificates for Tenable Security Center, before installing the app (or upgrade from v2.0.0 app), perform the following steps:
- Copy the CA's root certificate to /etc/pki/ca-trust/source/anchors/ on the QRadar console.
-
Run the following commands at the SSH command line on the console.
- /opt/qradar/support/all_servers.sh -p /etc/pki/ca-trust/source/anchors/<root_certificate> -r /etc/pki/ca-trust/source/anchors
- /opt/qradar/support/all_servers.sh -C update-ca-trust
Continue with the standard installation steps. For more information, refer to the IBM documentation.
If the app is already installed, restart the Docker container of the app:
- Login into your QRadar instance.
- Go to the Admin panel.
- Open configuration page of Tenable App for QRadar.
- From the configuration window, copy the app ID found within the URL. The app ID is the number after /console/plugins/ within the URL. For example, if the URL is: https://198.51.100.0/console/plugins/1062/app_proxy/index, copy the number "1062."
To get into the Docker container, run the following commands on your QRadar instance via SSH:
- Run the command docker pson your Qradar instance via SSH.
- Find the container ID of Tenable App. This is under the Image column containing the previous copied number. For example, "qapp-1062."
- To open the docker, run the command docker exec -it <container-id> /bin/bash.
-
Dashboard is showing the error message: "No data available."
- Make sure the user has initiated scans.
-
Run the following query in Log Activity to see if there are any scans initiated:
Select "Product" as 'Product', "Scan ID" as 'Scan ID', "Scan Result ID" as 'Scan Result ID', "Scan History ID" as 'History ID', "Scan Name" as 'Scan Name', "Scan Type" as 'Scan Type', "Scan description" as 'Scan description', "Scan Status" as 'Scan Status', "Scan Targets" as 'Scan Targets', "Note" as 'Note', "Redirect URL" as 'Redirect URL' from events where LOGSOURCETYPENAME(devicetype) = 'Tenable' AND QIDNAME(qid) NOT IN ('Tenable Message', 'Unknown') AND "Scan ID" is not null ORDER BY devicetime DESC LIMIT 1000 LAST 7 DAYS.
- If this query result returns the events, open any event and check if all of the CEPs are getting extracted. If the query returns nothing, or CEPs are not getting parsed, check the After upgrading from v2.0.0 (QRadar app framework v1 app) to v3.0.0 (QRadar app framework v2), unable to launch scan, unable to populate offense notes in the back end. troubleshooting topic in this document.
-
You have scanned an IP address once and are trying to scan the same IP again, but Scan Result ID is not updated for the second scan.
- Launch the scan on the IP address.
- Open the developer tool of the browser.
- Hard reload the browser or clear the cache.
-
Launch the scan on the same IP address.
Now the scan can be initiated on the same IP address.
-
I am getting an "Unable to launch scan. An error occurred while fetching the scan id of the scan. Check logs for more details." error upon launching a Tenable Vulnerability Management scan.
- Log in to Tenable Vulnerability Management.
- Click on Create Scan > Basic Network Scan.
- Add necessary details and click on Launch and Save.
-
Open QRadar.
-
Save the configuration with the newly created and launched scan on Tenable Vulnerability Management.
-
You can now launch the right-click scan for Tenable Vulnerability Management.