A Deployment Bot generates patch approvals and assigns specific configurations to those approvals, such as the Patching Process and the Deployment Channel.
Notification Bots exist only as optional components of Patching Strategies and Deployment Channels and deploy or generate notifications based on settings in the Notification Bot template. Notifications can alert administrators about the release or deployment of new patches or inform interested parties about newly published updates. Notification Bots do not execute independently.
TPM Deployment Bot templates include various filtering scenarios to cover most filtering requirements in an enterprise. When deciding which Bot filter to choose, consider the following examples to understand naming conventions for the different filter types.
Risk-Based Filters
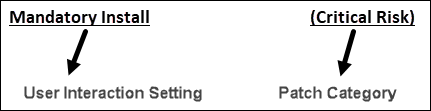
These templates filter several aspects of patches based on risk. They include different rollout schedules and approval levels, and all require mandatory installation.

|
Mandatory Installation for Specific Categories
These templates filter specific categories of patches, including bug fixes, expired by vendor, known exploit, and so on. These bots filter based on category and then approve installation for all patches included in that category.
The Bot templates provided by TPM include the following settings:
-
Bot Settings: Used by both Deployment Bots and Notification Bots. Choices are Deployment/Notification Settings or Bot Workflow. Both templates default to Deployment/Notification Settings. To create a Bot Workflow, enter a support ticket and request help from TPM.
-
Desired State: Used by Deployment Bots only. When patches match the patch filter settings, this field specifies what action the Deployment Bot takes:
|
Desired State |
Description |
|---|---|
|
Mandatory Install |
Force installation onto the end-user device. |
|
Do Not Install |
Do not install onto the end-user device. |
|
Rollback |
Roll back the patch to the last approved version. |
|
Uninstall |
Perform an uninstallation of the patch. |
-
Urgency: Used by both Deployment Bots and Notification Bots to specify the urgency setting (Low, Normal, High, Critical) for patches or notifications that meet the patch filter requirements. The Bot compares this setting against the urgency defined in the Patching Strategy or Deployment Channel to which this bot belongs. If the urgency settings do not match, the Bot does not deploy or send notification.
-
Business Units: Deployment Bots Only. Business Units are a fundamental organizational unit in TPM and logically group and manage devices, settings, and other resources according to business needs. Groupings include geographic location, department, or business function. For details, refer to Business Units.
-
Output Expression: Notification Bots only. The Output Expression is a free text field used to enter the text of the notification (E-Mail body, SMS/Text Message, Microsoft Teams message, or WhatsApp message).
-
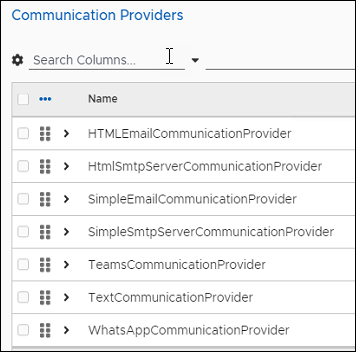
Communication Providers: Notification Bots only. Communication Provider settings define the type of communication to send when a Bot processes a patch that matches the Filter Settings. Choose one or more of the built-in Communication Providers.
TPM includes prepopulated templates that address most filtering scenarios. You can save these templates using a descriptive local naming convention, and then customize them to your environment.
Tip: To create customized Deployment Bots, Tenable Patch Management recommends entering a support ticket and requesting assistance from Tenable Support.
-
Follow the instructions in Create a New Folder for Objects.
-
Hover over or click Bots in the left navigation menu of the Tenable Patch Management Admin Portal, and then select Patch Deployment Bots. The top folder lists the templates provided by TPM.
-
Select Show All to view the available templates or click Filtered by: in the Bots list to view only the templates associated with that filter.
-
Select the Name of a template to open it. For example, in Filtered by: Known Exploit, click Mandatory Install (Known ExploitExists).
-
Save the template with a new title:
The TPM Deployment Bot and Notification Bot templates include Patch Filter Settings that provide the Bot with the details needed to approve patches for installation or to ignore specific patches, updates, or vendor content. Proceed carefully when customizing Patch Filter Settings. Enter a support ticket and request assistance from Tenable Support.
Used by both Deployment Bots and Notification Bots. New patches must meet the filter criteria before the Bot submits them to the Patching Cycle. After approving a patch that meets the Patch Filter Settings, the Bot forwards patch information to the Patching Process and the Deployment Wave associated with the Patching Strategy.
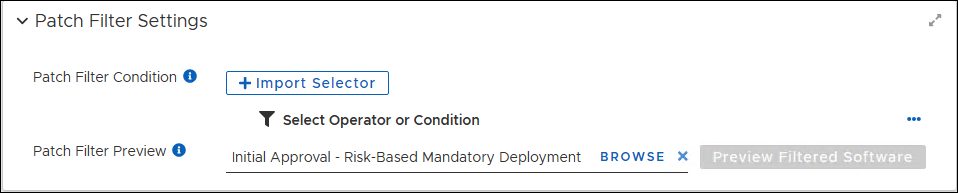
Configurable conditions include using + Import Selector, which allows you to use an existing Patch Filter to validate new patches submitted to this Bot. You can also use the Select Operator or Condition to create a flexible patch filtering process. With no filter settings applied, the Bot processes all patches.
In a Patch Deployment Bot template, scroll down to Patch Filter Settings:
-
If your template includes a patch filter condition that you want to modify, click the ellipsis (…), and then select Edit Condition.
-
If you want to remove a Patch Filter Condition, click the ellipsis (…), and then select Remove.

Allows you to select one or more, existing filter conditions to use for this Bot. If you want to add multiple conditions, refer to Set and Change Patch Filter Conditions. This example uses an existing TPM patch filter that tells the Bot to include patches based on the imported filter settings.
-
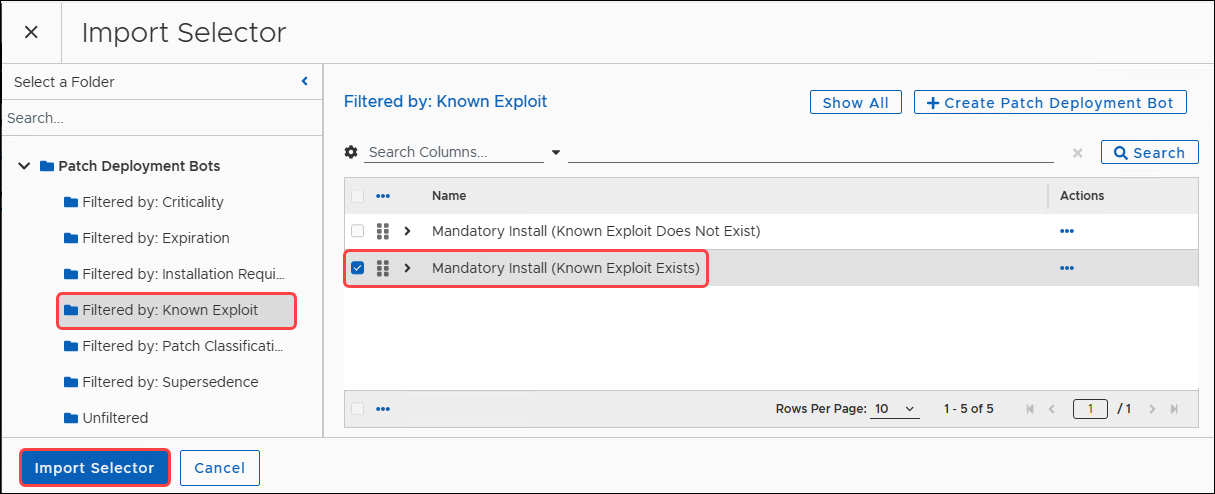
Select + Import Selector in the Patch Filter Settings dialog of an open Bot template.
-
Select an existing Filtered by: folder from the list of Patch Deployment Bots, and then select one or more filters to use in this Bot.
For example, in Filtered by: Known Exploit, select Mandatory Install (Known Exploit Exists).

-
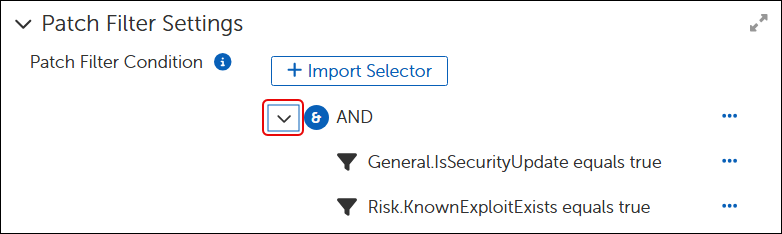
Select Import Selector at the bottom left of the dialog. This returns you to the Patch Filter Settings where the condition logic now displays as
Risk.KnownExploitExists Equals true.
If you chose more than one filter, the condition displays the AND operator and lists your selections:
Use Operating Conditions and Operators to manually set multiple Patch Filter Conditions to use for this Bot. You must add the operator before you can add the condition. To add multiple conditions, repeat this section as needed.
-
In the Patch Filter Settings of an open Bot template, delete any existing Filter Conditions.
-
To remove an existing condition, click the ellipsis to the right of the existing filter, and select Remove.
-
To add the condition in again as part of a string, make note of the name for later use.
-
-
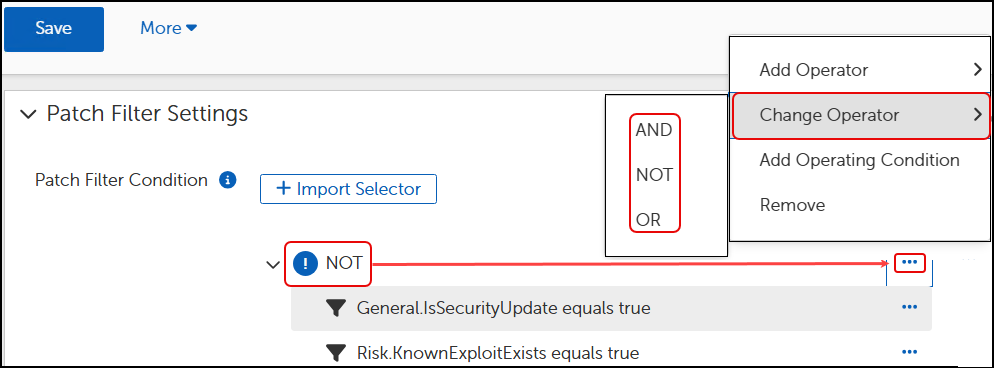
Select the ellipsis (…) to the right of Select Operator or Condition, and then select Add Operator.
-
Select the operator you want to use (AND, NOT, OR). For example, to filter out specific patches, select NOT.

This returns you to the Patch Filter Settings, which shows the operator you selected.
-
Continue to Add an Operating Condition.

After adding the Operator, add the Operating Condition. This example filters out all patches for Windows Server Update Services (WSUS).
-
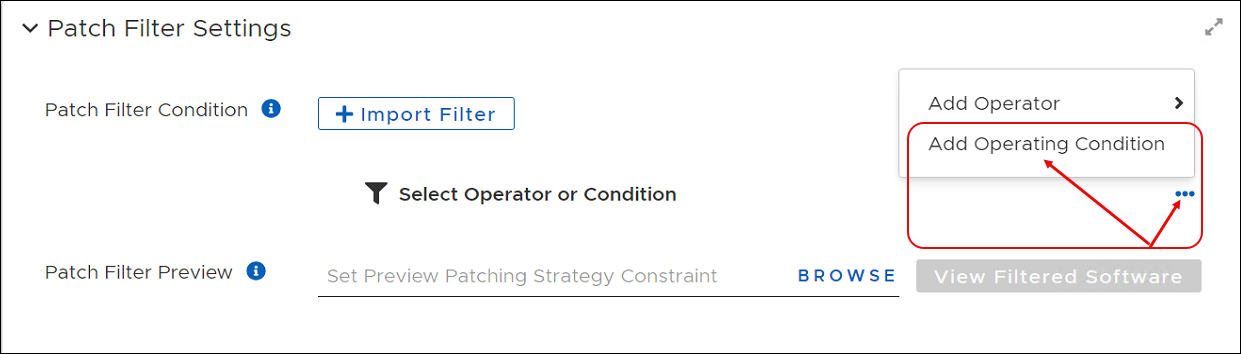
Select ellipsis (…) to the right of Select Operator or Condition, and then select Add Operating Condition.
-
Expand the list next to Data Column and select the filter you want to use. For example, select WSUS Classification.
-
Refer to Patch Filter Settings for a description of each available setting.
-
If you removed a Patch Filter Condition previously, you may add it back here.
-
-
Set the Operating Condition to Equals, and then choose one of the following for the Value:
-
Updates – Exclude Windows updates.
-
Upgrades –Exclude Windows upgrades.
-
Windows 11 upgrades – Exclude upgrades to Windows 11.
-
-
Select OK. This returns you to Patch Filter Settings, which now shows WSUS.Classification Equals <selected value> as a condition for excluding patches.
-
Refer to Preview Software Filtered by Conditions to confirm that the Software Patches listed do not include those you excluded.
The Product ID is the number assigned by TPM to all patches from a specific vendor.
-
Contact Tenable Support to obtain the Product ID for the vendor patches you want to filter.
-
Select ellipsis (…) to the right of Select Operator or Condition, and then select Add Operating Condition.

-
Expand the list next to Data Column and select Relationships.Parent as the Object ID.

-
Set the Operating Condition to Equals.

-
Enter the Product ID, and then click OK. This returns you to Patch Filter Settings, which now shows Parent ID Equals <product ID> as a condition for excluding patches.

-
Refer to Preview Software Filtered by Conditions to confirm that the Software Patches listed do not include those you excluded.
Preview a list of software filtered by this Bot based on the patch filter condition.
-
Select Preview Filtered Software on the lower-right corner of the Patch Filter Settings.
-
Select the Software Patches tab to view the Software Patches included in this Bot with your filter.
-
Select the Software Releases tab to view the Software Releases included in this Bot with your filter.
-
Select OK to return to the Patch Filter Settings.
Using the Patch Filter Settings in a Deployment Bot template, you can preview the software filtered out by the Patch Filter Conditions you set. You can enhance these filter conditions by specifying a Patching Strategy to further constrain the preview results
-
Select Browse next to Patch Filter Preview in the Patch Filter Settings of an open Deployment Bot template.
-
Select a Patching Strategy you want to preview, and then click Set Preview Patching Strategy Constraint.
-
Select Preview Filtered Software to view the patches or releases filtered by the Patching Strategy.
-
Select OK to return to the Patch Filter Settings.
In the Bot settings workspace of a Deployment Bot template, the default Deployment Settings require a Desired State, an Urgency level, and designated Business Units.

With Deployment Settings selected, complete the following steps.
-
Set the Desired State:
-
Select the input line for Desired State to view the menu options.
-
Select a State from the list (Mandatory Install, Do Not Install, Rollback, Uninstall).
-
-
Set the Urgency:
-
Select the input line for Urgency to view the menu options.
-
Select an Urgency setting from the list (Low, Normal, High, Critical).
-
-
Select Save at the upper left to save your progress:
-
Continue with Add Business Units.
In the Bot Settings workspace of an open Deployment Bot template with Deployment Settings selected, complete the following steps:
-
Select + Add Business Units:
-
With no Business Units added to the Bot, the patching cycle patches the devices in all Business Units identified in the Patching Strategy.
-
With one or more Business Units added to the Bot, the patching cycle patches the devices in the Business Units. The Patching Strategy must include the same Business Units as part of its assigned Deployment Wave (refer to Deployment Settings).
-
-
Select the right arrow next to a Business Unit type to expand one or more Business Unit structures.

-
Select one or more Business Units to include in this Deployment Bot.
-
Select Add Business Units on the bottom left to return to the Deployment Bot template.
-
Select Save at the upper left to save your progress:
Now, when you need to add this Deployment Bot to a Patching Strategy or other object, you can view it in the list of available Deployment Bots.
If you have not created a custom workflow, contact Customer Support and request assistance. To add a customer workflow, go to the Bot Settings workspace of an open Deployment Bot template with Bot Workflow selected and complete the following steps.
-
Select Browse next to Bot Workflow to open the list of available workflows.

-
Select Show All to view all available workflows for this setting.
Note: If you have created a custom Deployment Bot Workflow, you can view it listed there. If not, contact Tenable Support to create a Deployment Bot Workflow for use with these settings.
-
Select the workflow Name, and then click Add Workflow on the bottom left to include the workflow in the Bot Settings.
-
Select Save at the upper left to save your progress:
Patch Notification Bots generate notifications to alert administrators or users about the release or deployment of new patches that meet Patch Filter Settings in the Bot. When the Notification Bot detects patches that match a specified filter expression, the Bot generates a notification to include in the notification cycle. The notification cycle follows the Patching Strategy or Deployment Channel configuration that contains the Notification Bot.
Notification Bots are optional components of Patching Strategy templates and Deployment Channel templates and exist only within these templates.
The Patch Deployment Bot templates include various filtering scenarios to cover most filtering requirements in an enterprise. When deciding which Bot filter to choose, consider the following examples to understand naming conventions for the different filter types.
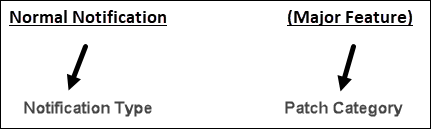
Normal Notification
These templates filter several aspects of patches based on risk. They include different rollout schedules and approval levels, and all require mandatory installation.
|
-
Follow the instructions in Create a New Folder for Objects.
-
Mouse over or click Bots in the left navigation menu of the Patch Dashboard and then select Patch Notification Bots. The top folder lists the templates provided by TPM.
-
Select the Show All to view the available templates or click Filtered by: in the Bots list to view only the templates associated with that filter.
-
Select the Name of a template to open it. For example, in Filtered by: Expiration, click Normal Notification (Expired by Vendor).

-
Save the template with a new title:
-
Select Save. When you have finished modifying your new template, you can drag and drop it in the folder you created (refer to Patch Object Management).
The Output Expression field is a text box that allows you to provide a more meaningful notification to users that informs them of the pending changes.
Except for Communication Providers, use the previously configured settings in the template. For details, refer to Communication Providers.
-
In the Notification Bot template, scroll down to Communication Providers, and then click + Add Communication Providers.
-
Select one or more providers to use for notifications by this Bot.
-
If you do not find the provider you want to use, refer to Communication Providers to add it.
-
-
Select Save at the upper left to save your progress:
-
Check the Error View and resolve any errors.
-
Select Save again if you make any changes.