Automatic Initiatives in Tenable Vulnerability Management
In the Exposure Response section of Tenable Vulnerability Management, you can create initiatives based off of findings that you can then link directly to your ticketing systems. Tenable calls this process mobilization. Initiatives are projects to address vulnerabilities in your environment. You can track specific findings using combinations and apply asset tags to choose the assets in scope. You can then assign initiatives to your team, set SLAs (Service Level Agreements), and measure progress through remediation scan results.
Because these initiatives automatically update when a change is made to the tracked ticket, they are considered automatic initiatives.
Example Initiative
To address recently exploited vulnerabilities on your Headquarters network, you might create an initiative as follows:
-
Name — Recently exploited vulnerabilities at HQ
-
Asset Scope — Network: HQ
-
Owner — [email protected]
-
Remediate Within (SLA) — 7 days
-
Combinations — Category is equal to Recently Actively Exploited AND VPR is greater than 6

Before you Begin
-
Review the Prerequisites and ensure you have the appropriate permissions and ticketing configurations enabled for initiative creation.
-
Create asset tags — Initiatives use asset tags to define the assets in scope. Create any asset tags you plan to use for your initiative.
-
(Optional) Create custom combinations — If you plan to use custom combinations, create them via the Manage Combinations tab.
You can create the following kinds of initiatives within Tenable Vulnerability Management:
Jira Initiatives in Tenable Vulnerability Management
Configure Jira
Before you create an initiative, you must first configure a connection between Jira and Tenable Vulnerability Management.
To configure Jira issue creation in Tenable Vulnerability Management:
-
In the left navigation, click
 Settings.
The Settings page appears.
- Click on the
 Jira Cloud tile.

The Jira Connector page appears.
- Configure the following Jira Cloud Credentials:
- To test the connection, click Connect.

Once Tenable validates the integration connectivity, a Connection was Successful notification appears.
Important! You must successfully connect the integration before you can proceed.
- Configure the following default values for each Jira project:
- To set default values for additional Jira projects, click
 Add Another Project.
 - Click Save.
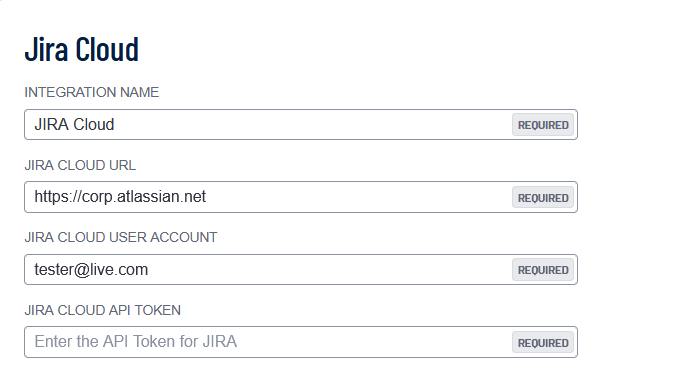
| Option | Description |
|---|---|
| Integration Name | Choose your own Jira integration name. |
| Jira Cloud URL | The unique web address for your organization's instance of Jira Cloud, typically formatted as https://[your-company-name].atlassian.net. |
| Jira Cloud User Account |
Your individual credentials (email and password) used to authenticate and access your organization's Jira Cloud site. |
| Jira Cloud API Token |
Your API key or token for authenticated access to the Jira Cloud API. |
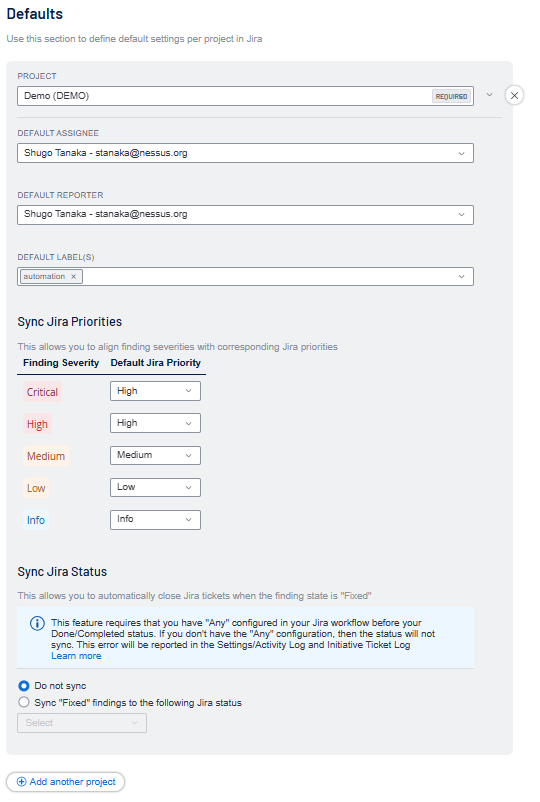
| Option | Description |
|---|---|
| Project | The Jira Project name that these options relate to. |
| Default Assignee | Assign a user as a default assignee from the drop-down list. |
| Default Reporter | Assign a default reporter value from the drop-down list. |
| Default Label(s) | Labels from your project that you want to use within Tenable Vulnerability Management. |
| Sync Jira Priorities |
Create a mapping of Tenable finding severities (for example, Critical, High, Medium, Low, Info) to Jira Priorities (for example, Highest, High. Lowest). |
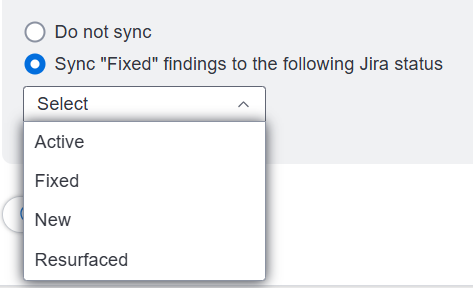
| Sync Jira Status |
Automatically close Jira tickets when the associated finding state is Fixed. Select the Sync "Fixed" findings to the following Jira status radio button and, from the drop-down menu, select the Jira status you to which you want to sync the fixed findings.
Important! For this feature to work as expected, you must configure the Any > Done/Completed status within your Jira workflow. If the status sync is incomplete or unsuccessful, an error message appears in the Activity Log and the Ticket Log section of the Finding Details page. For more information, see Add Statuses to a Jira Workflow.
|
Create a Jira Initiative
To create a Jira mobilization initiative based off of a finding:
-
In Tenable Vulnerability Management, in the left navigation menu, click
 Exposure Response.
The Exposure Response page appears. By default, the
 Initiatives tab is active.
 -
In the My Initiatives section, click the
 button.
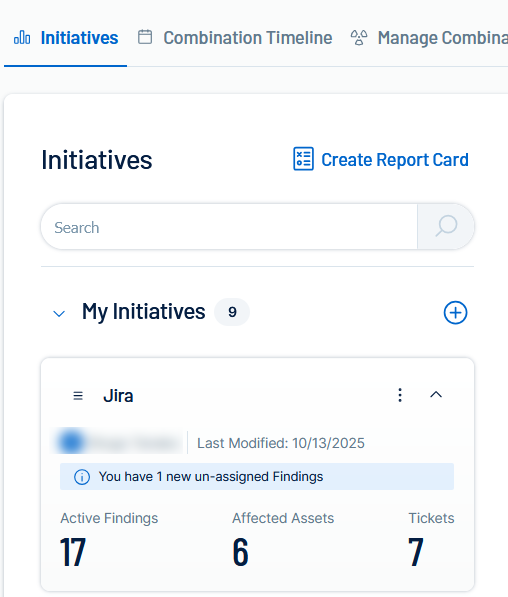
The Create an Exposure Response Initiative pane appears.
-
On the Basic Setup tab, configure the following options:
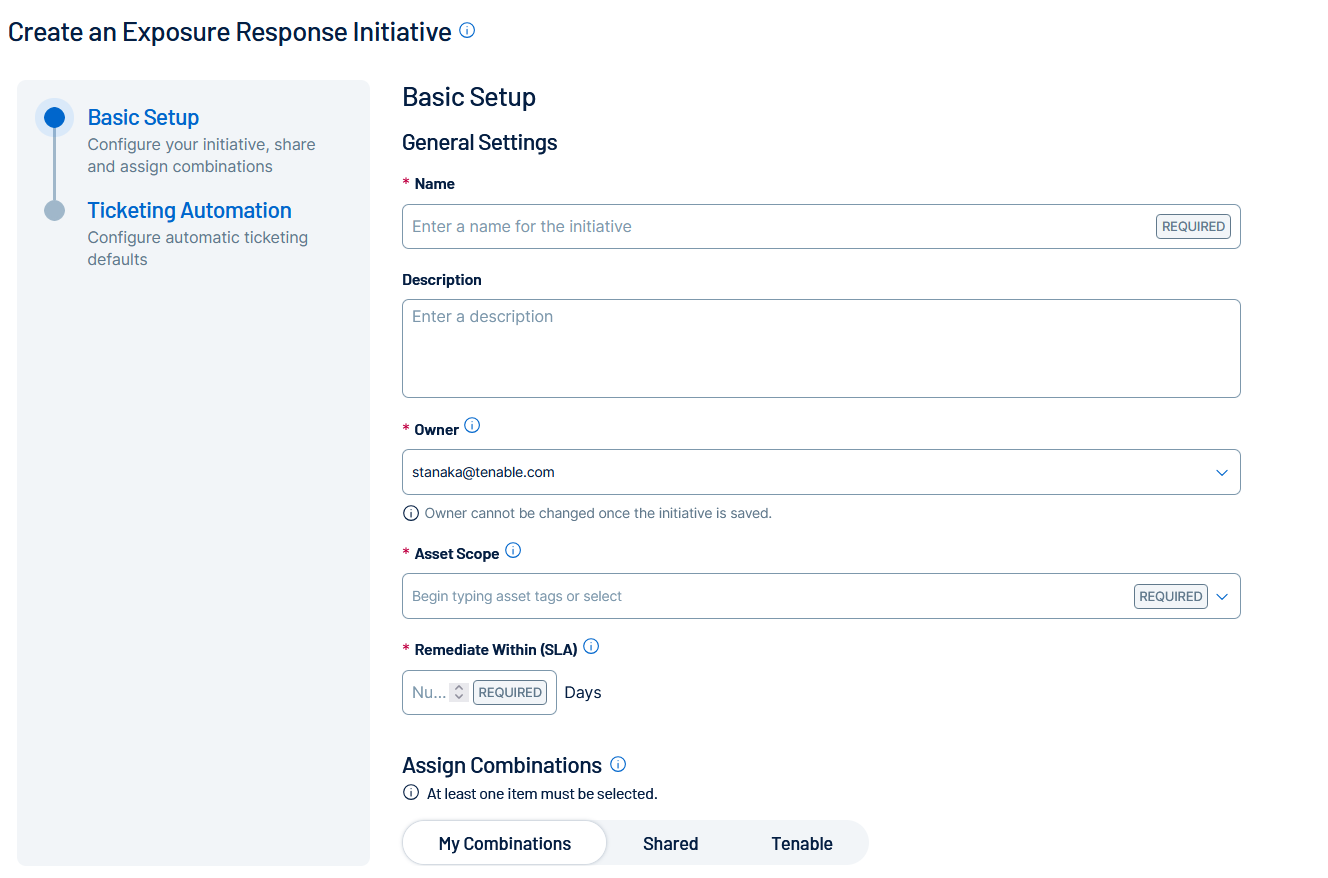
Option Description Name (required) Type a name for the initiative. Description Type a description for the initiative, for example Reduce my external attack surface. Owner Select the initiative owner from a list of [MadCap Variable: Tenable.VulnerabilityManagementStandalone] users. You cannot reassign initiatives once you create them.
Note: Only administrators and initiative owners can view initiatives.Asset Scope (required) Choose up to ten tags to define which assets in your environment are in scope. Search for and select tags to assign, for example Priority: High or Software: Oracle. Remediate Within (SLA) (required) Choose an SLA, in days, by which all findings require remediation. For example, to set an SLA of one week, enter 7. Assign Combinations Select up to ten combinations from the available tabs:
-
My Combinations — Your personal combinations, which only you can view. You cannot assign personal combinations to initiatives you do not own.
-
Shared — Organization-wide combinations, which anyone can view or use, and which your administrators and the combination owners can update. Track updates in the
 Combination Timeline.
 -
Tenable — Predefined combinations from the Tenable Research Team. These may be updated infrequently, which can change the resources in your initiatives. Track updates in the
Combination Timeline.
-
- Click the Ticketing Automation tab.
The Setup Delivery Methods appear.
- Click Jira.
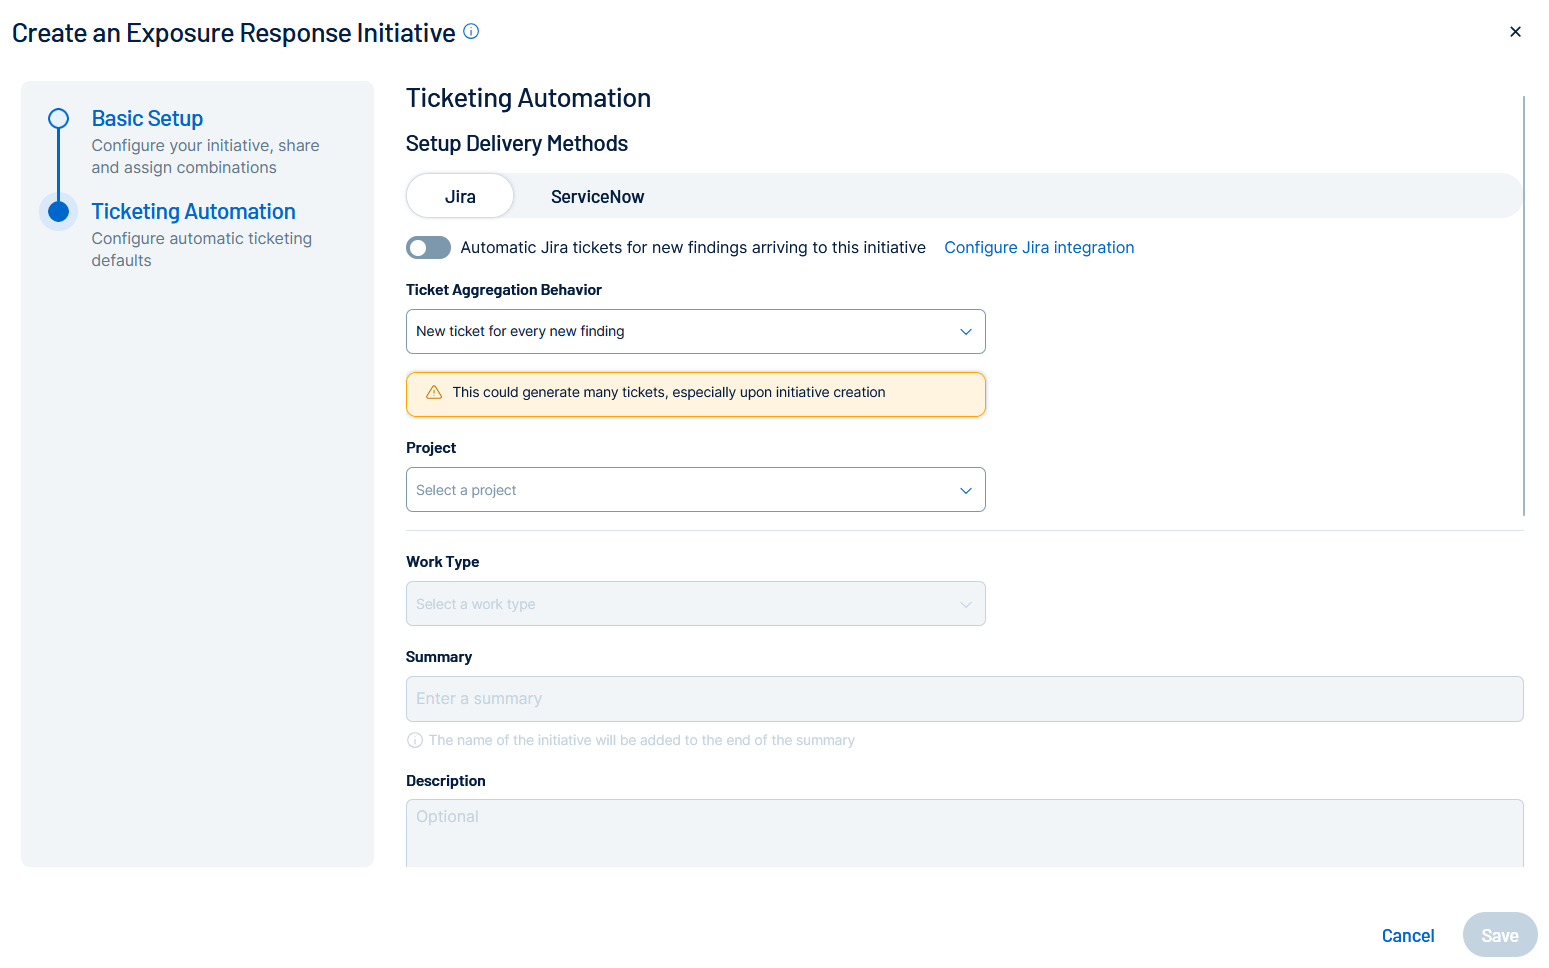
Jira ticketing configuration options appear.
-
Configure the following options:
Option Description Ticket Aggregation Behavior Select how you want Tenable Vulnerability Management to aggregate tickets for the finding:
-
New ticket for every new finding — Every time a finding appears, a new ticket gets created in Jira.
-
New findings create subtasks on an existing ticket — Every time a finding appears, a subtask gets created on an existing Jira ticket.
Existing Jira Ticket (optional) Select the existing Jira ticket from the drop-down list.
Note: You see this option only if you choose New findings create subtasks on an existing ticket.Project The Jira project in which you want tickets to be created.
Important: You must have at least one Jira project for the configuration to function as expected.Work Type The specific type of issue created, for example, Story, Task, or Bug. Summary The Jira Summary combines the finding name, asset name, and this text to create a descriptive ticket title. Description A detailed explanation of the issue, context, and steps to reproduce (if applicable). Priority The relative importance or severity of the issue. Default value: Default Mapping.
Note: Leave this set to Default Mapping to allow the priority to be set by the finding severity based on your Jira instance configuration. For more information about overriding this severity, see Configure Jira.Reporter The user who created the issue and submitted it to the project. Assignee The user to which the ticket or subtask is assigned in Jira. Parent The larger issue (for example, an Epic) under which the current item is nested. Labels Custom tags you want to apply to the ticket for flexible categorization and filtering.
-
-
Click Save.
The initiative appears in the My Initiatives panel.
ServiceNow Initiatives in Tenable Vulnerability Management
Configure ServiceNow
Before you create an initiative, you must first configure a connection between ServiceNow and Tenable Vulnerability Management.
To configure ServiceNow to support ServiceNow incident creation in Tenable Vulnerability Management:
-
In the left navigation, click
Settings.The Settings page appears.
- Click the
 ServiceNow tile.
The ServiceNow connector page appears.
- Configure your ServiceNow credentials:
- To test the connection, click Connect.

Once Tenable validates the integration connectivity, a Connection was Successful notification appears.
Important! You must successfully connect the integration before you can proceed.
- Configure the following default values for synchronizing ServiceNow Incident Priorities and Incident States: Important! When creating custom fields in ServiceNow, sync your values to the Task table rather than the Incident table. Fields added to the Task table are globally accessible across related records (such as Problem and Change), whereas Incident custom fields remain private to that specific table and do not propagate data across your environment.
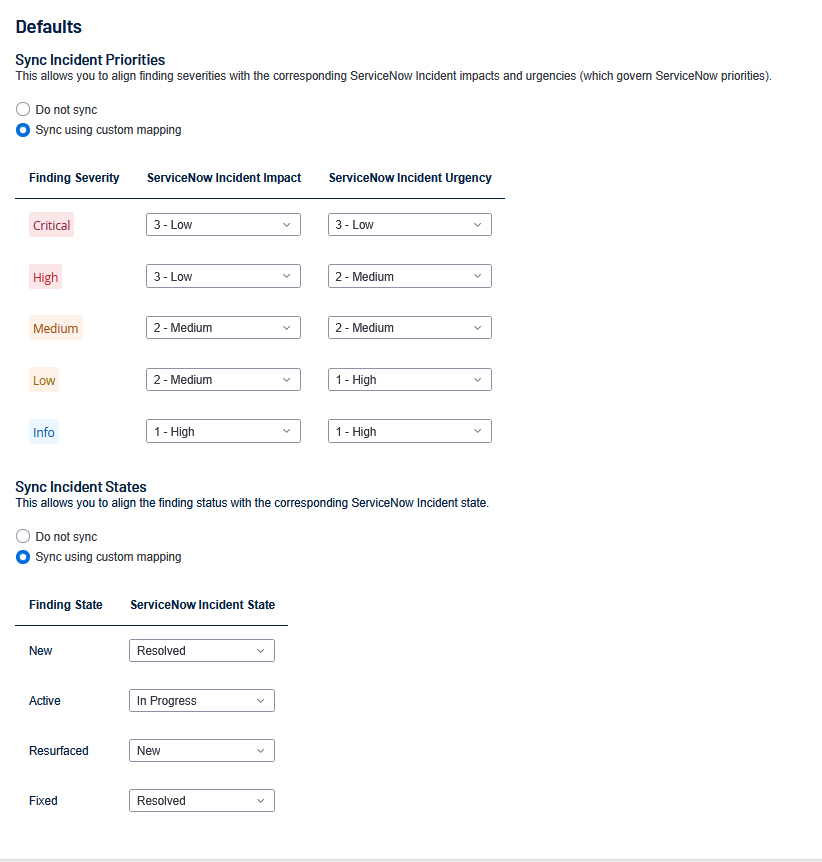
Sync Incident Priorities
Select one of the following:
Do Not Sync
Sync Using Custom Mapping — If you use a custom mapping, use the following guidelines:
Finding Severity ServiceNow Incident Impact ServiceNow Incident Urgency Resulting ServiceNow Priority Customer Context Critical
High High P1 (Critical) Immediate, business-impacting risk. Typically requires emergency patching or immediate action. High High Medium P2 (High) Confirmed vulnerability with high CVSS/VPR; requires aggressive patching as per SLA. Medium Medium Medium P3 (Moderate) Standard vulnerability management queue. Addresses moderate risk findings. Low Low Low P4 (Low) Non-critical finding, typically addressed during regular maintenance cycles. Info Low Low P5 (Informational) Excluded from most standard patching SLAs. For situational awareness or future planning.
Sync Incident State
Select one of the following:
Do Not Sync
Sync Using Custom Mapping — If you use a custom mapping, use the following guidelines:
Tenable Vulnerability Management Finding State ServiceNow Incident State New, Active, Resurfaced New, In Progress Fixed Resolved, Closed
- Click Save.

| Option | Description |
|---|---|
| Integration Name | Choose your own ServiceNow integration name. |
| ServiceNow Instance URL | The unique web address for your organization's instance of ServiceNow, typically formatted as https://[your-company-name].service-now.com. |
| User Name |
Your ServiceNow User ID. |
| Password |
Your ServiceNow password associated with the User ID. |
Create a ServiceNow Initiative
-
In Tenable Vulnerability Management, in the left navigation menu, click
Exposure Response.The Exposure Response page appears. By default, the
Initiatives tab is active. -
In the My Initiatives section, click the
button.
The Create an Exposure Response Initiative pane appears.
-
On the Basic Setup tab, configure the following options:
Option Description Name (required) Type a name for the initiative. Description Type a description for the initiative, for example Reduce my external attack surface. Owner Select the initiative owner from a list of [MadCap Variable: Tenable.VulnerabilityManagementStandalone] users. You cannot reassign initiatives once you create them.
Note: Only administrators and initiative owners can view initiatives.Asset Scope (required) Choose up to ten tags to define which assets in your environment are in scope. Search for and select tags to assign, for example Priority: High or Software: Oracle. Remediate Within (SLA) (required) Choose an SLA, in days, by which all findings require remediation. For example, to set an SLA of one week, enter 7. Assign Combinations Select up to ten combinations from the available tabs:
-
My Combinations — Your personal combinations, which only you can view. You cannot assign personal combinations to initiatives you do not own.
-
Shared — Organization-wide combinations, which anyone can view or use, and which your administrators and the combination owners can update. Track updates in the
Combination Timeline. -
Tenable — Predefined combinations from the Tenable Research Team. These may be updated infrequently, which can change the resources in your initiatives. Track updates in the
Combination Timeline.
-
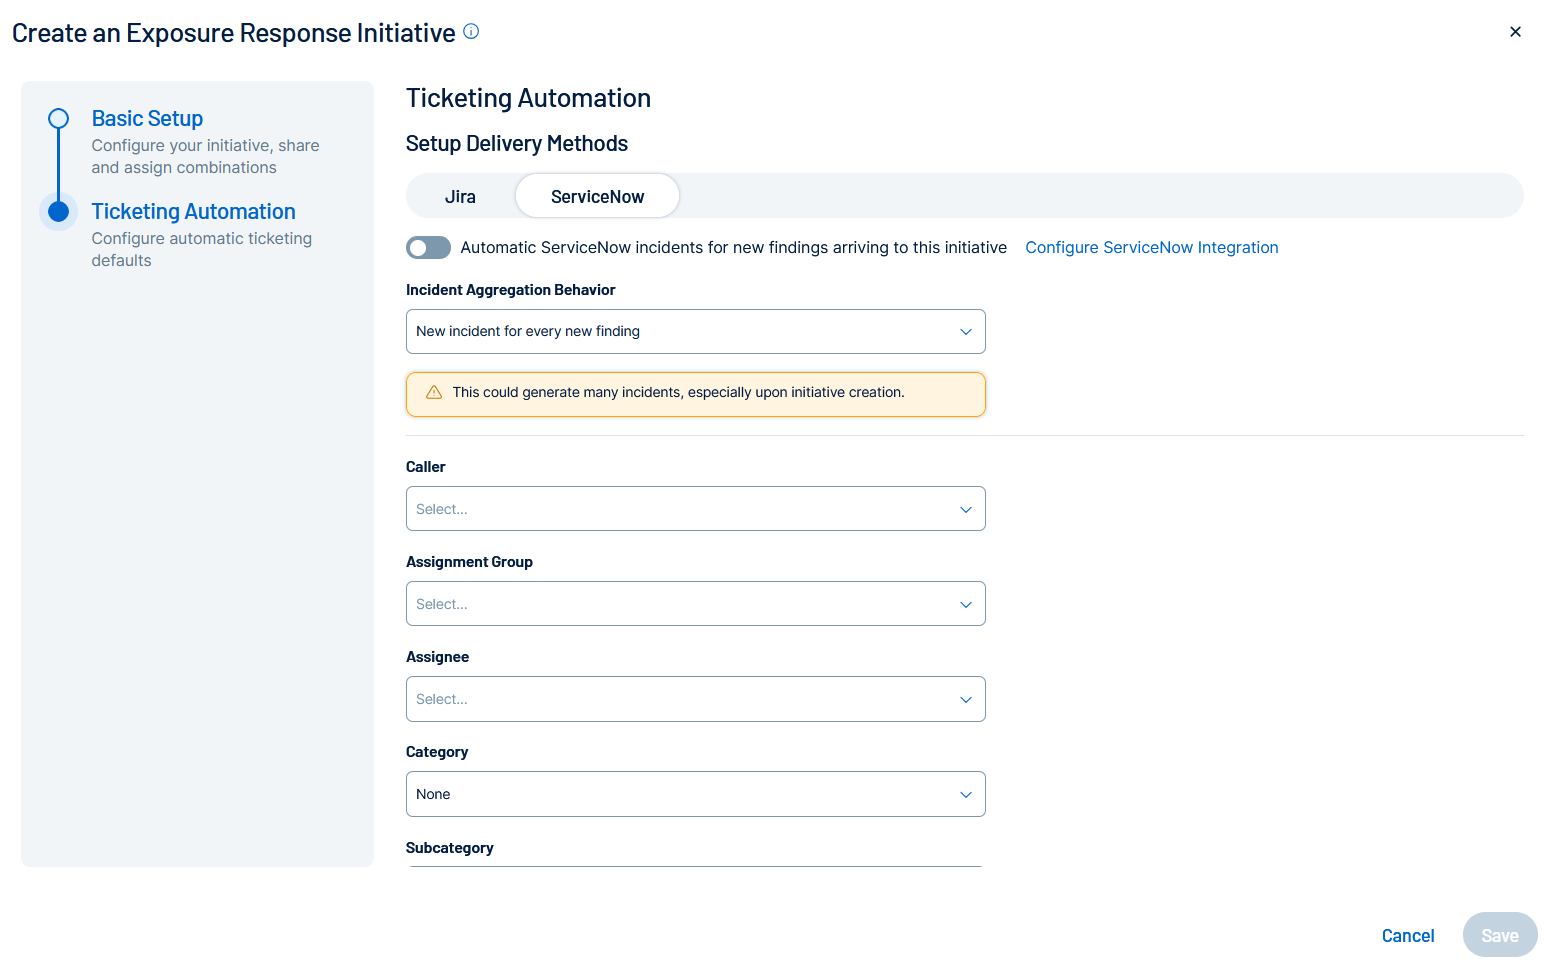
- Click the Ticketing Automation tab.
The Setup Delivery Methods appear.
- Click ServiceNow.
-
Configure the following options:
Option Description Incident Aggregation Behavior Select one of these two options:
-
New incident for every new finding
Every time a finding appears, a new incident gets created in ServiceNow.
-
New findings create subtasks on an existing incident
Every time a finding appears, a subtask gets created on an existing ServiceNow incident.
Existing ServiceNow Incident (optional) Select the existing ServiceNow incident from the drop-down list.
Note: You see this option only if you choose New findings create subtasks on an existing incident.Caller The user who originally reported or requested the issue. Assignment Group The team or group responsible for managing and resolving the ticket. Assignee The individual user currently responsible for resolving the ticket. Category A high-level classification of the issue or request, for example, Hardware, Network, Software. Subcategory A more detailed breakdown within the selected Category, for example, Laptop, Wireless, OS. Impact The measured effect this issue has on the business process or service. Values are Default, High, Medium or Low.
Note: Set this to Default to allow the finding severity to set the impact based on your ServiceNow instance configuration. See Configure ServiceNow. You can override it here.Urgency The speed required to resolve the issue, based on business needs. Values are Default, High, Medium or Low. Note: Set this to Default to allow the urgency to be set by the finding severity based on your ServiceNow instance configuration. See Configure ServiceNow. You can override it here.Short Description This value will be appended to the name of the finding. Description Additional descriptive information for this incident. -
-
Click Save.
The initiative appears in the My Initiatives panel.
What to do Next
View your Initiative Data and Updates
Within Tenable Vulnerability Management, you can view data about your existing mobilization initiatives and their updates in the following locations:
Manage your Initiatives
Once configured, you can view and manage your Tenable Vulnerability Management mobilization initiatives in the following ways: