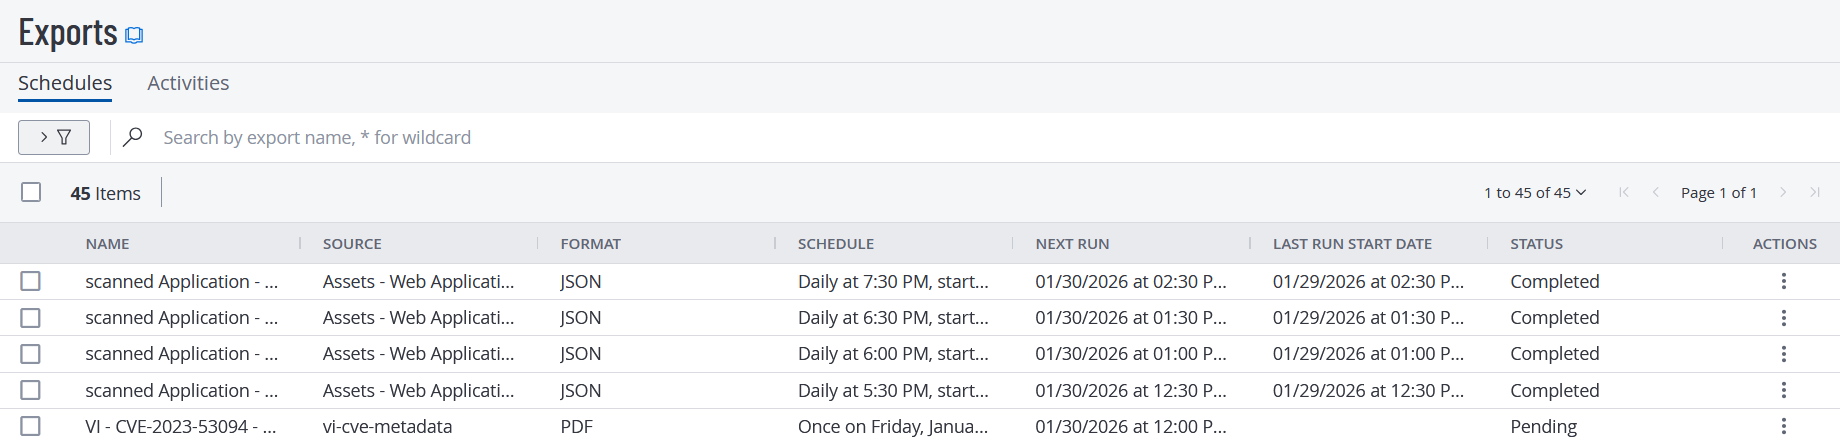
Manage Scheduled Exports
On the Exports page, you can manage your scheduled exports in the following ways:
Create a Scheduled Export
Tenable Vulnerability Management allows you to export data from various features for internal analysis or integration with third-party systems. Use the links in the table below to learn more about the data types available for scheduled exports.
| Vulnerability Management Feature | Documentation Link (How to Export/Schedule) |
|---|---|
| Explore > Assets | Export Assets |
| Explore > Findings | Export Findings |
| Recast and Accept Rules | Export Recast and Change Result Rules |
| Exclusions | Export Exclusions |
| Remediation Goals | Export Remediation Goals |
| Remediation Projects | Export Remediation Projects |
| Vulnerability Intelligence (CVEs) | Export CVE Details |
| Activity Logs | Export Activity Logs |
| Sensors > Linked Agents | Export Linked Agents |
| Sensors > Linked Agent Details | Export Linked Agent Details |
| Sensors > Scanner Groups | Export Scanner Groups |
| Sensors > Linked Scanners | Export Linked Scanners |
| Sensors > Linked Scanner Details | Export Linked Scanner Details |
| Sensors > Freeze Windows | Export Freeze Windows |
| Managed Credentials | Export Credentials |
| Network Configuration | Export Networks |
| Users | Export User Data |
| User Groups | Export User Groups |
Edit a Scheduled Export
On the Exports page, you can edit a scheduled export, as long as the export job is not currently running. If you are not a Tenable administrator, you can only edit exports you have created.
To edit a scheduled export:
-
In the left navigation, click
 Exports.
The Exports page appears with the Schedules tab showing, by default.
-
For any scheduled export that you want to edit, click
 in the Actions column.
A menu appears.
Click
 Edit .
The Export plane appears.
-
Edit the export options as follows.
Option Description Name
Type a custom name for your export. Formats Select an export format:
-
CSV – A CSV file that you can open in a spreadsheet application such as Microsoft Excel.
Note: For findings exports, Tenable Vulnerability Management automatically trims cells longer than 32,000 characters so they appear correctly in Microsoft Excel. Select Untruncated Data to disable this.
Note: If your export file contains a cell that starts with any of the following characters (=, +, -, @), Tenable Vulnerability Management adds a single quote (') at the beginning of the cell. For more information, see the Knowledge Base. -
JSON – A JSON file containing a nested list of findings, with no empty fields.
Configurations Select the fields to include:
-
Under Select Field Set, search for or select the fields to add to your export.
-
To view only selected fields, click View Selected.
-
In the Expiration box, type the number of days before the export file ages out.
Schedule Turn on the Schedule toggle to schedule your export:
- In the Start Date and Time section, choose the date and time for the export.
- In the Time Zone drop-down, choose a time zone.
- In the Repeat drop-down, choose the cadence on which you want the export to repeat (for example, daily).
- In the Repeat Ends drop-down, choose the date when exports end. If you select Never, the export repeats until you modify or delete it.
Email Notifications Turn on the Email Notification toggle to send email notifications:
- In the Add Recipients box, type the emails to notify.
- In the Password box, type a password for the export file. Share this password with the recipients so they can download the export file.
-
-
Click Schedule Export.
Tenable Vulnerability Management saves the updated export schedule.
Delete a Scheduled Export
On the Exports page, you can delete one or more scheduled exports from your Tenable Vulnerability Management instance.
Note: Deleting a scheduled export removes the schedule from your Tenable Vulnerability Management instance entirely. If you want to instead suspend a scheduled export, you can disable the schedule.
To delete a scheduled export:
-
In the left navigation, click
Exports.The Exports page appears with the Schedules tab showing, by default.
-
Do one of the following:
-
To delete a single scheduled export, do one of the following:
-
Use the action bar.
-
In the Schedules table, click the check box for the scheduled export that you want to delete .
An action bar appears.
-
Click the
 Delete button.
-
-
Use the Action column.
-
In the Schedules table, in the row for the scheduled export you want to delete, in the Action column, click the
button.A menu appears.
-
Click the
Delete button.
-
-
Use right-click.
-
In the Schedules table, hover over the row for the scheduled export you want to delete and right click.
A menu appears.
-
Click the
Delete button.
-
-
-
To delete multiple scheduled exports:
-
In the Schedules table, click the check boxes for the scheduled exports that you want to delete.
An action bar appears.
-
Click the
Delete button.
Note: You can delete up to 10 export schedules simultaneously.
-
-
Tenable Vulnerability Management deletes the selected scheduled export or exports. Deleted scheduled exports no longer appear in the Schedules table.
Disable a Scheduled Export
Disabling an scheduled export prevents Tenable Vulnerability Management from automatically creating exports based on the export schedule. You can enable a disabled scheduled export, as described in Enable a Disabled Scheduled Export.
Note: Disabling a scheduled export does not remove the scheduled export from the Schedules table or from the list of exports that count against your 1000 scheduled export limit. To remove a scheduled export from your account, you must delete the scheduled export.
To disable a scheduled export:
-
In the left navigation, click
Exports.The Exports page appears with the Schedules tab showing, by default.
-
Do one of the following:
-
To disable a single scheduled export, do one of the following:
-
Use the action bar.
-
In the Schedules table, click the check box for the scheduled export that you want to disable.
An action bar appears.
-
Click the
 Disable button.
-
-
Use the Action column.
-
In the Schedules table, in the row for the scheduled export you want to disable, in the Action column, click the
button.A menu appears.
-
Click the
Disable button.
-
-
Use right-click.
-
In the Schedules table, hover over the row for the scheduled export you want to disable and right click.
A menu appears.
-
Click the
Disable button.
-
-
-
To disable multiple scheduled exports:
-
In the Schedules table, click the check boxes for the scheduled exports that you want to disable.
An action bar appears.
-
Click the
Disable button.
Note: You can disable up to 10 export schedules simultaneously.
-
-
Tenable Vulnerability Management disables the selected scheduled export or exports.
In the Schedules table, disabled scheduled exports appear in gray and enabled scheduled exports appear in black.
Enable a Disabled Scheduled Export
When you disable a scheduled export, you can enable the scheduled export again to resume the export cadence specified in the schedule.
To enable a disabled scheduled export:
-
In the left navigation, click
Exports.The Exports page appears with the Schedules tab showing, by default.
-
Do one of the following:
-
To enable a single disabled scheduled export, do one of the following:
-
Use the action bar.
-
In the Schedules table, click the check box for the scheduled export that you want to re-enable.
An action bar appears.
-
Click the
 Enable button
-
-
Use the Action column.
-
In the Schedules table, in the row for the scheduled export you want to enable, in the Action column, click the
button.A menu appears.
-
Click the
Enablebutton.
-
-
Use right-click.
-
In the Schedules table, hover over the row for the scheduled export you want to enable and right click.
A menu appears.
-
Click the
Enable button.
-
-
-
To re-enable multiple scheduled exports:
-
In the Schedules table, click the check boxes for the scheduled exports that you want to enable.
An action bar appears.
-
Click the
Enable button.
Note: You can enable up to 10 export schedules simultaneously.
-
-
Tenable Vulnerability Management enables the selected scheduled export or exports.
In the Schedules table, disabled scheduled exports appear in gray and enabled scheduled exports appear in black.
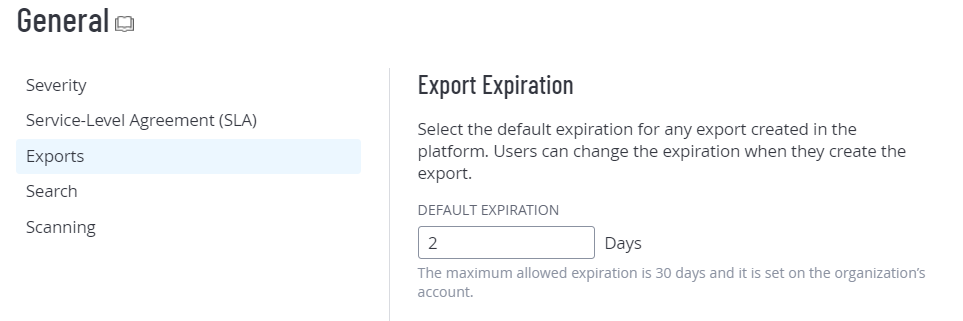
Configure Scheduled Export Expiration
When creating an export, you can specify an expiration delay of up to 30 calendar days. This is the maximum retention period permitted by Tenable Vulnerability Management before export files expire. To configure the number of days for your default export expiration, do the following:
-
In the left navigation, click
 Settings.
The Settings page appears.
-
Click the General tile.
The General page appears. By default, the Severity tab is active.
-
Click the Exports tab.
The Export Expiration options appear.
-
In the Default Expiration box, type the number of days you want Tenable Vulnerability Management to allow before your exports expire.
Note: Tenable Vulnerability Management allows you to set a maximum of 30 calendar days for export expiration.
Note: You must type the number of days as an integer between 1 and 30.
-
Click Save.
Tenable Vulnerability Management saves your settings and updates the number of allowable days before your exports expire.