Manage Initiatives
Required User Role: Administrator
You can edit initiatives that you own or that are assigned. Additionally Tenable administrators can delete initiatives from Tenable Vulnerability Management.
Note: Because combination updates are not retroactive, modifying a combination in an initiative only affects new findings. Existing tickets created by the previous criteria remain in your external ticketing system until you individually resolve them or you delete the entire initiative.
Edit an Initiative
To edit an initiative:
-
In the left navigation, click
 Exposure Response.
The Exposure Response page appears. By default, the
 Initiatives tab is active.
 - In My Initiatives section, in the upper right corner for the initiative you want to edit, click the
 button.
 -
Click Edit.
The Edit <Initiative Name> panel appears.
Edit the initiative settings, as described in Create an Exposure Response Initiative.
Note: Since the system calculates initiative metrics based on the owner's Tenable permissions, you cannot edit the initiative owner. -
Click Save.
-
Tenable Vulnerability Management saves your changes to the initiative.
Export Initiative Data
On the Initiativespage, you export results in CSV or JSON formats from both the My Findings and My Affected Assets tabs within the Activity section.
To export a finding or affected asset:
-
In the Activity section, click the My Findings tab or My Affected Assets tab.
-
Select the items to export.
Note: You export different items from the My Findings and the My Affected Assets tabs:
-
My Findings — In the main table, export findings. In the drop-downs >, export the assets associated with those findings.
-
My Affected Assets — In the main table, export assets. In the drop-downs >, export plugin results for those assets.
Tip: To select all items, click the checkbox in the action bar. If your results span multiple pages, click Select all <value> assets. -
-
In the action bar, click
 Export.
The Export window appears.
-
Select JSON or CSV and the desired configuration fields.
Tip: For more information on configuration fields, see Findings Columns or Asset Columns. -
Click Export.
Once complete, a confirmation message appears and your browser saves the file to your computer. Tenable Vulnerability Management also adds this export log to the Exports page.
Note: If you request a large export and then leave the page before it processes, you must manually download the file from the Exports page.
Add or Remove an Appended Initiative
Required User Role: Administrator
In the Initiatives list, administrators can append shared initiatives to the list for easy access. If you no longer wish to see shared initiative data within your Initiatives list, you can remove the initiative from being appended.
Append an Initiative
To append a shared initiative to your Initiatives list:
-
In the Initiatives list, in the Shared section, click Manage Shared.
The Append Initiatives from Other Users window appears.

-
From the list, select the initiatives you want to append to your Shared list.
-
Click Save.
Tenable Vulnerability Management adds the selected initiatives to the Shared section of your Initiatives list.
Remove an Appended Initiative
To remove an appended initiative from your Initiatives list:
-
In the Initiatives list, in the Shared section, on the tile for the initiative you want to remove, click the
 button.
A menu appears.
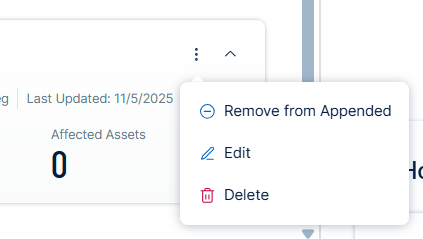
-
Click Remove from Appended.
Tenable Vulnerability Management removes the selected initiative from the Shared section of your Initiatives list.
Manage Affected Asset Tags
On the Initiatives page, in the My Affected Assets tab, the Tags column shows all asset tags for your assets. You can add or remove these tags using the following steps.
Add Tags to an Asset
To add tags to an asset:
-
In the My Affected Assets section, select the assets to tag.
The action bar appears.
-
In the action bar, click
 Add Tags.
The Add Tags window appears.

-
In the Add Tags window, do one of the following:
- Add New Tags
-
In the two text boxes, type a tag category and value (for example, Location: Headquarters).
Tip: For more information about tag category value pairs, see Tag Format and Application.
The tag appears in the Tags to be Added section.
-
(Optional) Repeat these steps to add additional new tags.
-
- Add Recently Used Tags
-
In the Recently Used Tags section, click a tag.
The tag appears in the Tags to be Added section.
-
(Optional) Repeat these steps to add additional new tags.
-
- Add New Tags
-
Click Add Tags.
Tenable Vulnerability Management adds the tags to the selected assets.
Remove Tags from an Asset
To remove tags from an asset:
-
In the My Affected Assets section, select the assets to remove tags from.
The action bar appears.
-
Click
 Remove Tags.
The Remove Tags window appears.

-
Do one of the following:
- In the Current Tags section, expand the drop-down box.
Click on an existing tag category and value (for example, Location: Headquarters).
- Below the drop-down box, select one of the listed tags.
The tag appears in the Tags to be Removed section.
- In the Current Tags section, expand the drop-down box.
-
Click Remove Tags.
Tenable Vulnerability Management removes the tag or tags from the assets.
Edit Initiative Tickets in the Ticket Log
Tickets that were created by this initiative and that are listed in the Ticket Log may be modified in your external ticketing system (e.g., Jira or ServiceNow) or directly within the Exposure Response interface.
To edit a ticket shown in the Ticket Log:
-
In the row for the ticket that you want to edit, do one of the following:
-
On the left side of the row, click the check box.
An action bar appears.
Click
 Edit Automated Ticket.
 -
On the right side of the row, click the
button.A menu appears.
Click
Edit Automated Ticket.
An edit pane appears along with the initiative name.
-
-
Make any desired changes to the ticket fields.
Tip: For more information, see the description of Jira and ServiceNow ticket fields in Create an Exposure Response Initiative.
-
Click Save.
Delete an Initiative
To delete an initiative:
-
In the left navigation, click
Exposure Response.The Exposure Response page appears. By default, the
Initiatives tab is active. -
In My Initiatives section, in the upper right corner for the initiative you want to edit, click the
button. -
Click Delete.
A confirmation message appears.
-
Click Delete.
Tenable Vulnerability Management permanently deletes the initiative and you return to the Initiatives page.