Tenable Web App Scanning CI/CD Application Scan Overview
Required User Role: Administrator
You can deploy the Tenable Web App Scanning Docker image as a continuous integration and continuous delivery (CI/CD) tool to run Tenable Web App Scanning scans on software before merging it. Scanning your CI/CD applications and services at any point in your application's lifecycle can greatly improve your security stance by finding vulnerabilities as early as possible.
Before you begin:
-
Ensure your CI/CD build system supports using the Docker container.
Note: Scanning CI/CD builds is limited to a single scan run at a time.
Scan CI/CD build with Tenable Web App Scanning Docker image:
-
In the upper-left corner, click the
 button.
 The left navigation plane appears.
-
In the left navigation plane, click
 Integrations.
The Integrations page appears.
-
In the left navigation plane, select an integration type:
Tip: WAS CI/CD can integrate with build system that can run arbitrary docker images. The following integrations can be used as examples.
-
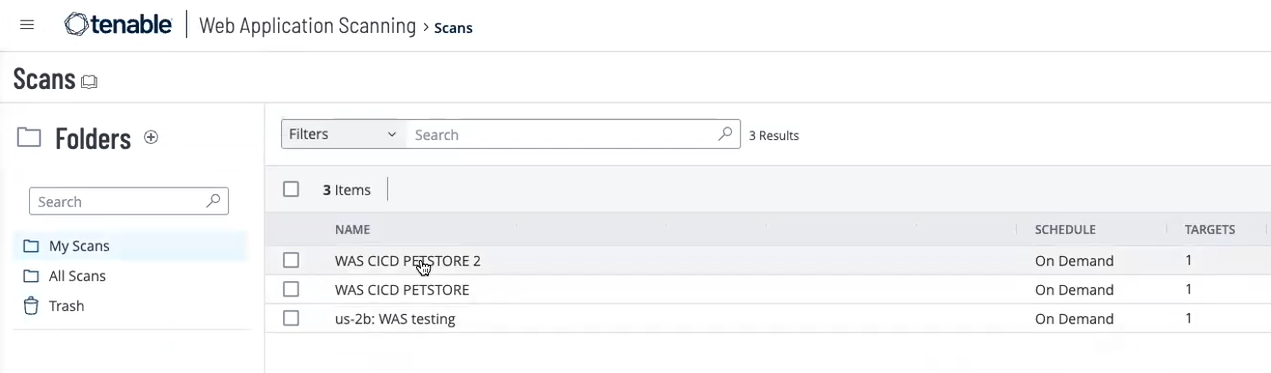
Locate your scan in the Tenable Web App Scanning user interface.
Note: The Scanner Type and Scanner fields do not apply to CI/CD scans and should remain at their default setting.
Note: When configuring a scan for integration into a CI/CD pipeline, Tenable recommends selecting a Scan Template with a relatively short runtime to avoid potential delays in your build process. For more information, refer to the Scan Templates section.
Note: Ensure that the target hostname is distinct from your production application. This ensures that vulnerabilities found during builds do not intermix with your production application's vulnerabilities.
-
Export the scan configuration for the selected scan to the scan pipeline stages.
On the Scans page, click the
 button for the scan you have chosen and select Export for CI/CD.
 -
Upload your scan configuration file to your Git repository.
-
(Optional) Make Credentialed Scan Edits in your configuration file.
-
Generate an API key.
Note: If you don't have an API Key, you can generate one on your Account page. For more information, see Generate API Keys.
-
Copy generated API keys to your preferred secret storage provider.
Caution: Tenable recommends that you always take measures to hide any sensitive information, such as API keys used to link the scanner to Tenable and the username/password combination used by the scanner to authenticate to the web app being scanned. Keep these out of source control and placed in secure storage provided by the repository, or the continuous integration tooling in use.
-
Run the following steps to run the scan:
Copy
docker pull tenable/was-scanner:latest
docker run -e WAS_MODE=cicd -e ACCESS_KEY=${TENABLE_IO_ACCESS_KEY}
SECRET_KEY=${TENABLE_IO_SECRET_KEY} -v ./:/scanner tenable/was-scanner:latest -
Set the vulnerability_threshold field parameter to either Critical, High, Medium, or Low.
Note: The threshold you set for this field causes your build to pass or fail if your build meets, or does not meet, the threshold, respectively. Builds can also fail due to scan errors or incomplete configurations.
-
(Optional) Follow the specific outline of the pipeline workflow file required for your CI/CD integration, as described in the following CI/CD Pipeline Workflow File section.
-
Go to the selected scan in the Scans page to view the results.
-
(Optional) Retrieve your logs. Refer to the following Reports and Logs section.
When creating a scan configuration and adding credentials to that scan, you can also edit the credentials in the CI/CD file you exported. In the exported tenable_was.conf file, there may be placeholder text instead of sensitive information related to those credentials (passwords, auth tokens, etc.). For example, ${?USER_PASS_PASSWORD} and ${?USER_PASS_USERNAME} are placeholders in the following example file:
scan {
  credentials {
    "user_pass" {
    "auth_type"=auto
    password=${?USER_PASS_PASSWORD}
    username=${?USER_PASS_USERNAME}
  }
}
When you run the docker image, those placeholders represent environment variables that where the scanner retrieves the actual values from, so make sure they are present. In the previous example, you would run the docker image with the environment variables necessary to fill in those values, As shown in the following example:
`docker run -e WAS_MODE=cicd -e USER_PASS_USERNAME=<the username here> -e USER_PASS_PASSWORD=<the password here> ..etc, etc`In cases where values serve as both keys and values, you must provide them as a JSON object containing the corresponding key-value pairs. For instance, if your web application uses Login Form authentication and requires both field names and values, such as "username" and "password," configure it as follows:
scan {
  credentials {
    "login_form" {
    "auth_headers"=${?LOGIN_FORM_AUTH_HEADERS}
    "login_check"=Welcome
    "login_check_pattern"=Welcome
    "login_check_url"="http://app:3000/home.html"
    "login_parameters"=${?LOGIN_FORM_LOGIN_PARAMETERS};
  }
}
You can use the following example inputs:
`docker run -e WAS_MODE=cicd -e LOGIN_FORM_LOGIN_PARAMETERS=’{“username”: “my_username”, “password”:”my_password”}’-e LOGIN_FORM_AUTH_HEADERS=’{}’ …etc, etc`You can apply the setup for pipeline workflow files to many available tools, once you understand the principles involved. The following is an example pipeline workflow file for Jenkins:
pipeline {
agent any
stages {
stage('build-run-scan') {
environment {
ACCESS_KEY = credentials('ACCESS_KEY')
SECRET_KEY = credentials('SECRET_KEY')
}
steps {
sh '''
docker pull swaggerapi/petstore
docker run -d -e SWAGGER_URL=http://petstore:8080 -e SWAGGER_BASE_PATH=/v2 --name petstore swaggerapi/petstore
docker pull tenable/was-scanner:latest
docker run -v $(pwd):/scanner -t -e WAS_MODE=cicd -e ACCESS_KEY=${ACCESS_KEY} -e SECRET_KEY=${SECRET_KEY} --link petstore tenable/was-scanner:latest
'''
}
}
}
post {
always {
sh '''
docker rm $(docker stop $(docker ps -a -q --filter ancestor="tenable/was-scanner:latest" --format="{{.ID}}")) || true
docker rm $(docker stop $(docker ps -a -q --filter ancestor="swaggerapi/petstore" --format="{{.ID}}")) || true
docker system prune -f --volumes
'''
archiveArtifacts 'scanner.log'
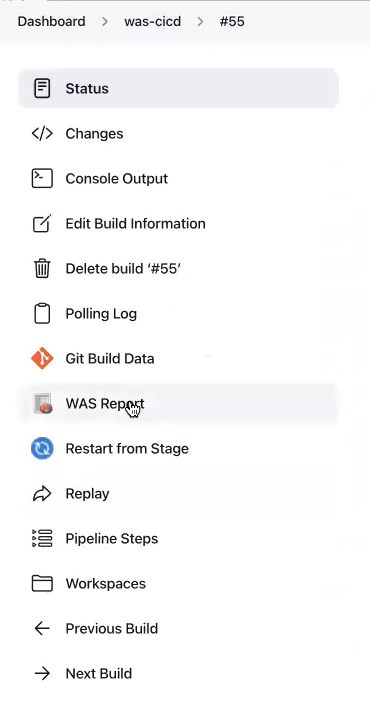
publishHTML([allowMissing: false, alwaysLinkToLastBuild: false, keepAll: true, reportDir: '', reportFiles: 'tenable_was_scan.html', reportName: 'WAS Report'])
cleanWs()
}
}
}You can generate the console output, HTML report (tenable_was_scan.html), and scanner log file (scanner.log) after each build. Use command lines to archive your HTML report and scanner log. These are specific to each CI/CD tool. The console output after completion of your build indicates a build pass or failure and potential causes. The HTML report indicates further scan results based on the vulnerability_threshold you input into the tenable-was.conf file.
Note: Tenable recommends that you retain scanner logs as they can be useful for debugging.
Example archive command lines for a Jenkins pipeline workflow file:
archiveArtifacts 'scanner.log' publishHTML([allowMissing: false, alwaysLinkToLastBuild: false, keepAll: true, reportDir: '', reportFiles: 'tenable_was_scan.html', reportName: 'WAS Report']Example console output:

Example HTML report:

Example integrations for CI/CD tools: