ServiceNow Connector
The following is not supported in Tenable FedRAMP Moderate environments. For more information, see the Tenable FedRAMP Product Offering.
The following steps allow you configure this connector for use with Tenable Exposure Management from start to finish.
Connector Details
| Details | Description |
|---|---|
|
Supported products |
|
|
Category |
Endpoint Security |
|
Ingested data |
Assets only |
|
Ingested Asset Classes |
Devices Website Applications |
|
Integration type |
UNI directional (data is transferred from the Connector to Tenable Exposure Management in one direction) |
|
Supported version and type |
SaaS (latest) |
Prerequisites and User Permissions
Before you begin configuring the connector, make sure to:
-
Identify the ServiceNow instance name (e.g., https://dev123456.service-now.com/, then the instance name is dev123456)
-
Create a ServiceNow user with the following roles: personalize_dictionary, itil, cmdb_read, and oauth_user.
-
Choose an authentication method and gather the required credentials:
When attempting to configure the ServiceNow connector, you have the option to select one of the two available types of Authentication methods.
- Basic Auth: ServiceNow username and Password. Credentials are used for pulling assets. Make sure the above permissions are enabled for this user.
-
OAuth2: ServiceNow username and password + Client ID and Client Secret ID. Tenable Exposure Management uses these keys to communicate with the ServiceNow API.
-
Microsoft Entra ID (Azure AD) OAuth 2.0: A Tenant ID and Scope.
TIP: For more info, see Configure OAuth application in Microsoft Azure.
Obtain API Keys and a Secret ID for OAuth 2.0
-
Log in to the ServiceNow platform.
-
Navigate to System Security > System OAuth.
-
Click Application Registry. This is where all registered applications are listed.
-
Click New to start creating a new application.
A few options are presented.
-
Select the Create an OAuth API endpoint for external clients option. This option is specifically designed for creating credentials that external clients will use to interact with your ServiceNow instance via API. Fill in the required fields:
-
Name: Provide a descriptive name for the integration.
-
Client ID: Leave blank to auto-generate.
-
Client Secret: Leave blank to auto-generate.
-
Other fields as necessary for your integration.
-
-
After submission, open the newly created application registry entry.
The Client ID and Client Secret are displayed.
-
Click the lock icon next to the Client Secret to reveal it.
-
Copy the Client ID and Client Secret to a safe location. You need them to configure the connector.
Obtain Tenant ID for Microsoft Entra ID (Azure AD) Aouth 2.0
-
Log in to the Azure platform.
-
In the left-hand navigation pane, select Microsoft Entra ID (Azure AD).
-
Locate the Tenant ID:
-
In the Overview section, you'll find the Tenant ID listed.
-
Copy this value; it uniquely identifies your Microsoft Entra ID (Azure AD) tenant.
-
To determine scope:
The Scope defines the level of access your application is requesting. Scopes are typically formatted as: https://resource-name/.default. For example, if you're accessing Microsoft Graph API, the scope would be: https://graph.microsoft.com/.default
This .default scope requests all the permissions that have been statically configured for the application. To configure scopes:
-
In Microsoft Entra ID (Azure AD), navigate to App registrations and select your application.
-
Navigate to Expose an API.
-
Set the Application ID URI if not already set.
-
Click on Add a scope.
-
Define the scope name, user consent display name, and description.
-
Specify who can consent (Admins only or Users and admins).
-
Click Add scope to save.
Once defined, your application can request tokens for this scope.
Add a Connector
To add a new connector:
-
In the left navigation menu, click Connectors.
The Connectors page appears.

-
In the upper-right corner, click
 Add new connector.
The Connector Library page appears.

-
In the search box, type the name of the connector.
-
On the tile for the connector, click Connect.
The connector configuration options appear.
Configure the Connector
-
(Optional) In the Connector's Name text box, type a descriptive name for the connector.
-
In the Instance Name text box, type the name of your ServiceNow instance.
-
From the Authentication Method drop-down, select the method you want to use to authenticate the connector and fill in the relevant auth parameters.
-
In the Data pulling configuration section, you can configure dynamic settings specific to the connector. Enable the relevant options and configure as needed.
-
Configure ServiceNow CMDB data: Click on Edit ServiceNow data to customize how data from ServiceNow is mapped into Tenable Exposure Management during connector setup:
-
On the ServiceNow tables screen, choose which ServiceNow tables to include. You can select from the predefined list or specify a custom table.

-
Select Next to proceed to the mapping screen. Here, you can review the default mappings or customize them as needed.
-
Click Next.
The Tables Mapping screen appears.
-
Review the default mappings, or customize them as needed.
-
Each asset must have a unique identifier column, such as sys_id (recommended).
-
All hierarchical tables are expected to include a sys_class_name column. This column identifies the record type and enables accurate table inheritance mapping.
IMPORTANT! Keep sys_id as the default value for the asset_id field to ensure data integrity. If you select a non-unique field as the asset_id, data may be overwritten between assets that share the same identifier.
-
To add an attribute, select the + icon on the right.
-
To remove an attribute, hover over its name, select the three-dot menu, and choose Delete.

Prefix rules:
-
If Include prefix is selected, you must provide a prefix.
-
Maximum length is 50 characters. The system enforces this limit.
Asset Enrichment tab:
-
If you map a column here to an attribute already selected on the previous page, the values are appended.
Note: Some attributes support mapping multiple fields. Certain attributes apply only to specific asset classes. -
-
-
Click Next.
The Asset Enrichment screen appears.

Table and column selection:
-
Select Add tableto add an available ServiceNow.
-
You can search the list, and the column names are sorted in ascending order.
Attribute options:
-
Select a first-level column open the attribution options.
-
Use as tag
-
Use as reference (only available if the selected column is a reference field)
-
-
The option Map to Tenable Exposure Management attribute is not available for first-level columns. It becomes available only when mapping from an indirect (referenced) table.
Referenced tables:
-
Select Use as reference to open an indented row showing the referenced table name.
-
You can select them and configure the same checkboxes (Use as tag, Use as reference) for each new attribute.
Prefix settings:
-
If you select Include prefix, you must provide a prefix.
-
If you delete the default prefix and do not add a new one, the system prompts you to Set the tag prefix.
-
-
Prefix length is limited to 50 characters.
-
The field stops accepting input after 50 characters and displays the error: “Prefix is limited to 50 characters.”
-
Note: Some attributes support mapping multiple fields. Certain attributes apply only to specific asset classes. -
-
-
Collect assets only when their ServiceNow Operational Status is set to ‘1’: Filters ingested assets to include only those where operational_status = 1.
-
Immediately remove assets when their install_status matches any of the selected values.
-
In the Asset Retention text box, type the number of days after which you want assets to be removed from Tenable Exposure Management. If an asset has not been detected or updated within the specified number of days, it is automatically removed from the application, ensuring your asset inventory is current and relevant.
Tip: For more information, see Asset Retention.
-
-
In the Test connectivity section, click the Test Connectivity button to verify that Tenable Exposure Management can connect to your connector instance.
-
A successful connectivity test confirms that the platform can connect to the connector instance. It does not, however, guarantee that the synchronization process will succeed, as additional syncing or processing issues may arise.
-
If the connectivity test fails, an error message with details about the issue appears. Click Show tests for more information about the exact error.

-
-
In the Connector scheduling section, configure the time and day(s) on which you want connector syncs to occur.
Tip: For more information, see Connector Scheduling. -
Click Create. Tenable Exposure Management begins syncing the connector. The sync can take some time to complete.
-
To confirm the sync is complete, do the following:
-
Navigate to the Connectors page and monitor the connector's status. Sync is complete once the connector status is Connected.
-
View the sync logs for the connector to monitor the logs for a successful connection.
-
ServiceNow in Tenable Exposure Management
Locate Connector Assets in Tenable Exposure Management
As the connector discovers assets, Tenable Exposure Management ingests those devices for reporting.
To view assets by connector:
-
In Tenable Exposure Management, navigate to the Assets page.
-
In the Filters section, under 3rd Party Connectors, click the connector name for which you want to view assets.

The asset list updates to show only assets from the selected connector.
-
Click on any asset to view Asset Details.
Data Mapping
Tenable Exposure Management integrates with the connector via API to retrieve relevant weakness and asset data, which is then mapped into the Tenable Exposure Management system. The following tables outline how fields and their values are mapped from the connector to Tenable Exposure Management.
-
Define the data mapping in the Service Now Connector during connector configuration.
-
When adding a table, available columns load instantly and can be searched and sorted.
-
If you select a reference column and enable Use as reference, the referenced table columns load for mapping.
-
Some attributes can only be mapped from indirect (referenced) tables.
Status Update Mechanisms
Every day, Tenable Exposure Management syncs with the vendor's platform to receive updates on existing findings and assets and to retrieve new ones (if any were added).
The table below describes how the status update mechanism works in the connector for findings and assets ingested into Tenable Exposure Management.
|
Update Type in Tenable Exposure Management |
Mechanism (When?) |
|---|---|
|
Archiving Assets |
|
Uniqueness Criteria
Tenable Exposure Management uses defined uniqueness criteria to determine whether an ingested asset or finding should be recognized as a distinct record. These criteria help define how assets and findings are identified and counted from each connector.
Tip: For more information, see Asset Deduplication in Tenable Exposure Management
The uniqueness criteria for this connector are as follows:
|
Data |
Uniqueness Criteria |
|---|---|
|
Asset |
sys_id |
API Endpoints in Use
API version: 2.0
|
API |
Use in Tenable Exposure Management |
Required Permissions |
|---|---|---|
|
https://{{{ instance_name }}}.service-now.com/oauth_token.do |
Authenticate using OAuth2. |
oauth_user |
|
https://{{{ instance_name }}}.service-now.com/api/now/table/ |
|
itil |
|
https://{{{instance_name}}}.service-now.com/api/now/doc/table/schema/ |
|
personalize_dictionary |
|
https://{{{ instance_name }}}.service-now.com/api/now/table/sys_db_object |
Display all tables exist to the user in the UI |
|
| https://{{{ instance_name }}}.service-now.com/api/now/table/sys_dictionary | Provide the user with the structure of the table columns in one API call |
|
Support Limitations and Expected Behavior
This section outlines any irregularities, expected behaviors, or limitations related to integration of the connector and Tenable Exposure Management. It also highlights details about ingested and non-ingested data to clarify data handling and functionality within this integration.
Each asset is expected to include a unique identifier, such as sys_id. We strongly recommend using sys_id as the default asset_id. Using a non-unique field may result in data conflicts, including overwriting data for assets that share the same identifier.
Each hierarchical table is expected to include a sys_class_name column. This column is used to distinguish parent assets from child records during ingestion.
Data Validation
This section shows how to validate and compare data between Tenable Exposure Management and the ServiceNow platform.
Asset Data Validation
Objective: Ensure the number of assets/devices in ServiceNow aligns with the number of devices displayed in Tenable Exposure Management.
In ServiceNow:
-
Navigate to All > System Definition > Tables.

-
Use the Label column to search for the table’s user-friendly name, or use the Name column to locate the system name used in the integration.
Example of table:
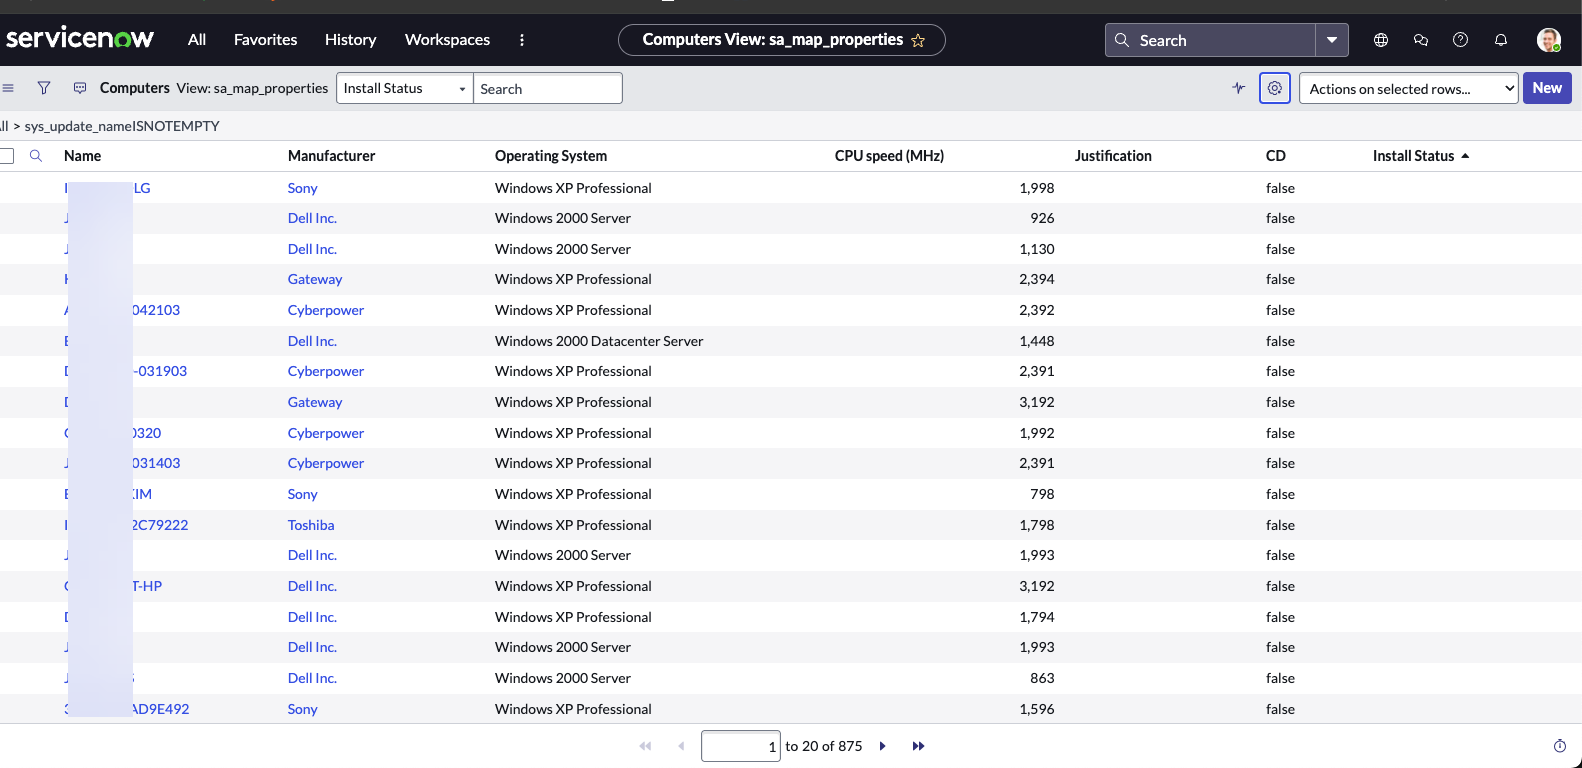
-
Click the relevant table (for example, cmdb_ci_computer) to open the list of records.
-
Click the gear icon in the top-right corner to configure the view and add the columns used for filtering. These typically include:
-
install_status
-
sys_class_name (displayed as Class)
-
operational_status

-
-
Click the funnel icon in the top-left corner to apply filters that align with the connector configuration in Tenable Exposure Management. For example:
-
install_status = 1
-
operational_status = 1
-
A specific sys_class_name
After applying filters, note the total number of records displayed. This number should align with the devices count shown on the Devices page in Tenable Exposure Management.
IMPORTANT! The sys_id field is used as the unique identifier for ServiceNow assets. If a non-unique field is selected in the connector configuration, discrepancies such as duplicate or overwritten assets may occur.
-
In Tenable Exposure Management:
-
Compare the total number of assets between ServiceNow and Tenable Exposure Management.
Expected outcome: The total numbers returned in ServiceNow and Tenable Exposure Management should match.
If an asset is not visible in Tenable Exposure Management, check the following conditions:
-
Asset archived because its status changed to one of the selected statuses defined in the Asset Retention configuration.
-
Verify that the asset’s sys_class_name matches one of the table classes selected in the connector configuration.
-
Records that do not contain required fields, such as sys_id, may be excluded from ingestion.
-
Assets archived based on the value in the last_seen column (or an equivalent timestamp field configured in the connector). Only assets considered active at the time of sync are retained.
 Tip: To learn more on how assets are archived and findings change status, see ServiceNow Connector.