Manage SAML Configurations
Required User Role: Administrator
In Tenable MSSP, you can manage your SAML configurations in the following ways:
Add a SAML Configuration
You can manually enter the details for your SAML configuration or you can upload a metadata.xml file that you download from your identity provider (IdP).
Before you begin:
Review the Tenable SAML Configuration Quick-Reference guide for a step-by-step guide of how to configure SAML for use with Tenable MSSP. This includes the following high-level steps:
-
Follow the steps described in your IdP's documentation to set up a SAML application for Tenable MSSP on your IdP account. Your IdP requires an entity ID and a reply URL for Tenable MSSP to set up the SAML application:
-
Entity ID/Audience URI— TENABLE_IO_PLACEHOLDER.
-
ACS/SSO URL/Login URL/Reply URL— https://
-
-
In your IdP account, download your metadata.xml file.
Note: Tenable does not currently support a SP-Initiated SAML flow. Because it must be initiated from the Identity Provider side, navigating directly to https://
To add a new SAML configuration:
-
Access the SAML page.
-
In the action bar, click
 Create.
The SAML Settings page appears.
-
Do one of the following:
-
To provide configuration details by uploading the metadata.xml file from your IdP:
-
In the first drop-down box, select Import XML.
Note: Import XML is selected by default.
-
The Type drop-down box specifies the type of identity provider you are using. Tenable MSSP supports SAML 2.0 (for example, Okta, OneLogin, etc.).
This option is read-only. -
Under Import, click Add File.
A file manager window appears.
-
Select the metadata.xml file.
The metadata.xml file is uploaded.
-
-
To manually create your SAML configuration using data from the metadata.xml file from your IdP:
-
In the first drop-down box, select Manual Entry.
A SAML configuration form appears.
-
Configure the settings described in the following table:
Settings Description Enabled toggle A toggle in the upper-right corner that indicates whether the SAML configuration is enabled or disabled.
By default, the Enable setting is set to Enabled. Click the toggle to disable SAML configuration.
Type Specifies the type of identity provider you are using. Tenable MSSP supports SAML 2.0 (for example, Okta, OneLogin, etc.).
This option is read-only.Description A description for the SAML configuration. IdP Entity ID The unique entity ID that your IdP provides.
Note: If you want to configure multiple IdPs for a user account, create a new configuration for each identity provider with separate identity provider URLs, entity IDs, and signing certificates.
IdP URL The SAML URL for your IdP. Certificate Your IdP security certificate or certificates.
Note: Security certificates are found in a metadata.xml file that your identity provider provides. You can copy the content of the file and paste it in the Certificate box.
User Auto Provisioning Enabled A toggle that indicates whether automatic user account creation is enabled or disabled.
IdP Assigns User Role at Provisioning To assign a user role during provisioning, enable this toggle. In your SAML identity provider, add an attribute statement with userRoleUuid as the attribute name and the user role UUID as the attribute value. Note: To access this option, you must first enable the User Autoprovisioning Enabled option.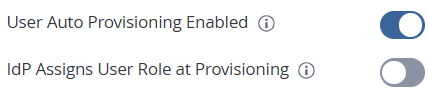 Important! The Tenable platform creates users at the exact moment of their first successful SAML login. They are not pre-populated by group assignment in the IdP. During the initial provisioning login, the platform prioritizes identity creation, which often results in the assignment of a default baseline role. Tenable does not fully process the userRoleUuid claim mapping until the user logs out and logs in a second time.
IdP Resets User Role at Each Login To assign a role each time a user logs in, overwriting the current role with the one chosen in your IdP, enable this toggle. In your SAML identity provider, add an attribute statement with userRoleUuid as the attribute name and the user role UUID as the attribute value.
Important! The Tenable platform creates users at the exact moment of their first successful SAML login. They are not pre-populated by group assignment in the IdP. During the initial provisioning login, the platform prioritizes identity creation, which often results in the assignment of a default baseline role. Tenable does not fully process the userRoleUuid claim mapping until the user logs out and logs in a second time.
-
-
-
Click Save.
Tenable MSSP saves your SAML configuration.
What to do next:
-
Download the metadata.xml from Tenable MSSP using the
 Download SP Metadata option in the SAML Configurations table.
 -
Upload this file to the SAML application you created for Tenable MSSP with your SAML provider.
Edit a SAML Configuration
To edit a SAML configuration:
-
On the SAML page, in the table, click the SAML configuration that you want to edit.
The SAML Settings page appears.
-
(Optional) In the first drop-down box, select a different method to provide basic configuration details.
-
Import XML — Configure SAML authentication by uploading the metadata file your IdP provided, as described in Add a SAML Configuration.
-
Manual Entry — Configure SAML authentication by manually configuring SAML options using data from the metadata.xml file your IdP provided, as described in Add a SAML Configuration.
Tenable MSSP updates the configuration options based on your selected source.
-
-
Update any of the configurable SAML settings.
Note: Some settings are read-only and cannot be modified.
Note: The configuration options you can update depend on the source you select in the first drop-down box.
-
Click Save.
Tenable MSSP saves the configuration. The SAML page appears with the updated configuration.
Disable a SAML Configuration
Disabling a SAML configuration prevents users on your instance from using the SAML credentials in the configurations to log in to Tenable MSSP. You can enable a disabled SAML configuration as described in Enable a SAML Configuration.
To disable a SAML configuration:
-
On the SAML page, in the table, click the SAML configuration that you want to disable.
The SAML Settings page appears.
-
At the bottom of the page, click the SAML Enable toggle to disable the configuration.
-
Click Save.
Tenable MSSP disables the SAML configuration. On the SAML page, the disabled configuration appears in light gray.
Enable a SAML Configuration
On the SAML page, you can enable a disabled a SAML configuration.
Before you Begin:
Configure your IdP to authenticate with Tenable MSSP. For more information, see the Tenable SAML Configuration Quick Reference Guide.
To enable a disabled SAML configuration:
-
On the SAML page, in the table, click the SAML configuration that you want to enable.
Tip: Disabled configurations appear in light gray.
The SAML Settings page appears.
-
At the bottom of the page, click the SAML Enable toggle to enable the configuration.
-
Click Save.
Tenable MSSP enables the SAML configuration. On the SAML page, the enabled configuration appears in black.
Enable Automatic Account Provisioning
When you manually configure or edit a SAML configuration, you can enable automatic user account provisioning. Automatic account provisioning allows users with credentials for the IdP named in the SAML configuration to create a Tenable MSSP account the first time they log in via the IdP.
Tenable MSSP creates automatically provisioned accounts with the following defaults:
-
Full name — NameID
-
Username — NameID
-
Email — NameID
-
User role — Basic
Tenable MSSP does not currently support any other claim types.
Before you Begin:
Configure your IdP to authenticate with Tenable MSSP. For more information, see the Tenable SAML Configuration Quick Reference Guide.
To enable automatic user account provisioning:
-
On the SAML page, in the table, click the SAML configuration for which you want to enable automatic account provisioning.
The SAML Settings page appears.
-
At the bottom of the page, click the User Autoprovisioning Enabled toggle to enable automatic account provisioning.
-
Click Save.
Tenable MSSP enables automatic account provisioning in the SAML configuration.
Disable Automatic Account Provisioning
Disabling automatic account provisioning prevents users from automatically creating Tenable MSSP account the first time they access the platform via their IdP. You can enable automatic account provisioning on a SAML configuration, as described in Enable Automatic Account Provisioning.
To disable automatic user account provisioning:
-
On the SAML page, in the table, click the SAML configuration for which you want to disable automatic account provisioning.
-
The SAML Settings page appears.
-
At the bottom of the page, click the User Autoprovisioning Enabled toggle to disable automatic account provisioning.
-
Click Save.
Tenable MSSP disables automatic account provisioning in the SAML configuration.
Delete a SAML Configuration
You can delete a SAML configuration on the SAML page.
Before you begin:
-
Disable the SAML configuration you want to delete.
To delete a SAML configuration:
-
On the SAML page, in the table, select the check box for the SAML configuration that you want to delete.
-
In the action bar, click the
 Delete button.
Tenable MSSP deletes the SAML configuration.
Note: Ensure that when you delete a SAML configuration, you also remove the related configuration in your IdP.
What to do next:
-
Remove the related configuration from your identity provider's application.