Connect Microsoft Copilot
Use this procedure to integrate Microsoft Copilot with Tenable One AI Exposure.
Prerequisites
- A Global Administrator or Power Platform Administrator role within your Microsoft Entra ID environment.
- A registered application called Tenable within your Microsoft Entra ID environment.
- AI Exposure supports the following Microsoft Copilot license SKUs:
- a69133fb-7e57-40ce-9a69-6c8551bb7854 - Microsoft 365 Copilot for Business
- a809996b-059e-42e2-9866-db24b99a9782 - Microsoft 365 Copilot
- ad9c22b3-52d7-4e7e-973c-88121ea96436 - Microsoft 365 Copilot (Education Faculty)
- 639dec6b-bb19-468b-871c-c5c441c4b0cb - Microsoft 365 Copilot (Enterprise)
- 9a18296a-025f-4e37-9ffa-30bf8d1ce775- Microsoft 365 E7 (The Frontier Suite)
- 15f2e9fc-b782-4f73-bf51-81d8b7fff6f4 - Microsoft Copilot for Sales
Set Up Microsoft Entra Graph API Access
To allow Microsoft Entra Graph API to send conversations to AI Exposure, run a deployment script in Azure CLI or Azure Cloud Shell.
- In AI Exposure, navigate to Settings > Integrations and click Add Integration.
- In the Integrations Library, select Microsoft Copilot. The Add Integration wizard opens.
-
On the Configuration page:
a. Enter a Name for your integration. The Console displays this name.
b. Select one of the following options:
- Use existing Microsoft Entra ID integration (Recommended) - Select an existing Microsoft Entra ID or create a new one.
- Do not use Microsoft Entra ID integration - Enter Tenant ID.
Note: Tenable recommends that you connect a Microsoft Entra tenant to enable identity visibility for synchronized user conversations.c. In the Access Verification section, click Verify. The system redirects you to log in to your Microsoft Entra ID tenant to verify access.
d. In the Deployment section, copy the script that appears in the wizard and run it in Azure CLI or Azure Cloud Shell to grant AI Exposure the required permissions.
After this step, create a security role and application user for the Tenable application.
Configure Power Platform Security Roles and Application User
Create a Custom Security Role
- Log in to the Power Platform admin center.
- In the left navigation bar, select Manage.
- Navigate to the environment you want to connect.
- Navigate to Settings.
-
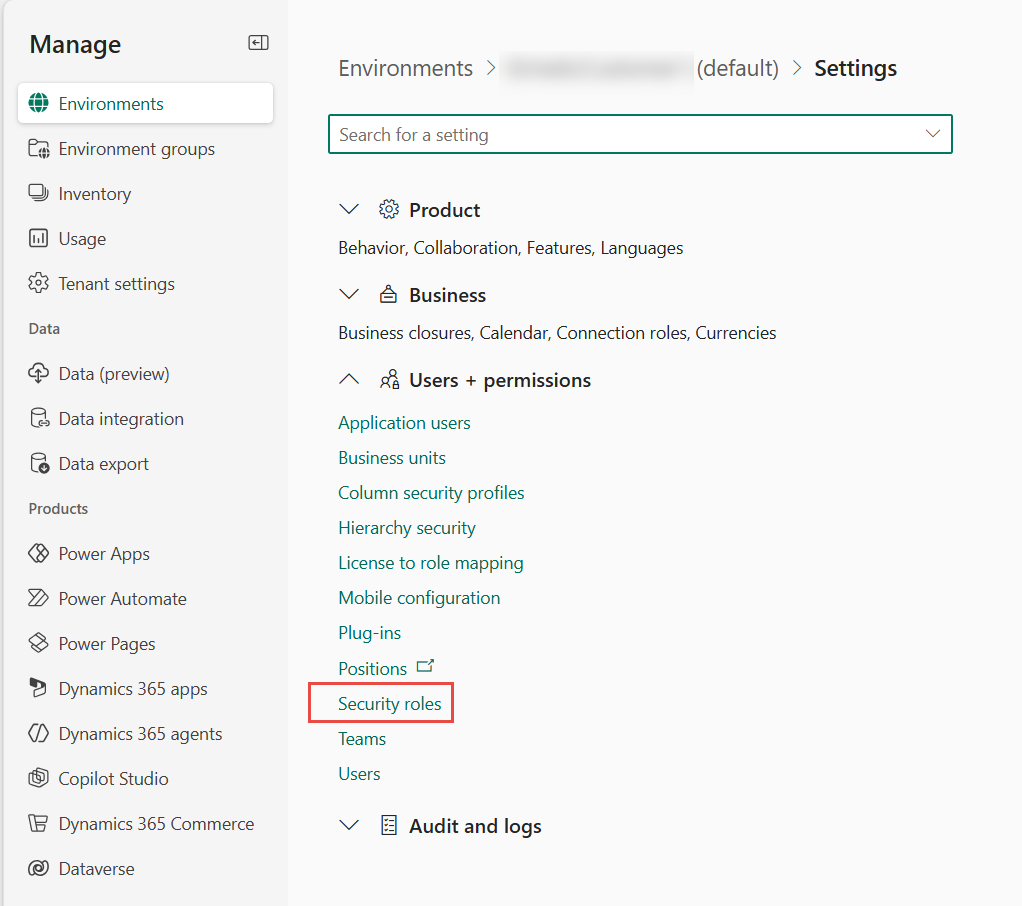
Click Users + permissions > Security roles.
-
Click New role.
Note: You must be a member of the Microsoft Entra ID environment to perform this step. You can verify that you are a member on the environment details page. If you are not a member, in the upper-right corner of the environment details page, select Membership and add yourself as a member. - In the Role Name box, enter Tenable Copilot Reader.
- In the Business Unit section, select a business unit from the list or create a new one. Then, copy the business unit name for future use.
- Select Applies to Tenable Copilot Reader.
- In the Description and Summary of Core Table Privileges boxes, provide any text that fits your use case.
- From the Member's privilege inheritance drop-down list, select Direct User (Basic) access level and Team privileges.
- Select the Include App Opener privileges for running Model-Driven apps checkbox.
- Click Save.
- Navigate to Settings > Security roles, and select the newly created Tenable Copilot Reader role. The role page appears.
-
Set Read access in the Organization scope for the following tables:
Table Name Permissions Agent bot Read (Organization) Agent component botcomponent Read (Organization) Agent component collection botcomponent collection Read (Organization) Connection Reference connectionreference Read (Organization) Security Role role Read (Organization) User systemuser Read (Organization) - Click Save.
Create an Application User
- Log in to the Power Platform admin center.
- Go to Manage > Environments and select your target environment.
- Click Settings.
- In the Users + permissions section, select Application users.
- Click + New app user.
-
Click + Add an app and search for Tenable One Cloud Exposure Copilot.
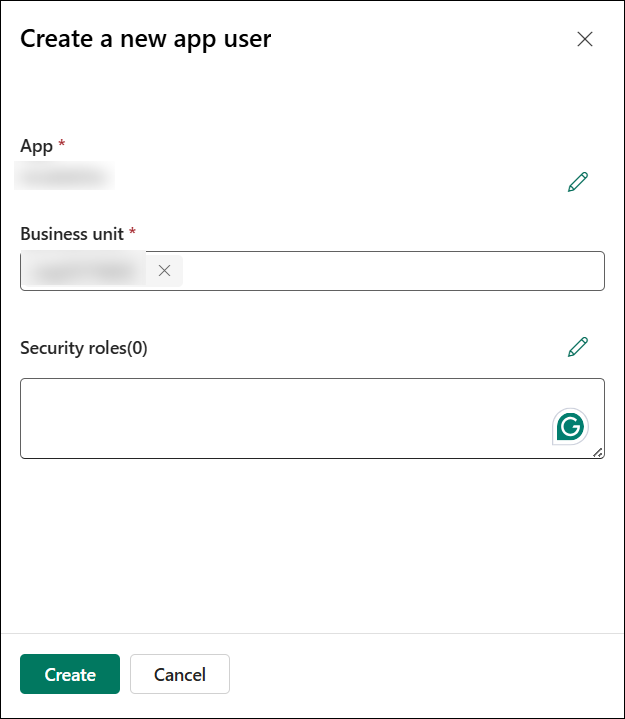
- In the Business Unit section, select the same business unit you used when configuring the selected security role.
- In the Security role section, select Tenable Copilot Reader role and click Save.
- Click Create.
- After configuring Power Platform by creating a security role and application user, click Next in the Console to proceed with the integration setup.
Connect Microsoft Copilot
- In the AI Exposure wizard, click Next to continue.
-
On the Scopes Page, select one of the following options:
-
Sync all current and future environments (recommended)
Important: Selecting the Sync all current and future environments (recommended) option does not automatically configure access in Power Platform. AI Exposure synchronizes an environment only after you create the security role and application user in that specific environment. This requirement applies to both existing environments and any environments you add in the future. AI Exposure cannot synchronize data from the environment until you complete this configuration. - Include specific folders and environments
- Exclude specific folders and environments
-
- Click Finish.
Next Steps
After the Microsoft Copilot integration is complete, it appears in the Settings > Integrations table. From here, you can manage your integration and view the integration status.