Export Assets
You can export assets data to CSV or JSON formats from the Assets page.
- Manual Selection — has a limit of 200 assets that you can export.
- Select all [number][asset_type]— has no limit on the number of assets to export.
To export assets from the Assets page:
-
In the left navigation, click
 Explore > Assets.
The Assets page appears.
-
Select one or more assets to export by doing one of the following:
-
Manually select up to 200 assets to export.
-
In the row for the asset(s) that you want to select, click the checkbox(es).
-
In the action bar, click the checkbox.
You will see [number] [asset_type] selected, based on the current number of items per page displayed.
Tip: You can modify the number of assets displayed in the table on a single page. For more information, see Workbench Tables.
-
-
Use Select all [number] [asset_type].
-
Manually select one or more assets.
A link to Select all [number] [asset_type] appears in the Action bar.
-
Click that link.
You now see [number] [asset_type] selected.
-
-
-
Select the Export action by doing one of the following:
-
Right click over any row.
A menu appears.
Click
 Export.
 -
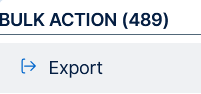
In the action bar, click
Export. -
On any row, click the
 button.
A menu appears.
Click
Export.
The Export dialog appears.
Note: You can also activate the Export action by clicking on the View Findings Details pane.
-
-
Configure the following export options:
Option Description File Name
Type a name for the export. Formats Select an export format:
-
CSV – A CSV file that you can open in a spreadsheet application such as Microsoft Excel.
Note: If your export file contains a field starting with any of the following characters (=, +, -, @), the system adds a single quote (') at the beginning of the field. For more information, see the Knowledge Base. -
JSON – A JSON file containing a nested list of assets properties.
Configuration Search for and select the fields to include.
Expiration Number of days the generated export file will be retained and displayed in the Export Activities list. Default is 30 days. A custom default value can be set in General Settings.
Schedule Turn on the Schedule toggle and set the following options:
- Choose an export Start Date and Start Time.
- Choose a Time Zone.
- Under Frequency, choose how often you want the export to repeat. Choose either Once or one of the following:
- Daily, also set Repeat Every.
- Weekly, also set Repeat Every and Repeat On (for example, Mo, Tu, We, etc).
- Monthly, also set Repeat Every and Repeat By (for example, Day of Month (Day 1)).
- Under Repeat Ends, choose when the exports end. If you choose Never, the export repeats until you modify or delete it.
Email Notifications Turn on the Email Notification toggle and set the following options:
- Under Add Recipients, type the emails to notify.
- Under Password, type a password for the export file which the recipient will need to enter.
-
-
Click Export.
The system processes the export and the file downloads to your computer. Processing may take several minutes.
Tip: If you close the Export dialog before the download completes, you can access the export file in
 Settings > Exports.