Create a Ticket from Findings
Required User Role: Administrator
On the Findings page, you can select any number of findings on which you want to take action by creating a ticket. This ticket can then be used to track the remediation effort on the finding or findings.
Tickets created from the Findings page are considered "manual", because they do not currently support automated status updates.
To create a manual ticket from the Findings page:
-
In the left navigation, click
 Explore > Findings.
 The Findings page appears.
-
Manually select up to 200 findings.
-
In the row for the finding(s) that you want to select, click the check box(es).
-
In the action bar, click the check box.
You will see [number][findings_type] selected, based on the current number of items per page displayed.
Tip: You can modify the number of items displayed in the table on a single page. For more information, see Workbench Tables.
-
-
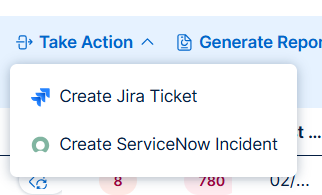
In the action bar, click Take Action.
A drop-down menu appears.
-
Select one of the following options:
-
Create Jira Ticket — Create a manual Jira ticket based on the selected findings.
-
Configure the following options:
Option Description Action to Perform Select how you want Tenable Vulnerability Management to aggregate tickets for the finding:
-
New ticket for every new finding — Every time a finding appears, a new ticket gets created in Jira.
-
New findings create subtasks on an existing ticket — Every time a finding appears, a subtask gets created on an existing Jira ticket.
Project The Jira project in which you want tickets to be created.
Important: You must have at least one Jira project for the configuration to function as expected.Existing Jira Ticket (optional) Select the existing Jira ticket from the drop-down list.
Note: You see this option only if you choose New findings create subtasks on an existing ticket.Work Type The specific type of issue created, for example, Story, Task, or Bug. Summary The Jira Summary combines the finding name, asset name, and this text to create a descriptive ticket title. Description A detailed explanation of the issue, context, and steps to reproduce (if applicable). Priority The relative importance or severity of the issue. Default value: Default Mapping.
Note: Leave this set to Default Mapping to allow the priority to be set by the finding severity based on your Jira instance configuration. For more information about overriding this severity, see Configure Jira.Reporter The user who created the issue and submitted it to the project. Assignee The user to which the ticket or subtask is assigned in Jira. Parent The larger issue (for example, an Epic) under which the current item is nested. Labels Custom tags you want to apply to the ticket for flexible categorization and filtering.
-
-
-
Create ServiceNow Ticket — Create a manual ServiceNow ticket based on the selected findings.
-
Configure the following options:
Option Description Action to Perform Select one of these two options:
-
New incident for every new finding
Every time a finding appears, a new incident gets created in ServiceNow.
-
New findings create subtasks on an existing incident
Every time a finding appears, a subtask gets created on an existing ServiceNow incident.
Existing ServiceNow Incident (optional) Select the existing ServiceNow incident from the drop-down list.
Note: You see this option only if you choose New findings create subtasks on an existing incident.Caller The user who originally reported or requested the issue. Assignment Group The team or group responsible for managing and resolving the ticket. Assignee The individual user currently responsible for resolving the ticket. Category A high-level classification of the issue or request, for example, Hardware, Network, Software. Subcategory A more detailed breakdown within the selected Category, for example, Laptop, Wireless, OS. Impact The measured effect this issue has on the business process or service. Values are Default, High, Medium or Low.
Note: Set this to Default to allow the finding severity to set the impact based on your ServiceNow instance configuration. See Configure ServiceNow. You can override it here.Urgency The speed required to resolve the issue, based on business needs. Values are Default, High, Medium or Low. Note: Set this to Default to allow the urgency to be set by the finding severity based on your ServiceNow instance configuration. See Configure ServiceNow. You can override it here.Tags Any tags or labels you want to apply to the incident. Short Description This value is appended to the name of the finding. Description Additional descriptive information for this incident. -
-
-
-
Click Create.
Tenable Vulnerability Management creates the ticket based on the selected finding data. It can take up to 10 minutes to see the updated ticket information in both Tenable Vulnerability Management and the selected ticketing system.