Install OT Security Sensor
Installation of OT Security sensor involves pairing sensors with the Industrial Core Platform (ICP). To pair sensors with the OT Security ICP, use both the ICP management console and the sensor’s Tenable core user interface.
You can either enable automatic approval for incoming pairing requests, or disable automatic approval and allow only manual approval for each new sensor pairing request.
Before you begin
Make sure that the following conditions are met:
-
The Sensor hardware is properly installed (see Set up the Sensor).
-
The Sensor is connected to your network switch (see Connect the Sensor to the Network).
-
The Sensor has its own static IPv4 address (see Access the Sensor Setup Wizard).
-
The Sensor is connected to the Tenable Core platform and you have a username and password for logging into the Core User Interface. For more information on using the Tenable Core user interface, see the Tenable Core + Tenable OT Security User Guide.
-
A valid certificate in the ICP console (see Certificate).
Pair the Sensor
To pair a Sensor version 3.14 or later with the ICP:
-
In the ICP Management Console (user interface), navigate to the Settings > Sensors window.

-
To enable automatic approval of Sensor Pairing, ensure that the Auto Approve Incoming Sensor Pairing Requests switch at the top of the page is toggled to ON. If not, all pairing requests require manual approval.
-
Open a new tab, leaving the ICP tab open, and type <Sensor IP>:8000 to open the Sensor's Tenable Core user interface.
Note: You can only access the Tenable Core user interface from the latest version of Chrome. -
In the Tenable Core console login window, type your Username and Password, select the Reuse my password for privileged tasks checkbox, and click Log In.
 Important: If you do not select the Reuse my password for privileged tasks upon login, you cannot restart the sensor service.
 -
In the navigation menu bar, click OT Security Sensor.
The OT Security Sensor Pair window appears.
 Note: The Tenable OT Security Sensor Pair window only appears the first time the page loads. To open the window after this, click the
 button in the Pairing Info section of the Tenable Core console.
 -
In the ICP IP Address box, type the IPv4 address for the ICP to pair with this sensor.
-
To use unauthenticated (unencrypted) pairing, select Unauthenticated Pairing and skip to step 8.
Note: Sensors that use Unauthenticated Pairing can only passively scan their network segments and the ICP cannot manage them to send Active Queries. -
To authenticate the pairing, do one of the following:
-
In the ICP User box, type the ICP username and the ICP password in the ICP Password box.
-
In the ICP API Key box, type an API Key for the ICP.
Note: Tenable recommends that you create a dedicated ICP user for pairing sensors in order to ensure connectivity during the pairing process (see Adding Local Users).
Note: The authentication method that uses username and password offers the advantage of non-expiring credentials unlike an API Key, which eventually ages out. -
-
Click Pair Sensor.
-
To use a certificate offered from the ICP:
-
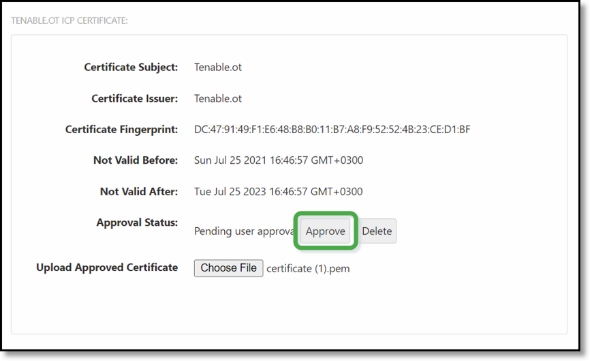
In Tenable Core, in the Tenable ICP Certificate section, under Approval Status, wait for the certificate information to load.
-
Click Approve to approve the certificate.
-
In the Confirm Accept Tenable OT Security Server Certificate window, click Accept This Certificate.
If you prefer to upload a certificate manually:
-
In the Tenable ICP console, follow the procedure described in Generating an HTTPS Certificate.
-
In Tenable Core, in the Tenable ICP Certificate section, under Upload Approved Certificate, click Choose File.
-
Navigate to the .pem certificate file to upload.
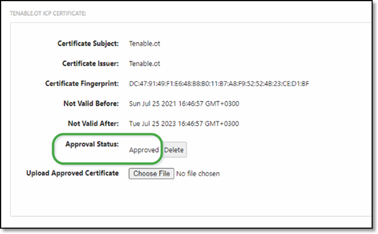
Once a valid certificate loads correctly, its Approval Status in the OT Security ICP Certificate table shows as Approved.
-
-
-
In the ICP user interface, navigate to Local Settings > Sensors.
OT Security displays the new sensor in the table, and the Status shows Pending Approval.

-
Click on the Sensor’s row, then click Actions (or right-click on the row) and select Approve.
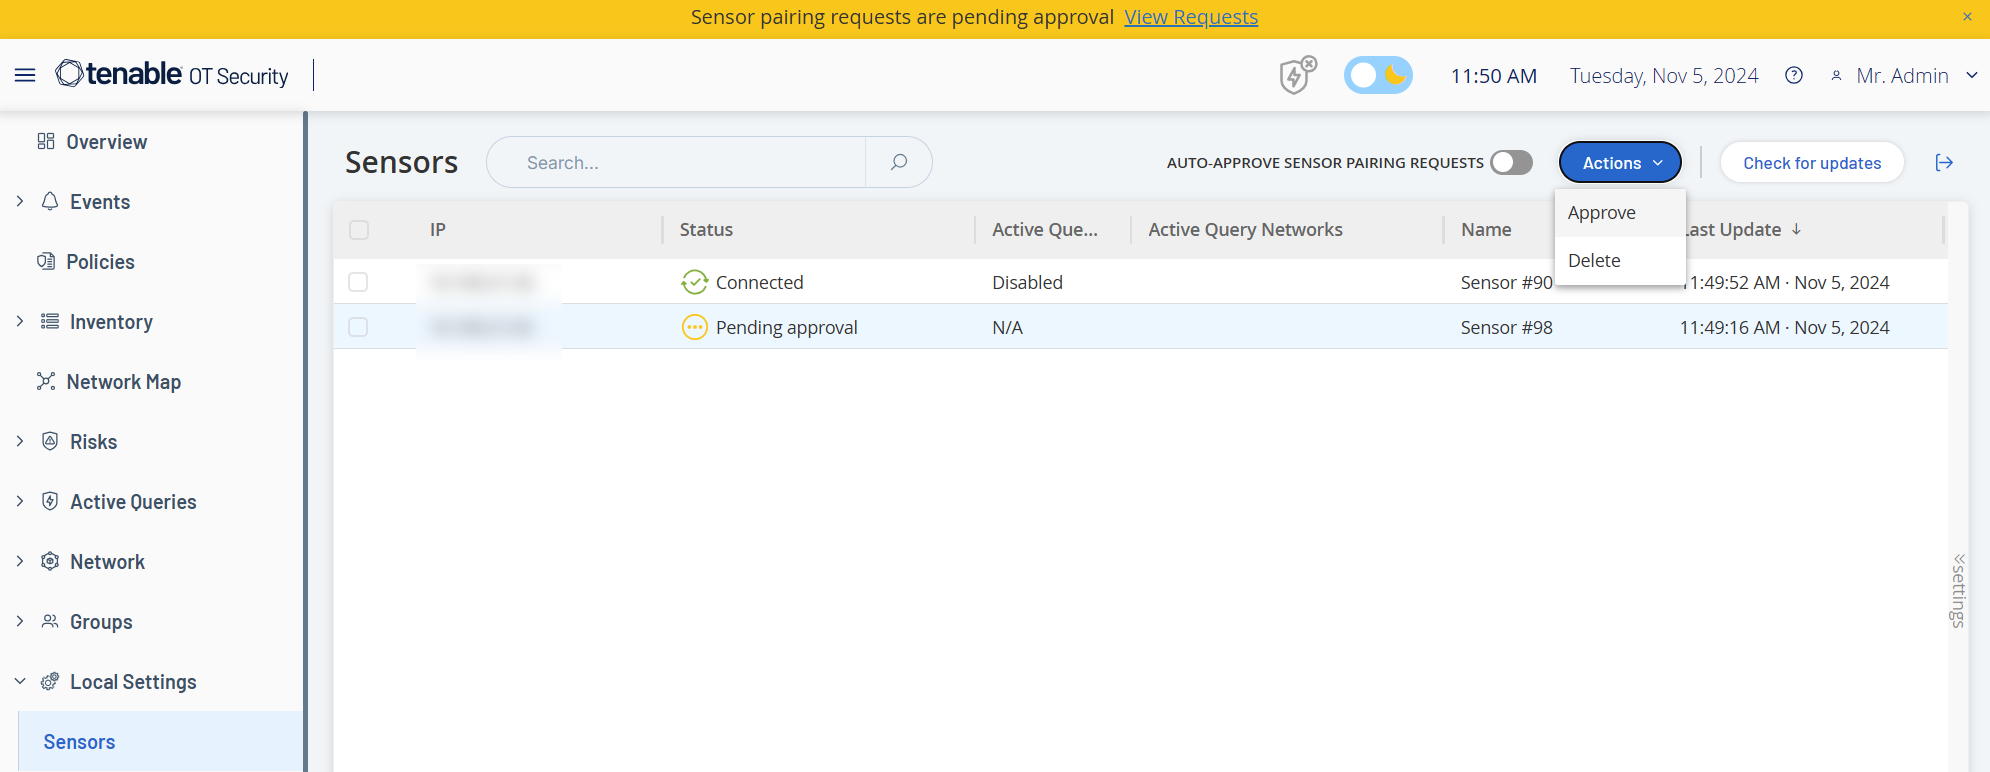
The Status switches to Connected, indicating a successful pairing. Other possible statuses are:
-
Connected (Unauthenticated) — The sensor is connected in unauthenticated mode. The sensor can only execute passive network detection.
-
Paused — The sensor is connected properly, but paused.
-
Disconnected — The sensor is not connected. For an authenticated sensor, this may result from an error in the pairing process. For example: tunnel error and API issue.
-
Connected (Tunnel error) — The pairing is successful, but communication over the tunnel is inoperable. Check the connectivity of the port 28304 from the sensor to the ICP. For more information, see Firewall Considerations.
Once OT Security completes the pairing for an Authenticated Sensor, you can configure Active Queries to run on that Sensor.