Inventory (Properties and Labels)
Add custom properties and labels that can be applied to resources to:
- Add additional context for risk assessment.
- Help further enrich your environment by allowing you to correlate them with factors like excessive permissions and network exposure (labels).
- Send notifications to resource owners when specific findings are created in Tenable One Cloud Exposure (custom properties).
For example, you may want to apply labels to sensitive buckets/databases, or to instances with vulnerabilities.
Manage Custom Properties
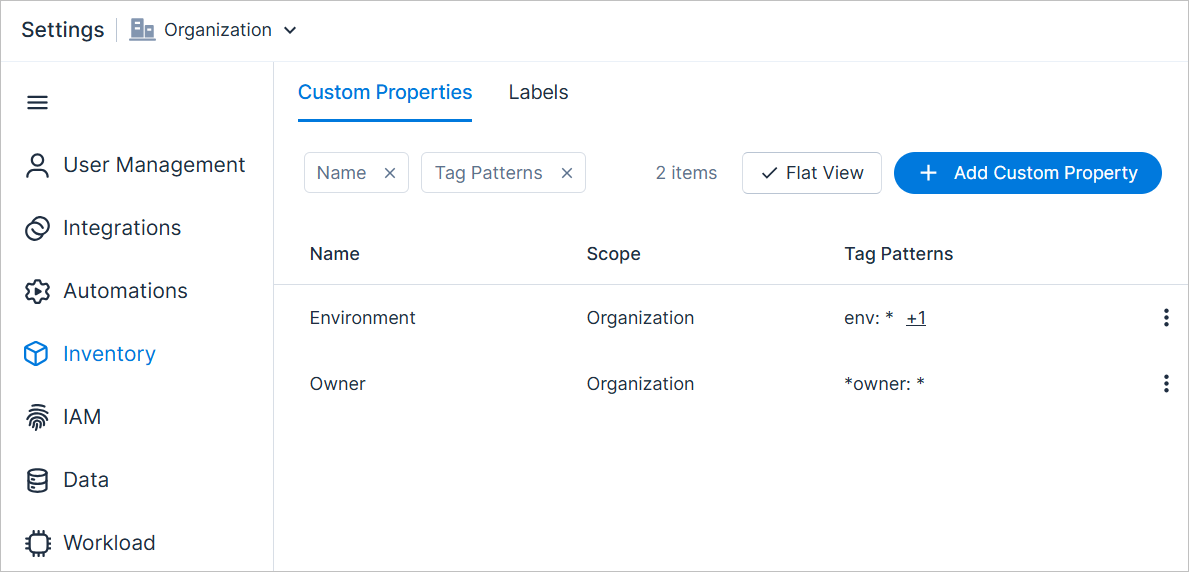
Custom properties can be populated automatically via cloud tag patterns (key-value pairs), or assigned manually by users directly in the Inventory. Manage custom properties from the table in Settings > Inventory > Custom Properties.
| Item | Description |
|---|---|
| Name | The name of the custom property. |
| Scope | The account hierarchy within the Cloud Exposure folder structure, indicating for which scope the custom property was configured. The account path is dynamic, and changes if the account is moved to a different folder. |
| Tag Patterns | The tag key-value pair, based on text patterns found in tag keys or patterns. Use * to indicate zero or more characters, or ? to indicate a single character. Resources tagged with key-value pairs that match the pattern you define are populated with a custom property. |
| Create Custom Property | Create a new custom property. |
| Edit | Edit a property. Available for custom properties created on the currently selected scope. |
| Delete | Delete a property. Available for custom properties created on the currently selected scope. |
Resource Owners
The owner tag is used across cloud providers to indicate the owner and main user of a given resource, and can be a single user or group.
Tenable searches across users/groups in all your integrated identity providers, and displays entities that match the tag pattern. Tenable first searches for matching email addresses, based on the tag pattern. Next, in the case of groups, Tenable then searches for any relevant group name. If none are found, the owner is listed as an Unknown Principal.
In Cloud Exposure, you can assign multiple distinct owners to a single resource to reflect complex shared-responsibility models. This ensures the right person is contacted for the right issue, reducing alert fatigue. For example, you can define both an Application Owner and a Platform Engineer.
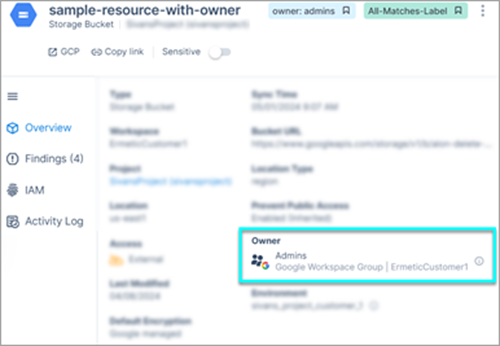
In addition to being displayed in the Inventory:
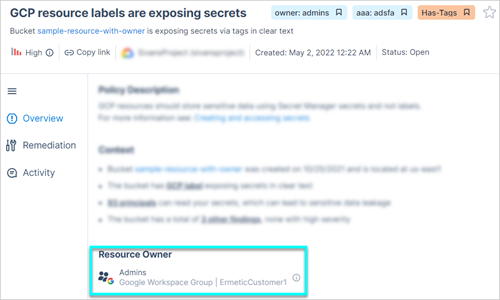
- The Owner custom property is displayed in any finding with an associated resource that has the Owner property applied.
- When sharing such findings via email, you can choose to send to all resource owners. See Automations and Manually Trigger Actions Based on Findings for details.
- When creating a Findings report, you can choose to send a mail per resource owner to send each resource owner a report of findings associated with their resources.
Custom Property Inheritance
Custom properties defined at a higher organizational scope, such as the account or project level, are inherited by all resources within that scope. This allows for efficient application of properties across numerous resources without needing to define them individually. This inheritance mechanism provides a powerful way to enrich your environment with contextual information. For example, if a GCP project is tagged with product:security-tool, all resources within that project, such as a virtual machine, will automatically inherit the product:security-tool tag.
Add a Custom Property
After you create a property, it will be reflected in relevant resources the next time data is synchronized in your environment.
To create a custom property:
- Navigate to Settings > Inventory > Custom Properties.
- Select a scope in the Organization tree on the left to create the custom property for a specific subset of accounts.
- Click Create Custom Property.
- Enter a meaningful Name.
-
Choose the Type of custom property you want to define:
- Owner
- Custom
- Decide whether to Use tags.
-
If tags are used, enter a Tag Key Pattern and Tag Value Pattern.
Note: Keep the following in mind when you define a value pattern:- Use * to indicate zero or more characters, or ? to indicate a single character.
- By default, the value pattern is set to *, but you can update as needed.
- You can add multiple patterns.
- Resources tagged with key-value pairs that match the pattern you define are populated with values for the property accordingly.
- Choose whether or not to Ignore case (treat upper- and lower-case letters the same).
- Click Create.
View Custom Properties in the Console
You can see custom properties in the Console (for AWS, Azure, and GCP):
- As filter and relation criteria in the Explorer.
- As columns/filters which you can use to sort resources.
-
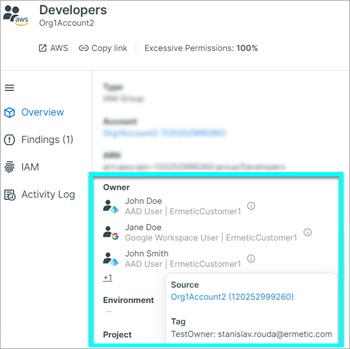
When you drill-down into a specific resource. A tooltip is displayed next to matched values indicating:
- Automatic values (tags):
- Source — The resource/account where the tag is defined in the cloud provider. Tenable first looks for a tag defined on the resource itself. If none exist on the resource, Tenable then looks for a tag defined on any parent-level resource, or on the account level.
Tag — The key and value of the cloud tag used to populate the property.
- Manual values:
Source / User. The name and email address of the user who made the change.
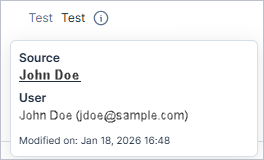
- Automatic values (tags):
Custom properties are displayed for the account scope/s that they were created on.
Edit Custom Properties in the Inventory
Manually assign and bulk-edit custom properties via the Cloud Exposure Inventory, independent of cloud tags. For example, instantly assign an owner to a critical, untagged S3 bucket. This ensures accurate security context and routing, even when cloud metadata is missing or incorrect, without requiring DevOps to update tags in the cloud provider.
Properties set at a higher level automatically propagate to all resources in that scope unless specifically overridden.
To edit custom properties:
- Navigate to Explore > Inventory.
- Search for, or navigate to the relevant inventory page.
- Click on the three dots menu next to the relevant resource and then click Edit custom properties.
- Select the relevant property.
-
In the Edit Property dialog, choose:
- Automatic value (Default) — Use the value that is automatically populated via cloud tag patterns (key-value pairs).
- Manual value — Manually assign a value, independent of cloud tags.
-
For manual values, do one of the following:
- Enter a single value.
- Enter multiple values by pressing Enter (for example, if a single resource has multiple stakeholders).
- Click the Empty value button to use an empty value and clear specific data.
- Click Save.
Manage Labels
Create labels that can be applied to resources in the following ways:
- Manually
- Automatically, based on tags
View and manage custom labels from the table in Settings > Inventory > Labels.
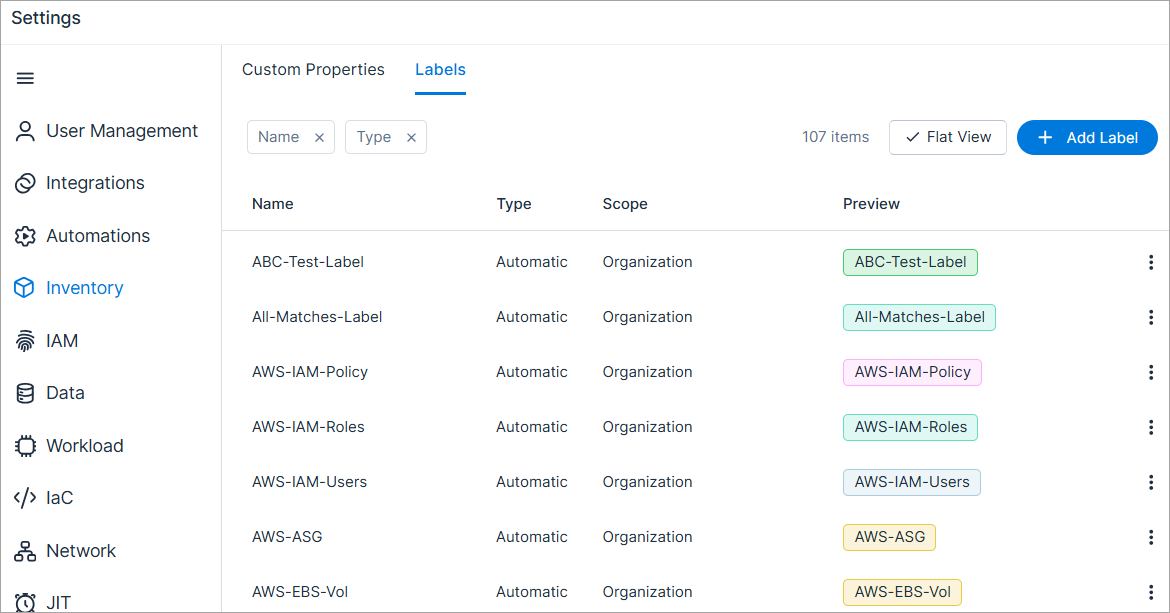
| Item | Description |
|---|---|
| Name | The name of the label. |
| Type |
|
| Path | The account hierarchy within the Cloud Exposure folder structure, indicating for which scope the label was configured. The account path is dynamic, and changes if the account is moved to a different folder. |
| Preview | A preview of how the label will look in the Cloud Exposure Console, after it's applied to a resource. For long label names, hover over the preview to see the full name. |
| Flat View |
By default, the table displays items defined in the selected scope and parent scopes. Click Flat View to also see any items defined in children scopes. |
| Add Label | Add a new custom label. |
| Edit | Edit a Label. Available for labels created on the currently selected scope. |
| Delete | Delete a label. Available for labels created on the currently selected scope. |
| View | Read-only view of a label. Available for labels created on parent-level scopes. |
Add a Label
After you create an automatic label based on tags, relevant labels are applied to resources the next time data is synchronized in your environment.
To create a custom label:
- Navigate to Settings > Inventory > Labels.
- Select a scope in the Organization tree on the left to view and manage labels for a specific subset of accounts.
- Click Add Label.
- Select a color for the label.
-
Choose the type of label you want to define:
- Manual label — Enter a label name.
- Automatic label based on exact tag key — Select a tag key. Resources with the key that you define are automatically labeled accordingly.
- Automatic label based on exact tag key and value. Select a tag key-value pair, and, optionally, give the label a name. Resources with the specific key-value pair that you define are automatically labeled accordingly.
Automatic label based on tag key and value patterns.
- Give the label a Name. To create dynamic label names, use the {key} and/or {value} placeholders in the name. Otherwise, enter a static name to use a single label name. For example, if you enter dynamicLabel:{value} as the label name, a matching resource with a tag value of 32 will receive a label name of dynamicLabel:32 in Cloud Exposure.
- Select a tag key-value pair, based on text patterns found in tag keys or patterns. Use * to indicate zero or more characters, or ? to indicate a single character. Resources tagged with key-value pairs that match the pattern you define are automatically labeled accordingly.
- Choose whether or not to ignore case (treat upper- and lower-case letters the same).
Note: For automatic labels, the value entered can't be only white/blank spaces.
- Click Create.
Edit a Label
You can change the color, name, and other details of a label.
- For automatic labels, you can change the logic of the label. For example, you can change from Automatic label based on exact tag key to Automatic label based on tag key and value patterns.
- You can't convert automatic labels to manual labels, or vice versa.
- Changes to automatic labels take effect the next time data is synchronized in your environment.
To edit a custom label:
- Navigate to Settings > Labels.
- Select a scope in the Organization tree on the left to view and manage labels for a specific subset of accounts.
- Click on the three dots menu
 and then click Edit.
- Make any required changes, and then click Save.
Built-in System Labels
The following system labels are built-in to Cloud Exposure and are automatically applied to resources as relevant.
| Label | Meaning |
|---|---|
| 3rd Party | An identity used by a third party vendor |
| Microsoft Entra ID External | An Microsoft Entra user that authenticates via a different Microsoft Entra organization or an external identity provider |
| Microsoft Entra ID Privileged | An identity that has a privileged Microsoft Entra administrative role assigned to it. Microsoft assigns a Privileged label to a sub-set of Microsoft Entra built-in roles. If you work with other Microsoft Entra roles that you also want to be considered privileged within Cloud Exposure, you can define them as such. |
| Admin |
A principal with admin privileges.
Admin label trumps Privileged label: A principal can have at most one of these labels per account. However, a principal may have both labels across different accounts - for example, holding the Admin label on one account and the Privileged label on another. |
| Anomaly | A resource that was observed performing unusual behavior |
| Access Keys | An identity with active access keys |
| Disabled | An identity that's disabled |
| Excessive | An identity with high severity excessive permissions |
| Guest | An identity that's a guest user |
| IaC | A resource that's managed by code in one of your repositories. |
| Inactive | An identity that is inactive |
| JIT | JIT eligibilities can be requested for this permission or group |
| No Credentials | An identity with no password or active access keys |
| No MFA | An identity without MFA enabled |
| OS Unpatched | A resource running a version of the operating system for which there is a large number of known vulnerabilities |
| OS End-of-Life | A resource running a version of the operating system which is at or nearing End-of-Life |
| Privileged |
Admin label trumps Privileged label: A principal can have at most one of these labels per account. However, a principal may have both labels across different accounts - for example, holding the Admin label on one account and the Privileged label on another. |
| Public | IAM: A resource that is accessible to any identity Network: A resource that is directly or indirectly exposed to the internet A virtual machine must be running to be labelled as Public. |
| Public Compute | An identity that is linked to a compute resource that is accessible from a wide range of public IP addresses. |
| Sensitive | Excessive permissions on sensitive resources. Applied to resources that are marked as sensitive and resources with access to that resource. |
| Trusted Service | Used by a trusted AWS service |
| Unused | A GCP project that's unused |
| Vulnerable | A resource that has critical vulnerabilities |
| Vulnerable Compute | An identity that's linked to a compute resource that has critical vulnerabilities |
For more information about prioritizing VMs that are both vulnerable and privileged, see Secure Vulnerable Privileged VMs.