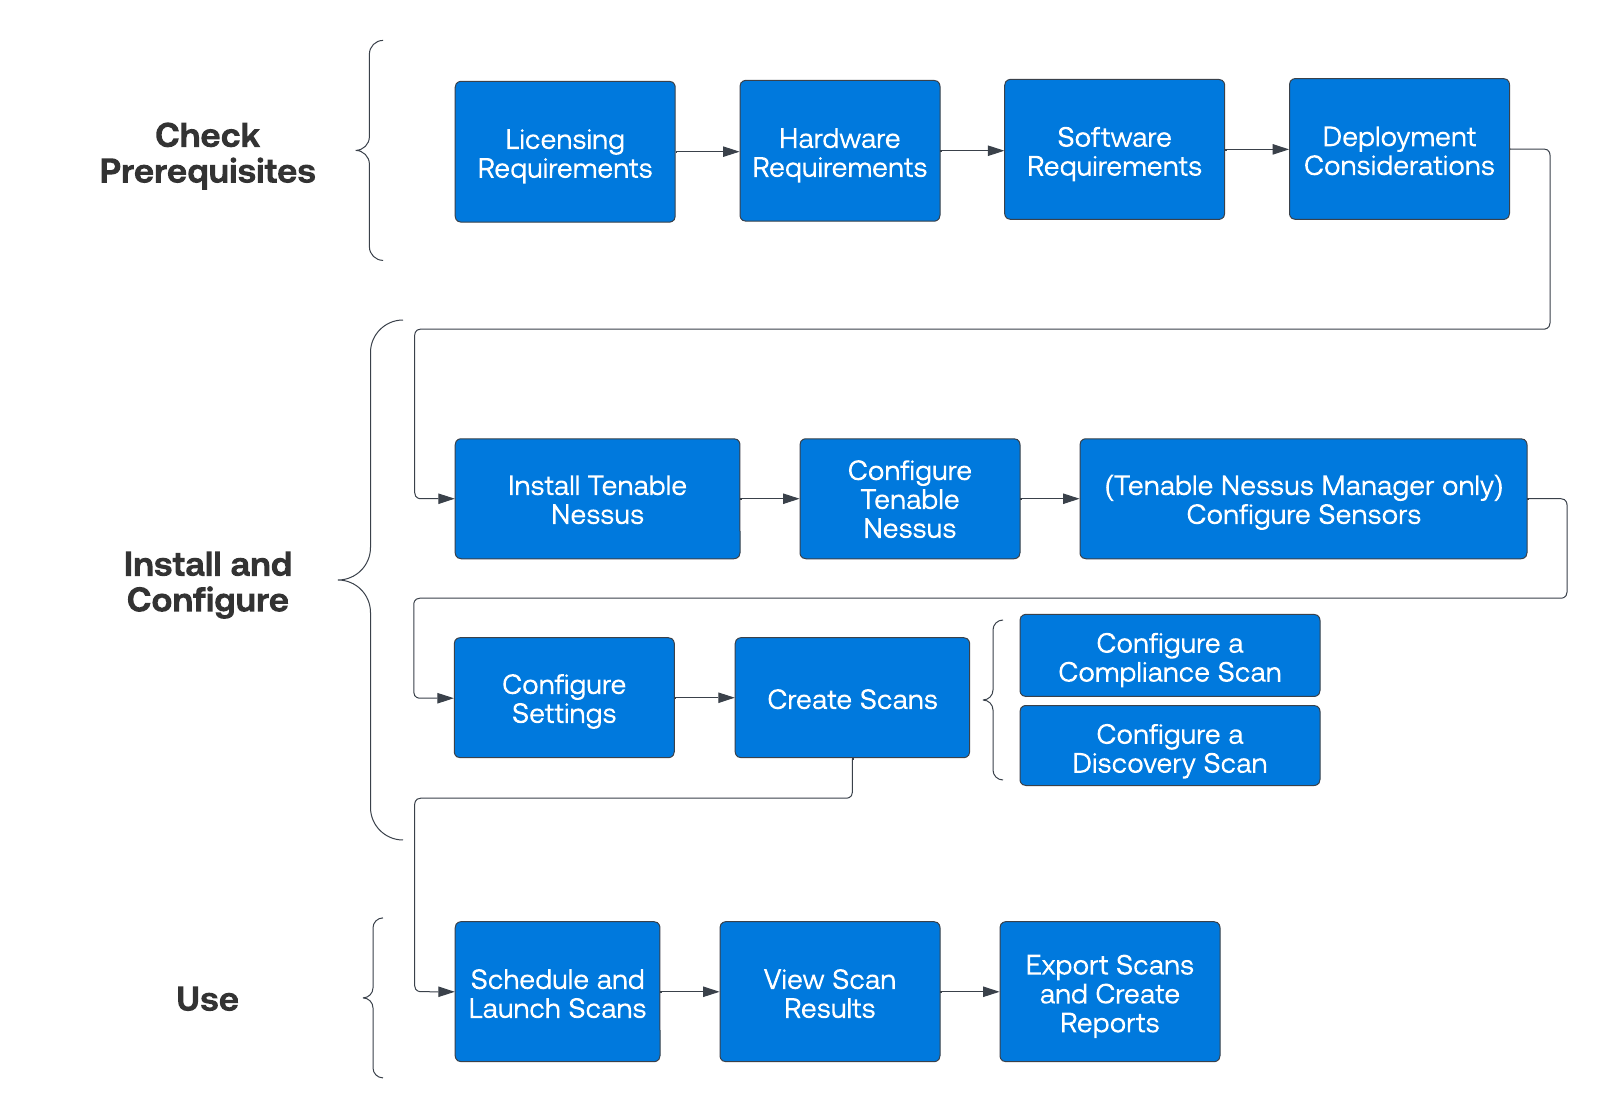
Get Started with Tenable Nessus
Tip: Click a box to view the relevant task.

Prepare
-
Ensure that your setup meets the minimum system requirements:
- Obtain your Activation Code for Tenable Nessus.
Install and Configure Tenable Nessus
-
Follow the installation steps depending on your Tenable Nessus software and operating system, as described in Install Tenable Nessus.
-
Perform the initial configuration steps.
Create and Configure Scans
- Run a host discovery scan to identify assets on your network.
- Create a scan.
- Select a scan template that fits your needs.
- Use a Tenable-provided scanner template.
- (Tenable Nessus Manager only) Use a Tenable-provided Agent template.
- Create and use a user-defined template by creating a policy.
- Configure the scan:
Configure the scan settings available for your template.
For information about scan targets, see Scan Targets.
- (Optional) To configure live results, see Live Results.
- (Optional) If you are running a credentialed scan, configure credentials.
- (Optional) If you are running a compliance scan, select the compliance audits your scan includes.
- (Optional) If you are using an advanced scan template, select what plugins your scan includes.
- Launch the scan.
View and Analyze Scan Results
- View scan results.
- View and manage vulnerabilities.
- Manage scan folders.
- Create a scan report or export.
Refine Tenable Nessus Settings
- Adjust scan settings to address warning messages.
- Monitor scanner health.
- Configure Tenable Nessus advanced settings.