IaC Policies
This is a how-to guide for managing policies and configuring how findings are created in Tenable One Cloud Exposure.
- For a how-to guide about viewing and monitoring IaC findings, see IaC Findings.
- For a conceptual overview of how finding severity works, see Finding Severity.
After setting up Cloud Exposure IaC Security to detect and fix issues in configuration files, you can view and manage IaC policies to monitor your environment.
IaC/Code Policies IaC policies can be disabled/excluded via the Exclusions and the Policies pages. It's important to note that any exclusions you configure always override any inclusions, as follows:
- If you excluded a policy via the parameters in the Exclusions page, but the policy is enabled in the Policies page, the policy is excluded from the scan.
- If you disabled a policy in the Policies page (or defined a relevant exclusion), but the policy is included (either explicitly or implicitly) via the Exclusions page, the policy is excluded from the scan.
Manage Policies
To view and manage policies:
-
In the Cloud Exposure Console, click on Policies > IaC Policies.
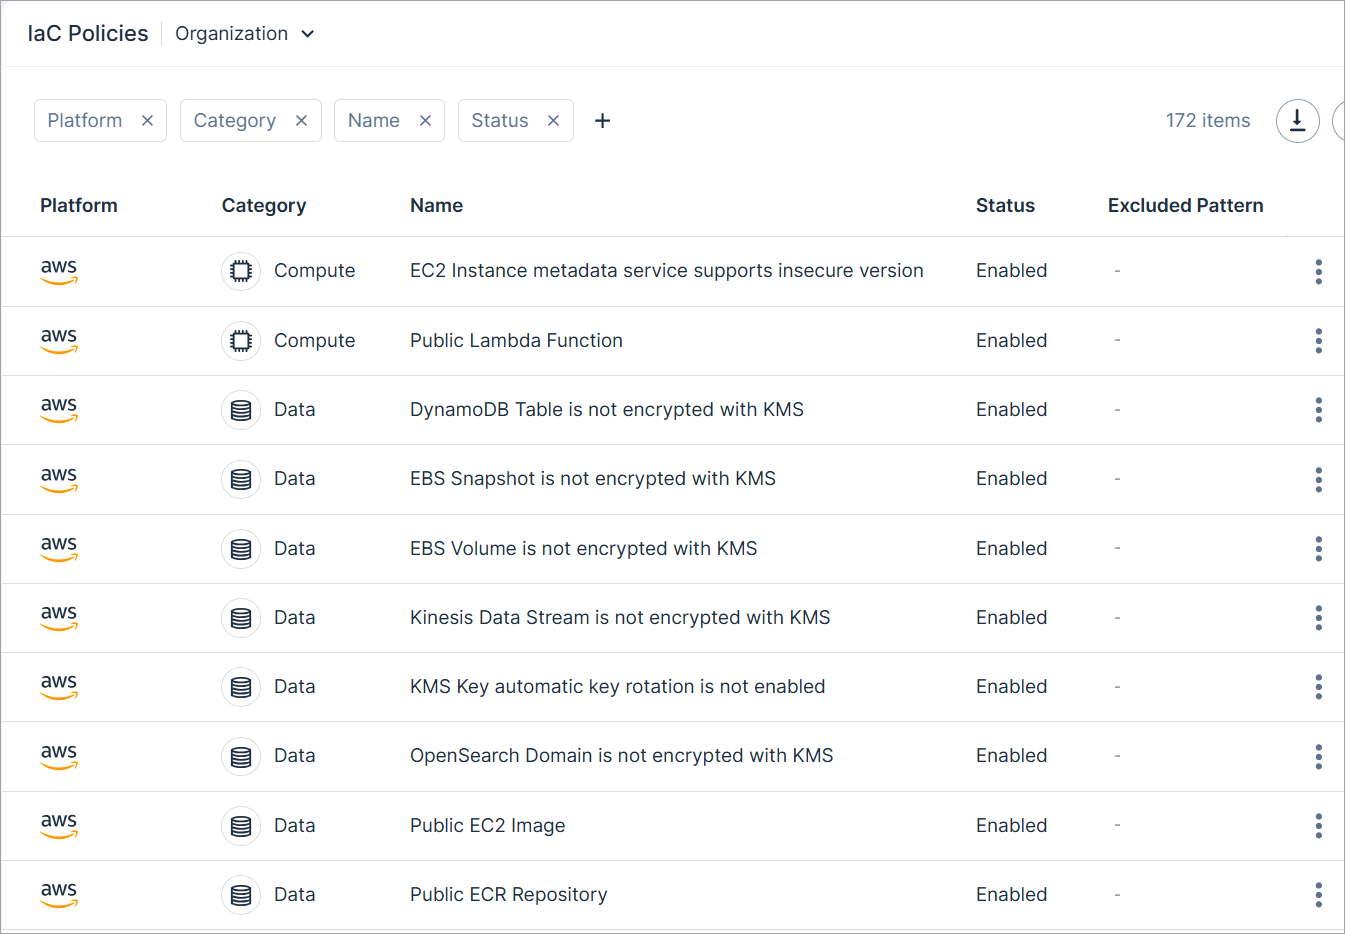
- Select a code tenant in the Organization drop-down to view and manage policies for a specific subset of organizations/repositories. By default, the entire Organization (all organizations/repositories) is selected.
- Filter the table to narrow the scope of the visible data. Use the column picker on the top right of the table to choose which columns to display. See IaC Policy Column Data for more information.
-
Click a policy to open a slideout panel with more information. Review and manage the policy. See IaC Policy Column Data for more information.
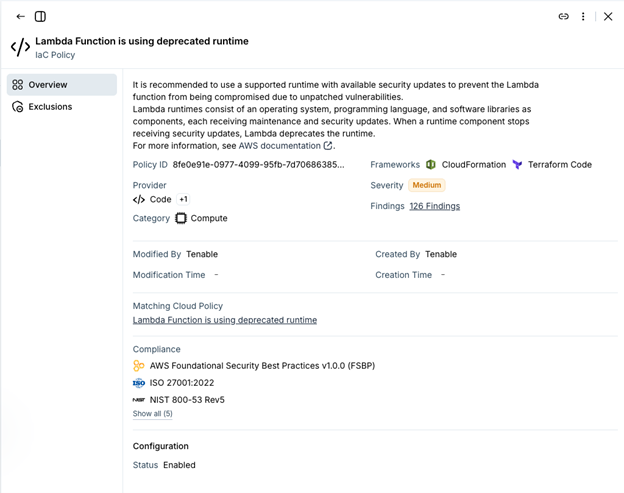
- Edit configuration for a policy. You can perform the following policy management activities:
IaC Policy Column Data
The following columns appear in the table on the page, and most of them can also be used to filter data in the table:
| Filter | Description |
|---|---|
| Platform | For example, the cloud service provider or IdP. Possible values: AWS, Azure, Microsoft Entra ID, Code (IaC-unique policies), GCP, or OCI. |
| Severity | The severity level of the policy. |
| Category | The logical category that the policy belongs to. See Policy Categories. |
| Name | The name of the policy. |
| Compliance | Compliance standards and security best practices that map to policy benchmarks. |
| Status | Whether the policy is enabled or disabled. You can Enable and Disable IaC Policies so that the policies don’t trigger findings for resources in those accounts. |
| Findings | See how many IaC findings are open for the policy. |
Policy Settings  |
|
| Frameworks | See which IaC frameworks are supported by each IaC policy. |
Enable and Disable IaC Policies
By default, out-of-the-box policies are enabled (except for Monitoring policies) and apply to all accounts in your organization. You can choose to fine-tune this by either disabling a policy across your entire organization, or just for a specific subset of accounts or folders.
To enable or disable a policy:
- In the Cloud Exposure Console, click on Risks > Scans > Code Scans.
- Select a code tenant in the Organization drop-down to enable/disable a policy on a specific subset of cloud accounts. By default, the entire Organization (all organizations/repositories) is selected.
- Navigate to the relevant IaC policy.
- Click the icon, and then Edit.
-
In the Status section, choose a relevant option:
- Inherit — Inherit the configuration of the parent-level account scope (default). The inherited configuration is shown in parentheses, next to the name of the parent-level scope. If you selected the entire Organization as the scope, this option does not appear.
- Enabled (overrides parent-level configuration). Findings are created when policy rules are violated.
- Disabled (overrides parent-level configuration). Findings are not created when policy rules are violated.
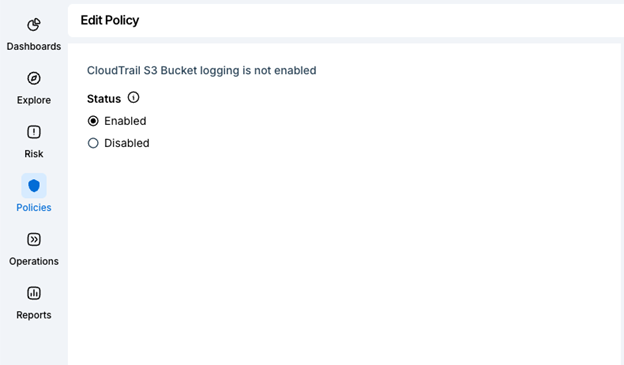
- Click Save.
Set Exclusions in IaC Scans
You can exclude specific paths, resource types, or resource name patterns from code-based scans to prevent potential findings related to those resources. For each exclusion option, enter a pattern you would like to exclude. If the pattern matches the relevant option, Cloud Exposure will exclude it from the scan. The configuration options are combined using an AND condition, and all are optional. Additionally, you can add a comment explaining the reason for excluding the resource. For more information, see Exclusions.
Required Cloud Exposure User Role: Excluding resources from policies is available to users with either the Collaborator or Administrator role.
To create an exclusion for IaC scans:
- Go to Policies > Exclusions.
- In the Organization dropdown, select an account scope. By default, the entire organization (all accounts) is selected.
-
Click Add Exclusion.
Note: You cannot change the account scope after you start creating an exclusion. -
Enter a Name and Description.
- Use a clear, business-focused name (for example, Publicly known EC2 instances for QA).
- Describe the reason or justification for the exclusion.
-
Under Action, choose what happens when findings match the exclusion:
- Ignore — Excludes the matching findings from the Open Findings list.
- Provide a Reason for the findings to be ignored. When a finding is ignored, the sub-status can be Exception, By design, or False positive.
- Change severity — Lowers or raises the severity of matching findings.
- Ignore — Excludes the matching findings from the Open Findings list.
-
Define the scope of the Target Findings:
- For Type, select IaC.
Under Policies, choose All policies or Specific policies to target.
Tip: Select specific policies that match your defined business case.
- Optionally, add a Severity filter to include only findings of certain severities.
-
Define the Target Resources.
In the Code field, enter a pattern using the following wildcard characters:
- * (asterisk) — Matches zero or more characters
- ? (question mark) — Matches a single character
For example, names with the pattern aol-* .
-
Under Expiration, select Never or an expiration date.
After the expiration date, the exclusion no longer applies to the findings. If no other exclusion affects those findings, they are reopened or their severity reverts.
- Review your configuration in the Findings Preview panel, which lists all targeted open findings. Verify that your filters, retention, and scope accurately target the intended results before saving.
- Click Save.
The exclusion takes effect in the next scan cycle and updates all matching findings.
Export IaC Policy Data
Export policy data to a CSV file. The data is exported according to the current filters applied to the table, and contains all relevant policy data, including a URL for the Findings page filtered with the specific findings triggered by the policy.
To export IaC policy data:
- (Optional) Select a code tenant in the Organization drop-down to view policies that are relevant to a specific subset of cloud accounts. By default, the entire Organization (all organizations/repositories) is selected.
- Filter the table to narrow the scope of the visible data.
- From the top-right corner of the table, click the Export
 button.