Request Access
Request access to relevant accounts for a specific duration, which can be either a one-time grant or a recurring schedule, using defined permissions. When submitting a request, you first select an eligibility (created by administrative users). If the desired eligibility is not available in the request form, it indicates that your user is not configured as a requester in it.
You can request access via:
- The Tenable One Cloud Exposure JIT Portal
- Slack (if enabled)
- Microsoft Teams (if enabled)
If your request requires approval, you will be notified via email when your request is either approved or denied. If an approver doesn't review the request within 12 hours, the request expires. If your request is automatically approved, the permissions is granted immediately, either through the JIT Portal, Slack, the cloud provider, or an identity provider (IdP). Access granted via JIT allows you to access cloud accounts either through the cloud provider console/portal or programmatically. In some cases, access is granted by adding you to an identity provider (IdP) group—once you join the group, you automatically receive the permissions associated with it.
Request Access via the JIT Portal
To request access:
-
Log in to the Cloud Exposure JIT Portal using one of the following URLs:
- Global (All regions): app.tenable.com/user
- United States Gov Cloud: app.tenable.us/user
- Navigate to Requests from the left-hand navigation menu.
- Click Request Access.
- Select the Eligibility you need to perform the task. To learn more about available permissions, see Add Eligibilities.
- If requesting access to a cloud provider, select the Accounts you want to access. Depending on the eligibility configuration, there may be a limit on how many accounts (or in Azure, how many accounts and resource groups) you can select per request.
- (Azure) Select the Resource groups within the selected subscriptions. If selecting resource groups is optional, you can skip this step and request access at the subscription level.
- (Azure and GCP) If the eligibility can give access to more than one role, select the Roles you want to request access to. This list includes only the roles defined in the eligibility. You can select one or more roles, depending on what’s required for your task.
-
Select the desired Access Time. You can request for access:
- Immediately and for how long: Permissions will be granted immediately after any required approvals. The duration is calculated from the time that the request is approved.
- Scheduled — Specify a date and time when the permissions will be granted, pending any required approvals. The duration is calculated from the selected start time, after approval.
Recurring — Specify a start date and time, the recurrence frequency (such as daily, weekly on Mondays, monthly on the 1st), and an end date for the recurring access. Recurring requests are approved once, even though access is granted multiple times according to the schedule. The duration for each instance is calculated from its scheduled start time, after the initial approval. Once approved, access will be granted automatically at the scheduled times without requiring additional approvals.
Keep in mind:
- The option to request recurring access may not be available for all eligibilities, depending on how the administrator configured them.
- Each eligibility has a maximum recurring days limit. The end date of the recurring request must fall within the allowed number of days from the start date. For example, if the maximum is 30 days and the start date is January 1, you can request access only through January 31.
- If the request hasn't been approved by the scheduled start time or start time of the first recurrence, it will expire at that point (or after 12 hours - whichever is earlier). For example, let's say a user requested recurring access at 9:00 AM to start every Monday at 3:00 PM for a duration of 4 hours, ending in one month. If the approver doesn't approve by the first Monday at 3:00 PM, the entire recurring request will expire.
- If required, type a Justification providing any relevant details related to why you need this access.
-
Click Request.
-
If your request requires approval, you will be notified via email when your request is either approved or denied.
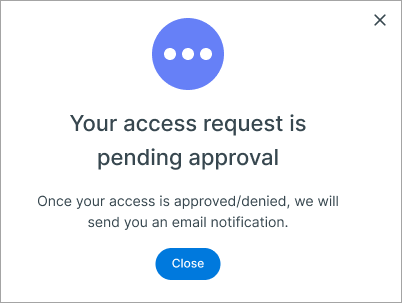
Your request is displayed on the Access Requests page, in the Pending section.
-
If your request is automatically approved, you can access the cloud account by clicking on the relevant link in the approval.
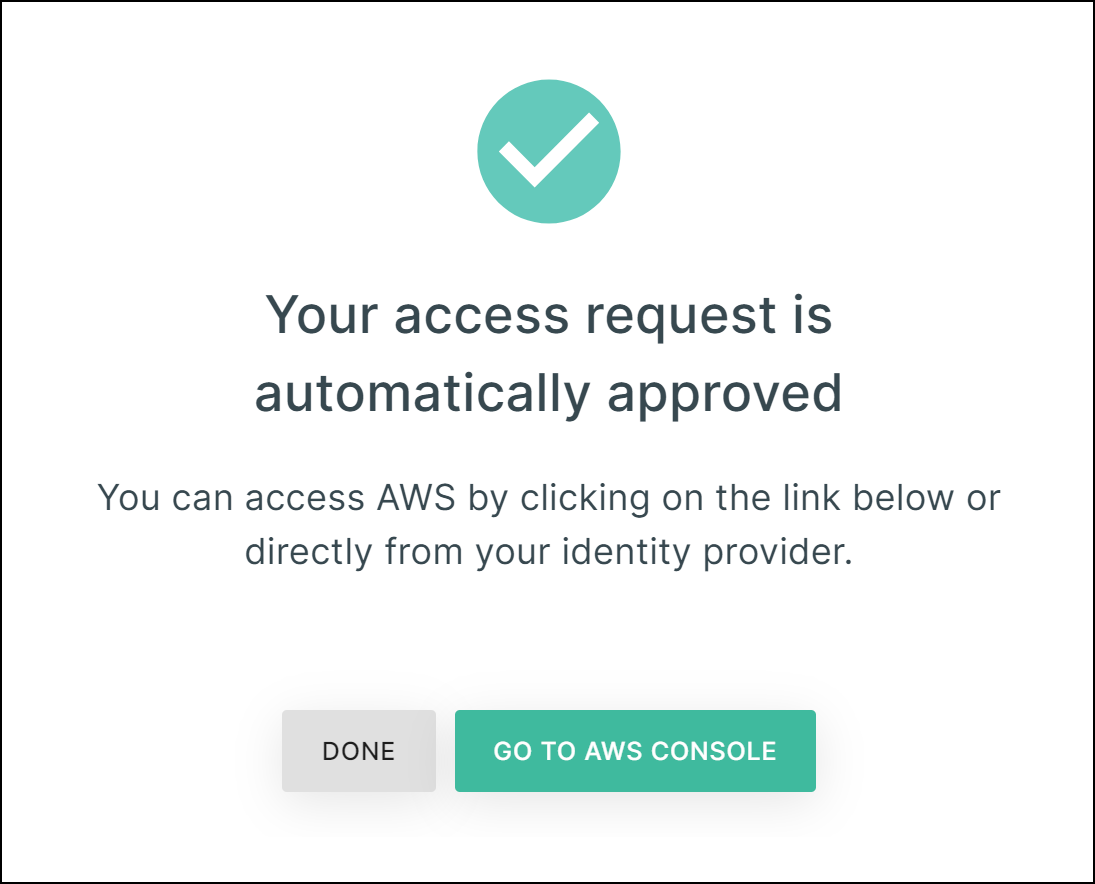
Note: For Azure and GCP, it may take between 1 to 10 minutes from the time of approval before access is available, due to caching issues on the side of the server provider.Your request is displayed on the Access Requests page, in the Active section.
-
Connect to Cloud or IdP Account
Use the Connect option to connect and gain access to the relevant cloud provider or identity provider.
- In the JIT Portal, navigate to Access Requests from the left-hand navigation menu.
- In the Active section, navigate to the relevant request.
- Click the three dots icon, and then click Connect.
Request Access Again
Use Request Again to initiate a new access request with the same parameters as a previous request. The request form is prepopulated with the previous details, which can be edited before submission.
- In the JIT Portal, navigate to Access Requests from the left-hand navigation menu.
- In the Active section, navigate to the relevant request.
- Click the three dots icon, and then click Request Again.
Request Access via Slack
You can use a Slack command to request access to the accounts you need without having to log in to the JIT Portal.
In the Request Access dialog box, you can click Request Again to initiate a new access request with the same parameters as a previous request
In addition to using Slack commands, you can view the latest status of your recent access requests in the Home tab of the Cloud Exposure Slack app. If your request is approved, you can quickly connect to your cloud account or revoke access directly from Slack.
Prerequisites
- Integrate your Slack workspace with Cloud Exposure
- Enable Slack for JIT access
- You must be eligible to request access. If you can't request access via Slack, verify with your Cloud Exposure Administrator that you're eligible to do so.
To request access:
- From the Cloud Exposure Slack app, or any Slack channel/message, type:
/tenable jit -
In the Request Access dialog box, choose:
- The Cloud provider that you want to access.
- The Eligibility you need to perform the task. To learn more about available permissions, see Add Eligibilities.
- Accounts to access. (If the eligibility defines a selection limit, you can select up to that number.)
- (Azure) Resource groups within the selected subscriptions (if applicable).
- (Azure and GCP) Roles to request (only the roles defined in the eligibility).
- The Duration, in hours, that you need access for. The duration is calculated from the time that the request is approved.
The desired Access time, upon approval:
- Immediately and for how long: Permissions will be granted immediately after any required approvals. The duration is calculated from the time that the request is approved.
- Scheduled — Specify a date and time when the permissions will be granted, pending any required approvals. The duration is calculated from the selected start time, after approval.
- Recurring — Specify a start date and time, the recurrence frequency (e.g., daily, weekly on Mondays, monthly on the 1st), and an end date for the recurring access. Recurring requests are approved once, even though access will be granted multiple times according to the schedule. The duration for each instance of the recurring access is calculated from the scheduled start time of that instance, after the initial approval. Once a recurring request is approved, the user will automatically receive access at the scheduled times without requiring further approval for each instance.
If the request hasn't been approved by the scheduled start time or start time of the first recurrence, it will expire at that point (or after 12 hours - whichever is earlier). For example, let's say a user requested recurring access at 9:00 AM to start every Monday at 3:00 PM for a duration of 4 hours, ending in one month. If the approver doesn't approve by the first Monday at 3:00 PM, the entire recurring request will expire.
- Type a Justification providing any relevant details related to why you need this access. This field is required.
-
Click Submit. You will receive a Slack response notifying you about your request.
The Slack response will be sent to you privately. If you entered the command in a public message or channel, the response will not be sent to that public message or channel (unless the channel was explicitly configured in the eligibility to receive notifications).
Slack responses:-
Request requires approval — You will be notified when your request is either approved or denied. Click the access request link in the Slack message to see your request on the Access Requests page (Pending section) of the Cloud Exposure JIT Portal. To cancel your request, click Cancel Request.
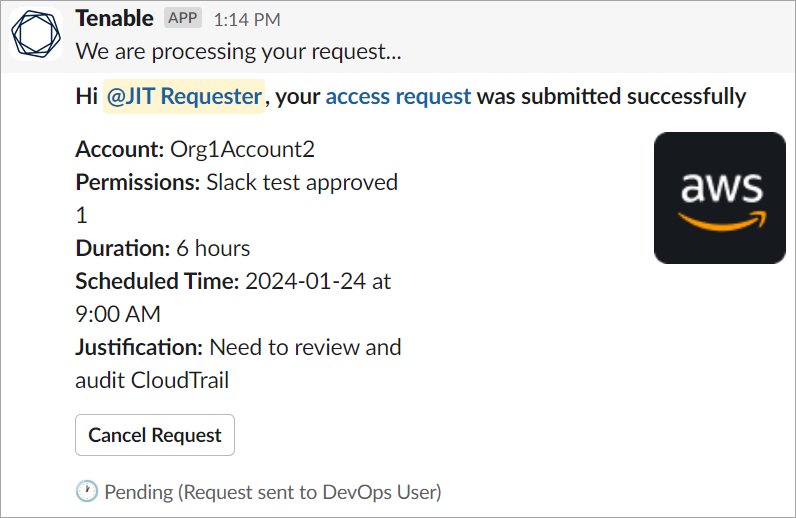
- Request approved — You can access the cloud account by clicking on the Connect or Revoke the access at any time while it is active.
Note: For Azure and GCP, it may take up to 10 minutes from the time of approval before access is available, due to caching issues on the side of the server provider. -
Request Access via Teams
You can request access directly in Teams, via an embedded version of the JIT Portal.
Prerequisites
To request access:
- Navigate to Microsoft Teams.
- On the Access Requests page, click Request Access.
-
In the Request Access dialog box, choose:
- The Permissions you need to perform the task. To learn more about available permissions, see Add Eligibilities.
- If requesting access to a cloud provider, select the Accounts you want to access.
- The Duration, in hours, that you need access for. The duration is calculated from the time that the request is approved.
The Start time when you want the access to begin, upon approval:
- Immediately — Permissions will be granted immediately after any required approvals. The duration is calculated from the time that the request is approved.
- Select start time — Specify a date and time when the permissions will be granted, pending any required approvals. The duration is calculated from the selected start time, after approval.
If the request hasn't been approved by the scheduled start time, it will expire at that point (or after 12 hours - whichever is earlier). For example, let's say a user requested access at 9:00 AM and scheduled it for 3:00 PM on the same day, with a duration of 4 hours.
- If the approver didn't approve or decline the request by 3:00 PM, it will expire at that time (because the scheduled time passed).
- If the approver approves the request at any time before 3:00 PM, the requester will be granted access from 3:00 PM until 7:00 PM.
- Type a Justification providing any relevant details related to why you need this access. This field is required.
-
Click Request.
- If your request requires approval, you will be notified via email when your request is either approved or denied.
Your request is displayed on the Access Requests page, in the Pending section.
- If your request is automatically approved, you can access the cloud account by clicking on the relevant link in the approval.
Note: For Azure and GCP, it may take between 1 to 10 minutes from the time of approval before access is available, due to caching issues on the side of the server provider.
View and Manage Requests
You can view and manage access activity from two pages in the JIT Portal: Access Requests and Access Reviews.
Access Requests
The Access Requests page allows you to track and manage access requests made by you as a requester.
In the Active tab, you can view all active and pending requests:
- For pending requests, you can cancel the request—for example, if you realize that you don’t actually need access, or if you submitted the request by mistake.
- For active requests, you can connect to the relevant cloud account, revoke the access, or request access again with the same configurations.
List of statuses in the Active tab:
| Status | Details |
|---|---|
| Active | The request was approved and activated, and the user has access |
| Pending activation | The request was approved, but access has not yet been activated |
| Pending approval | The request was submitted and is waiting for approval from an approver |
In the History tab, you can view all past requests.
List of statuses in the History tab:
| Status | Details |
|---|---|
| Access expired | The approved access duration has ended, and access has expired |
| Access revoked | The duration of the approved request expired, and access was revoked |
| Activation failed | There was an error activating access after approval |
| Request canceled | The request was canceled by the requester |
| Request denied | The request was denied by an approver |
| Request timed out | The request wasn’t reviewed by an approver within 12 hours or by the scheduled time of the request |
Access Reviews
The Access Reviews page displays information about access that has already been granted. This is useful for tracking and auditing purposes. This page is available when you are assigned as an approver in at least one eligibility.
In the Active tab, you can view all currently active access sessions. In the History tab, you can view all past access sessions that are no longer active.
Request Access Video
In this video, you can learn how to submit a JIT access request, including how to choose accounts, roles, or groups and provide the required details.