Sensors
After sensors are paired using the Tenable Core user interface, you can approve new pairings, view, and manage sensors using the Edit, Pause, and Delete functions in the Actions menu. You can also choose to enable automatic approval for sensor pairing requests using the Auto Approve Sensor Pairing Requests toggle.
View Sensors
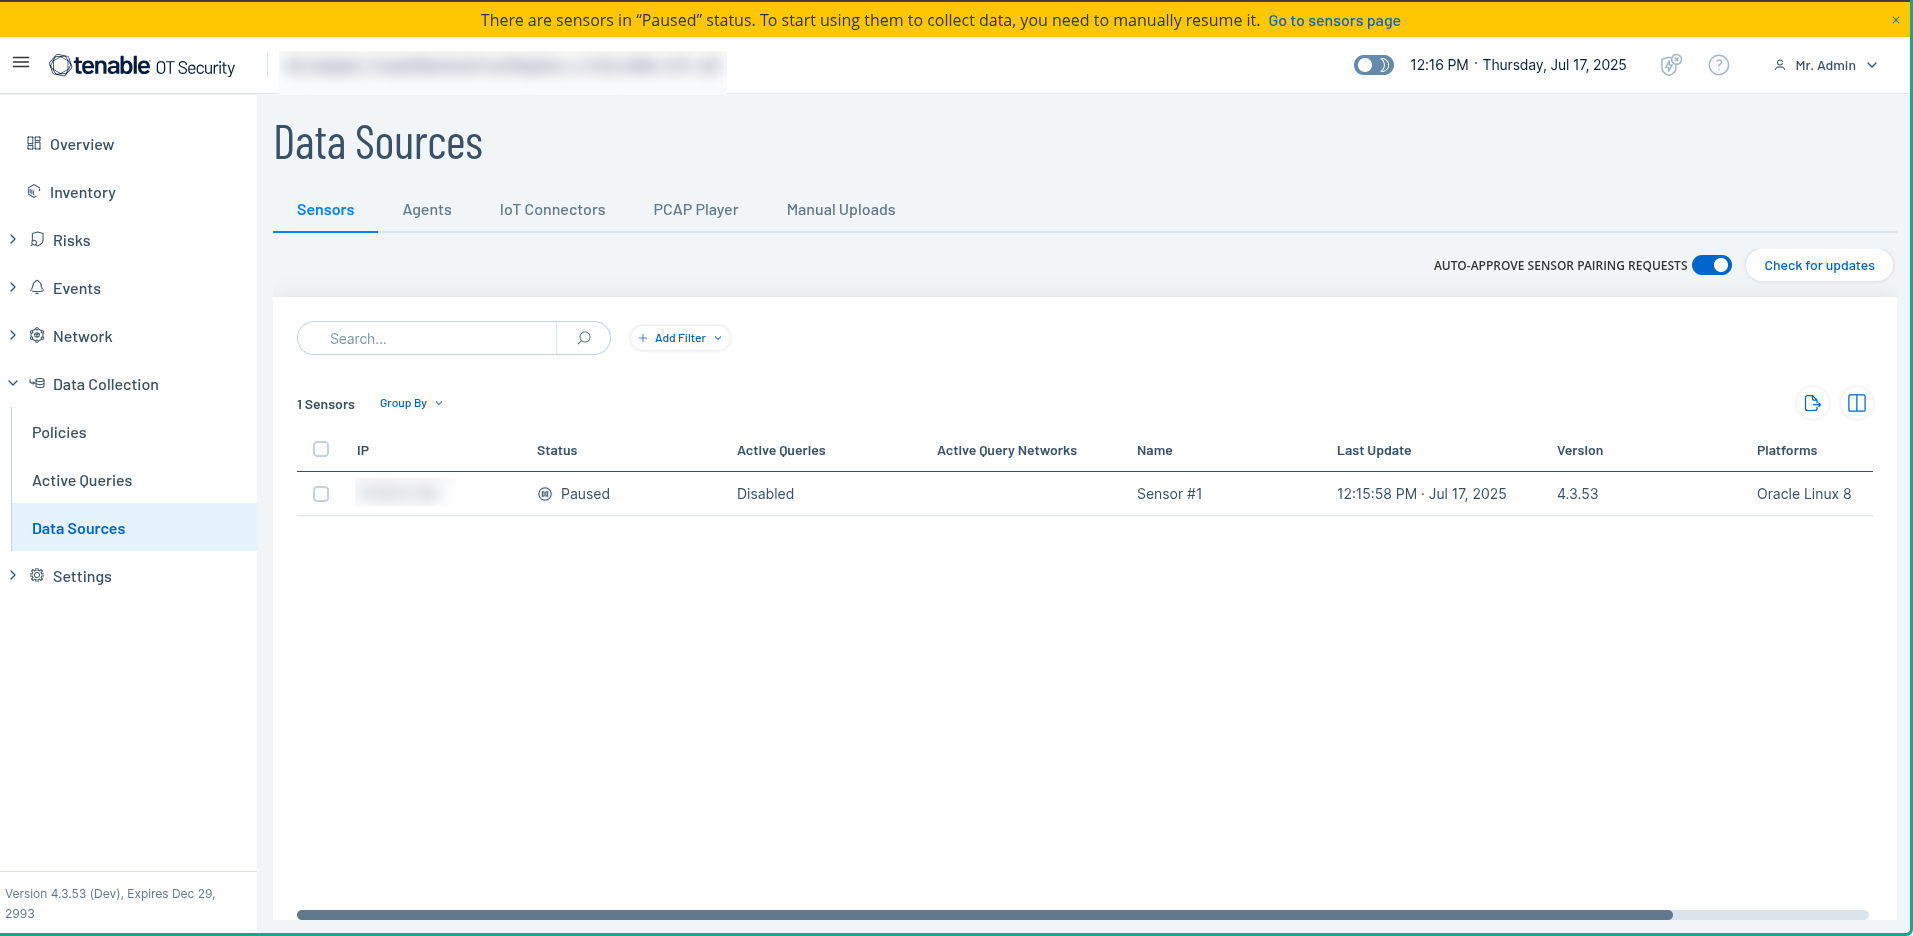
The Sensors table shows a list of all Sensors version 2.214 and later in the system. For information about how to customize tables, see Management Console User Interface Elements.
The Sensors table includes the following details:
| Parameter | Description |
|---|---|
| IP | The IPv4 address of the sensor. |
| Status |
The status of the sensor: Connected, Connected (Unauthenticated), Pending approval, Disconnected, or Paused.
Important: Once paired, all sensors show the status as Paused.
|
| Active Queries | The capacity of the sensor to send Active Queries: Enabled, Disabled, or N/A. |
| Active Query Networks | The network segments to which the sensor is assigned. |
| Name | The name of the sensor in the system. |
| Last Update | The date and time that the sensor information was last updated. |
| Sensor Identifier | The sensor Universal Unique Identifier (UUID), a 128-bit value used to uniquely identify an object or entity on the internet. |
| Version | The sensor version. |
| Throughput | A measure of how much data is streaming through the sensor (in kilobytes per second). |
Manually Approve Incoming Sensor Pairing Requests
If the Auto-Approve Sensor Pairing Requests setting is toggled to OFF, incoming sensor pairing requests must be manually approved before they are successfully connected.
To manually approve a sensor pairing request:
-
In the Data Collection > Data Sources page, click the Sensors tab.
The Sensors page appears.
-
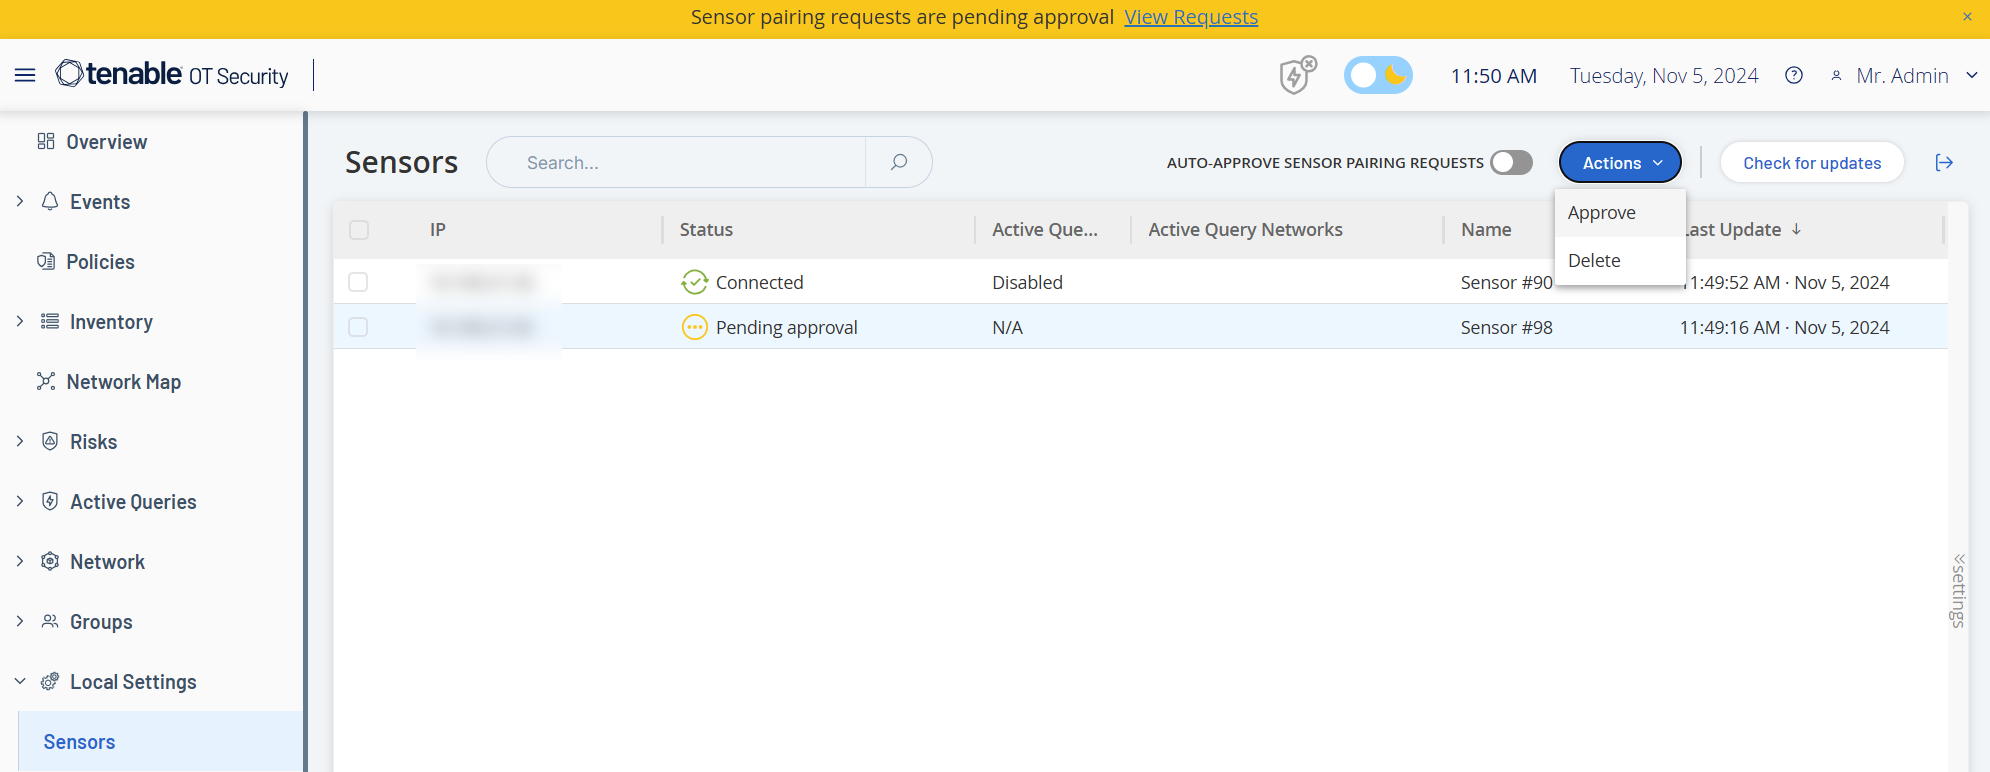
Click a row in the table with a status of Pending Approval.
-
Click Actions > Approve, or from the right-click menu, select Approve.
Note: To delete a sensor, click Actions > Delete, or right-click and select Delete.
Configure Active Queries
Once a sensor is connected in the authenticated mode, it can be configured to perform Active Queries in the network segments to which it is assigned. You need to specify which network segments it queries.
To configure Active Queries:
-
In the Data Collection > Data Sources page, click the Sensors tab.
The Sensors page appears.
-
Click a row in the table with a status of Connected.
-
Click Actions > Edit, or right-click and select Edit.
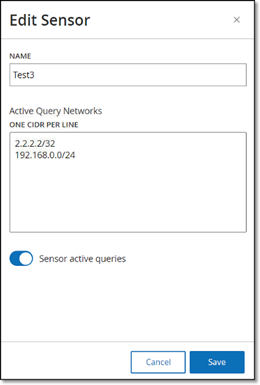
The Edit Sensor panel is displayed.

-
To rename the Sensor, edit the text in the Name box.
-
In the Active Query Networks box, add or edit relevant network segments to which the Sensor sends active queries, using CIDR notation and adding each subnetwork on a separate line.
Note: Queries can only be performed on CIDRs that are included in the monitored network ranges. Make sure to add only CIDRs that are accessible through this Sensor. Adding CIDRs that are not accessible may interfere with the ICP's ability to query those segments by other means.Note: If the sensor is part of a duplicated network, the duplicated network IP address appears in the Active Query Networks box and is disabled for editing. -
Click the Sensor active queries toggle to enable active queries.
-
Click Save.
The panel closes. In the Sensors table, in the Active Queries column, the enabled sensors now display Enabled.
Update Sensors
Starting from version 3.16, OT Security Sensor receives software and security updates from the ICP that manages it. Once a sensor is paired with authentication, it relies on the site to provide any OS and software updates necessary. The sensor only needs to reach OT Security for receiving software updates. OT Security allows you to update all your sensors from the centralized Sensors page.
If the sensor requires an update, you receive an alert during the following:
-
Startup.
-
Pairing completion between sensor and ICP.
-
Periodic check.
-
Using the Check for updates option.
To update authenticated sensor version 3.16 or later with the ICP:
-
In the Data Collection > Data Sources page, click the Sensors tab.
The Sensors page appears.
-
Check the Version column to see if the version is up to date or if it needs an update.
-
If the version needs an update, do one of the following:
 To update a single sensor:
-
Right-click the required sensor and select Update.
-
Select the checkbox next to the required sensor, then from the Actions menu, select Update.
 To update multiple sensors:
-
Select one or more sensors that requires an update, then from the Actions menu, select Update.
-
OT Security updates the selected sensors.

