Virtual Machines
View and manage virtual machines in your environment:
- For each virtual machine, see a clear picture of its network exposure, identify installed software packages, and analyze associated vulnerabilities.
- Understand which of your virtual machines have severe vulnerabilities, so that you can remediate these risks. For more information about prioritizing VMs that are both vulnerable and privileged, see Secure Vulnerable Privileged VMs.
- Run on-demand scans for your virtual machines.
- View all software packages installed on virtual machines in your environment, or the packages installed on specific workloads.
This is a how-to guide for viewing and managing virtual machines.
- For a conceptual overview of workload protection capabilities, see Vulnerability Management.
- To configure VM settings, see Virtual Machine Settings.
- For frequently asked questions, see FAQ: Vulnerability Management.
View All Virtual Machines
To view virtual machines:
- In the Tenable One Cloud Exposure Console, navigate to Explore > Compute > Virtual Machines.
- Filter the table to narrow the scope of the visible data. See Virtual Machine Column Data for more information.
- Click on a virtual machine Name to View Resource Details.
- From the resource page, click on Workload.
-
Click one of the following tabs:
- Software — View software packages installed on the machine.
- Vulnerabilities — View Vulnerabilities associated with packages installed on the machine.
- Malicious Files — View potentially Malicious Files detected on the machine.
Run an On-Demand Scan
Tenable automatically scans every virtual machine at least once every 24 hours. If you want to scan a specific workload sooner than that, you can request an on-demand scan. When you initiate a scan, it pushes the scan to the top of the queue. Scan results will appear in the Cloud Exposure Console after the next periodic data synchronization performed by Tenable.
If you excluded the relevant account or virtual machine from scanning, on-demand scanning is not available.
To run an on-demand scan:
- Navigate to, and then click on the relevant virtual machine. You can find virtual machines in Explore > Compute > Virtual Machines, or in the Inventory view of the relevant cloud provider (for example, Explore > Inventory > Compute > Azure Virtual Machines).
-
Click on the three dots icon and then click Scan Now.
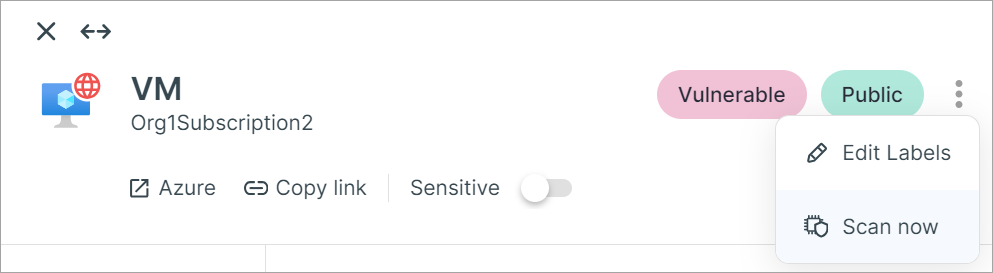
A dialog appears, indicating that the scan was successfully requested.
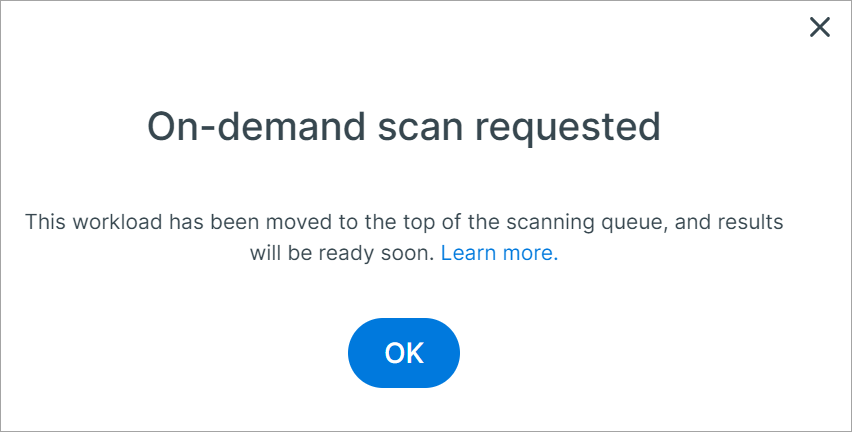
- Click OK.
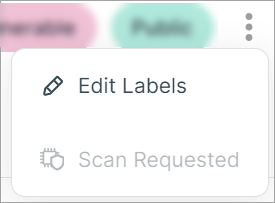
If a scan has already been requested, the button is disabled and displays Scan Requested.
Virtual Machine Column Data
The following columns appear in the table on the Virtual Machines page, and most of them can also be used to filter data in the table.
| Column | Description |
|---|---|
| Name | The name of the virtual machine. |
| Account | The cloud account where the virtual machine is located. |
| Operating System | The operating system and version running on the virtual machine. |
| Software | A list of all software packages installed on the workload. Where relevant, you can also see the file path of the package. This information can be useful when trying to determine where the package came from, and how to remediate any potential issues. For example, you may be able to identify if the package was installed as part of the base image, or if it was added to it. |
| Vulnerabilities | A breakdown of vulnerabilities found on the workload by Color-Coded Risk Severity. Click on a number to view a list of vulnerabilities for a given severity level. |
| Plugins | The plugins that are associated with the vulnerabilities discovered on the virtual machine. Click the plugin link to view plugin details. |
| Network Exposure |
How the workload is exposed to the internet:
|
| Network Exposure Scope |
The scope of the workload’s exposure to the internet:
|
| Identity Risk | Every identity is assigned an overall risk level, corresponding to the risk that the identity poses to your environment. The risk is calculated based on multiple weighted factors, and takes into account both the risk level of the identity’s specific permissions and the overall context of the identity in your environment (oftentimes reflected by labels). See Identity Intelligence for more information. |
| State | The current state of the virtual machine. Possible values: Running, Stopped |
| Vulnerability Scan Status | Indicates whether or not the workload was successfully scanned. Also indicates the reason why a workload may not have been scanned. See Vulnerability Scan Status for more information. |
| Vulnerability Scan Time | A timestamp indicating the last time that Cloud Exposure scanned the machine. If the machine has not yet been scanned, the value will be a dash (-). |
| Scan Source | Indicates whether a virtual machine was scanned using an agent-based or agentless method. This field is hidden by default but can be added via the column selector. This field is only visible when agent-based scanning is enabled. |
| Findings | A breakdown, by severity, of the number of findings associated with the machine. Click on the number to view a searchable list of the findings. |
| Data Types | The sensitive data types detected on the resource. See Scanned Data Types for a complete list. |
| Data Categories | The data categories that map to the sensitive data types detected on the resource. |
| Data Sensitivity | The highest sensitivity level detected out of all scanned data. See Sensitivity Levels for more information. |
| Data Scan Status | Indicates whether or not the resource was successfully scanned. Also indicates the reason why a resource may not have been scanned. See Data Scan Status for more information. |
| Data Scan Time | A timestamp indicating the last time that Cloud Exposure scanned the resource. If the resource has not yet been scanned, the value will be a dash (-). |
| Labels |
Displays all labels applied to the workload, whether applied manually, automatically based on tags, or by the system. Hover over a label tag for more information. If a workload has more than one label, click on the icon to see any additional labels. The following labels are unique to Workload Protection, and are displayed in the following circumstances:
|
Vulnerability Scan Status
The Vulnerability Scan Status column indicates the current scanning status of the machine. The following table lists the various statuses, along with associated reasons for why the status might appear (many of these reasons appear as tooltips next to the status).
| Scan Status | Reasons |
|---|---|
| Pending | The virtual machine is queued. |
| On-demand scan requested. | |
| This scan is pending a manual step by Tenable to subscribe to the needed marketplace image. Please check back in a few hours. | |
| Disabled | This virtual machine is excluded from scanning. |
| Workload protection scanning is disabled. | |
| This virtual machine is not being scanned due to missing Azure Key Vault permissions for the relevant vault. This can happen on Windows virtual machines with BitLocker or Linux virtual machines with DM-Crypt (supported only on Ubuntu) disk encryption. To grant the required permissions, see Azure: Grant Virtual Machine Scanning Permissions. | |
| This virtual machine is not being scanned due to missing Key Vault Crypto User permissions for the relevant vault. This can happen on Windows virtual machines with BitLocker key encryption key. To grant the required permissions, see Azure: Grant Virtual Machine Scanning Permissions. | |
| This virtual machine is not being scanned due to missing Key Vault permissions. This can happen when virtual machine disks are encrypted with CMK (Customer Managed Keys). For more information contact Technical Support. | |
| This virtual machine is not being scanned due to an Azure policy that prevents disabling data access authentication on snapshots. To grant the required permissions, configure a dedicated snapshot resource group and exclude it from the policy. | |
| This virtual machine is not being scanned due to missing Workload Protection permissions. To grant the required permissions, see Connect Workloads. | |
| (In-account scanning) Scanning this image requires an AWS marketplace subscription. Login to your dedicated AWS account used for in-account scanning, go to the AWS marketplace, find the relevant AMI, and click 'Continue to Subscribe'. See In-Account Scanning for more information. | |
| This virtual machine has not been scanned because the configured snapshot resource group was deleted. | |
| This virtual machine is not being scanned as there is an SCP that blocks Workload Protection permissions. | |
| This virtual machine is not being scanned due to a domain-restricted sharing policy. | |
| This virtual machine is not being scanned because your cloud account lacks the permissions required to create disk snapshots. | |
| Not supported | Scanning is not supported for this virtual machine because the operating system disk is unmanaged. |
| Scanning is not supported for this virtual machine since the disk contains no supported partitions. | |
| This virtual machine is not being scanned since it was launched from an AWS Marketplace AMI, and no product ID was found. | |
| This virtual machine is not being scanned since outbound network access is blocked for snapshots related to this virtual machine. | |
| This instance is not being scanned since it was launched from an AWS Marketplace AMI with unsupported instance specifications. | |
| Scanning is not supported for this workload since the disk is an instance store, and not an EBS volume. | |
| Scanning is not supported for this virtual machine since its operating system encryption is enabled. | |
| This virtual machine is not scanned since the resource belongs to a resource group on which there is a lock that prevents snapshot deletion. | |
| This virtual machine is not being scanned since its disk exceeds the maximum size. | |
| Scanning is not supported for this virtual machine because the operating system disk is unmanaged. | |
| Scanning is not supported for this virtual machine since it is based on an AWS image that has been removed from the marketplace. We recommend upgrading to a more recent image. Note: This limitation occurs because snapshots or images (AMIs) sourced directly from the AWS Marketplace carry specific licensing and ownership restrictions that prevent them from being copied or shared for the scanning operation. |
|
| Scanning is not supported for this virtual machine since it's based on an Amazon DevPay image, which is a legacy service that no longer accepts new sellers or products. | |
| Scanning is not supported for this virtual machine because the operating system disk is ephemeral. | |
| Scanning is not supported for this virtual machine in this region due to cloud provider limitations. | |
| Scanning is not supported for this virtual machine because it is part of a provider-managed application that restricts disk access. | |
| Scanned | Machine was scanned successfully. |
EC2 Instances Launched from AWS Marketplace AMIs
Cloud Exposure supports scanning EC2 instances launched from AWS Marketplace AMIs. Scanning is supported both for standard workload scanning and for in-account scanning. See Scan Status for more information about troubleshooting issues that may arise for such EC2 instances.
In-Account Scanning
If you are using marketplace images (AMI), Tenable highly recommends that you add the license-manager:ListReceivedLicenses permission. This allows Tenable to see which licenses are associated with the dedicated scanning account, in order to scan any licensed images. See Configure In-Account Scanning for more information.
Scanning images requires an AWS marketplace subscription in the dedicated account used for scanning. If the Scan Status of the image is Disabled because of a missing subscription, follow the tooltip instructions to subscribe. After subscribing, it takes about 15 minutes for the subscription to be updated in Cloud Exposure. If the machine was scanned within the last 24 hours ago, it wont be rescanned until the next scan cycle. As a result, you may want to Run an On-Demand Scan to scan the image sooner.